
Solar vs. Plug-In Electric Fences: Choosing the Right Power Source for Your Ranch
"Reliability or Freedom? Why you don't always have to choose."
When setting up an electric fence, the most critical decision after choosing your energizer's power is deciding how you're going to keep it running. Should you run a long cable from the barn (Plug-in/AC), or trust the sun to do the work (Solar)?
Each system has distinct advantages depending on your location, livestock, and budget. In this guide, we break down the pros and cons of Solar vs. Plug-in systems to help you build a perimeter that never sleeps.
Option 1: The Plug-In (AC) Energizer
Plug-in energizers are the traditional choice for permanent fencing close to the main farm infrastructure. They draw power directly from your 110V or 240V wall outlet.
The Pros:
Unmatched Reliability: No need to worry about cloudy days or battery health. If your house has power, your fence has power.
Maximum Output: Generally, AC units can deliver higher Joules (J) more consistently over extremely long distances.
Lowest Operating Cost: Grid electricity is much cheaper than replacing deep-cycle batteries every few years.
The Cons:
Fixed Location: You are tethered to the grid. Running insulated lead-out wire over long distances can lead to energy loss.
Lightning Risk: Being connected to the grid makes the unit more susceptible to surges during storms (requires high-quality lightning arrestors).
Option 2: The Solar-Powered Energizer
Solar systems use a panel to charge a 12V battery, which then powers the energizer. They are the ultimate "set it and forget it" solution for remote pastures.
The Pros:
Total Portability: Perfect for rotational grazing or remote back-paddocks where running AC power is impossible or too expensive.
Zero Electricity Bills: Once you pay for the hardware, your power is free.
Continuity: Even during a grid power outage, your fence remains live.
The Cons:
Weather Dependent: Requires a battery large enough to handle 3-4 days of heavy cloud cover.
Higher Initial Cost: You have to pay for the solar panel and the battery upfront.
Head-to-Head Comparison
Feature
Plug-In (AC)
Solar (DC/Battery)
Best For
Permanent farm-side fences
Remote pastures & Rotation
Ease of Move
Difficult
Very Easy
Initial Cost
$ - Lower
$$ - Higher
Maintenance
Minimal
Moderate (Battery checks)
The 2026 Solution: The Hybrid Multi-Power Energizer
Why choose one when you can have both? Modern units like the LIFEALL XSD Series are designed as 3-Way Power Systems.
These units can be plugged into a barn outlet (AC) when available, but also come with alligator clips for a 12V battery and a dedicated input for a solar panel. This gives you the flexibility to move your energizer as your needs change—from the home paddock in the winter to the high hills in the summer.
Which Power Source is Right for You?
Choose Plug-in if your fence is within 500ft of a power outlet and you want zero-maintenance operation.
Choose Solar if you want to eliminate the cost of trenching cables or if you need to move your fence frequently.
Explore Solar Options View AC Power Series
Read article

Electric Fence vs. Traditional Fencing: Which is Better for Your Farm?
"Stop building barriers and start managing perimeters."
Choosing the right fencing is one of the most expensive and permanent decisions a farmer can make. Traditionally, the choice was simple: heavy wooden posts and rails or labor-intensive barbed wire. However, as ranching technology evolves, electric fencing has emerged as the superior choice for modern land management.
If you are debating between sticking with "the way we've always done it" or making the switch to electric, this comparison breaks down the four key factors every farm owner should consider.
1. Cost: Upfront and Long-Term
In almost every scenario, electric fencing is significantly more affordable than traditional wood or wire fencing.
Feature
Traditional (Wood/Wire)
Electric Fencing
Material Cost
High (heavy posts, rails, mesh)
Low (thin wire, polywire, insulators)
Installation Labor
High (digging, post-driving, heavy lifting)
Minimal (lightweight posts, no digging)
Total Cost per Mile
$3,000 - $8,000+
$500 - $1,500
By switching to electric, you aren't just saving on wire; you are saving on the massive infrastructure required to hold heavy materials in place.
2. Installation Time and Labor
Installing a traditional fence is a multi-week project. It requires heavy equipment, hole-digging, and often a team of several people.
Electric fences are designed for speed. Because the barrier is psychological (the animal respects the shock) rather than physical, the wires can be thin and the posts can be light. A single person can often fence a 10-acre pasture in a single afternoon using an integrated energizer and polywire.
3. Maintenance and Durability
Traditional wood fences rot. Barbed wire sags. Both are damaged by animals leaning, rubbing, and pushing against them. Over ten years, the cost of replacing posts and re-stretching wire often equals the original cost of the fence.
Electric fences last longer because animals never touch them.
No leaning or rubbing means no structural stress on posts.
High-quality ABS energizers like the A605 Series are IP55 waterproof and built for decades of outdoor exposure.
The only maintenance required is clearing vegetation and checking the voltage on your LCD screen.
4. Animal Safety: Psychological vs. Physical
Barbed wire causes thousands of hide infections and lacerations every year. Wood fences can splinter and cause injury if an animal breaks through.
Electric fencing is the safest containment method available. The 0.3ms pulse is designed to be startling, not harmful. Animals learn to stay a few feet away from the perimeter entirely. There is no risk of entanglement, skin damage, or infection. It is a humane solution that respects the animal's natural instinct to avoid pain.
Summary: The Clear Winner
If you need a permanent, immovable barrier for high-stress areas like loading chutes, stick with wood or heavy steel.
But for pasture management, predator protection, and perimeter control, electric fencing is the faster, cheaper, and safer choice for the 2026 farmer.
Ready to make the switch?
Browse Our Complete Energizer Line
LIFEALL — Modern Fencing Solutions for Modern Ranches.
Read article

Protecting Your Property: The Ultimate 2026 Guide to Bear-Proof Electric Fencing
"When it comes to bears, a 'tickle' won't do. You need a deterrent they will remember."
As bear populations expand and human-wildlife encounters become more frequent, protecting your livestock, beehives, and fruit trees has never been more critical. In 2026, experts agree: standard garden-variety electric fences are not enough.
Bears are incredibly resilient. With thick fur and a determined appetite, they can easily push through low-output systems. To keep them out, you need a professional-grade setup that focuses on Energy (Joules) and Voltage (KV).
1. The Golden Rule: Stored Energy is Everything
If you take away one thing from this guide, let it be this: Joules matter more than Miles. While many energizers are rated by how many miles they cover, a bear-proof fence requires high stored energy.
For large predators like black bears and grizzlies, a minimum of 6 to 9 Joules is highly recommended. Why? Because a bear’s thick coat acts as an insulator. You need enough energy to "push" the shock through the fur to the skin.
The Professional Choice: The XSD-A740 9J Energizer is specifically designed for this level of deterrence. Its 9-Joule output ensures that a bear's first encounter with your perimeter is its last.
2. Correct Wire Placement: Think Like a Bear
Bears will try to go under, through, or over your fence. A single wire is a gateway, not a barrier. For a predator-proof setup, we recommend a 5 to 7-strand configuration:
The "Nose" Wire: Place your first wire roughly 8-10 inches (20-25cm) off the ground. Bears typically lead with their nose when investigating; a shock here is the most effective psychological deterrent.
Spacing: Wires should be spaced roughly 8-10 inches apart to prevent the bear from squeezing between them without making contact.
Height: Your top wire should be at least 42-48 inches high to prevent easy leaping.
3. The Importance of Grounding in Dry Soil
Bears often move during the dry months when they are searching for food. In dry soil, standard grounding fails because the earth doesn't conduct electricity well.
Solution: Use a "Hot-Ground" system (also known as Ground-Return). Connect every second wire directly to the ground terminal of your energizer. When the bear touches both a hot and a ground wire simultaneously, they receive the full 9J pulse regardless of the soil condition.
Proper grounding ensures the circuit completes through the predator.
4. Real-Time Monitoring: Don't Guess, Know.
A bear-proof fence that isn't working is just a decoration. High-joule units like the A740 feature LCD screens that show you exactly how much voltage is hitting the line.
In a bear-prone area, your LCD should ideally read 8.0KV to 11.0KV. If you see a sudden drop, it’s likely that a bear has tested the line and caused a short, or vegetation is bleeding power. The integrated alarm system on the A740 will notify you with a loud siren the moment the fence is contacted—giving you time to react.
Be Proactive, Not Reactive
Don't wait until you find a destroyed beehive or a lost calf to upgrade your security. In 2026, the technology exists to make your property a "no-go zone" for predators.
Ready to Secure Your Perimeter?
Get the power required for serious predator deterrence.
Shop XSD-A740 (9J Power)
LIFEALL — Professional Predator Protection for Farmers and Ranchers.
Read article

2026 Top High-Voltage Electric Fence Trends: Why LCD Monitoring is the New Industry Standard
"The days of walking miles to find a fence leak are over. In 2026, intelligence isn't a luxury—it's the standard."
The global agricultural landscape is shifting. With market growth for electric fencing projected at a compound annual rate of nearly 11% through 2026, the focus has moved away from basic physical wire and toward intelligent monitoring systems.
As predators become more encroaching and labor costs rise, ranchers are demanding more from their perimeters. Here are the three defining trends that are reshaping the industry this year.
Trend #1: The Death of the "Blind" Fence (LCD Monitoring)
For decades, checking a fence meant walking the line with a handheld tester or, worse, waiting for an animal to escape to realize the power was down. In 2026, this "blind" approach is being replaced by real-time visual feedback.
The Data: Recent industry surveys indicate that smart-monitoring fences reduce livestock loss by up to 40% by allowing farmers to catch voltage drops before animals realize the fence is weak.
Products like the A605 10KM Energizer have led this charge. By featuring an integrated LCD screen that displays real-time Output Voltage (KV), ranchers can verify the health of their entire perimeter with a single glance from 20 feet away. If the screen reads 9.8KV, you’re safe. If it drops to 4.0KV, you know there’s a weed contact or a broken insulator somewhere—instantly.
Trend #2: High-Joule Deterrence for Aggressive Predators
As wildlife patterns change, domestic livestock are facing increased pressure from large predators. Standard 0.5J chargers are no longer enough for high-stakes environments. The market is pivoting toward High-Voltage, High-Joule units.
The 2026 standard for large ranch protection has moved toward 8J - 12J of stored energy. High output serves two purposes:
Better "Burn-Through": It can power through heavy vegetation and weeds that would short out a smaller unit.
Psychological Respect: A 9-Joule shock (found in the LIFEALL XSD-A740) creates a lasting memory for even the most determined bears or wolves, ensuring they never return to that boundary.
Trend #3: Hybrid Energy Independence
Energy costs and the need for remote flexibility have made "Single-Power" units obsolete. The trend for 2026 is Hybrid Power Connectivity. Modern ranching requires an energizer that can live on the grid today, but move to a remote solar setup tomorrow.
The XSD-260 Series: Compact, Red, and Multi-Power Ready.
Ranchers are now opting for units that support **AC Mains, 12V Lead-Acid Batteries, and Solar Panels** simultaneously. This ensures that if the battery dies on a cloudy day, the unit can be quickly plugged into a portable generator or AC line without needing a different model.
Conclusion: Investing in the Future of Your Ranch
In 2026, the best investment isn't the most expensive wire—it's the smartest box. By choosing an energizer with LCD monitoring, high-joule output, and hybrid power, you aren't just building a fence; you're installing a silent employee that watches your perimeter 24/7.
Are you ready to upgrade your perimeter to 2026 standards?
Shop High-Power A740 (9J) View A605 LCD Series
LIFEALL Electric Fence — Built for 2026. Trusted by ranchers worldwide.
Read article
 Electric Fence
The electric fence circuit in plain terms — energizer, live wire, animal, soil and ground rods — and why the ground return decides whether your fence shocks.
Read article
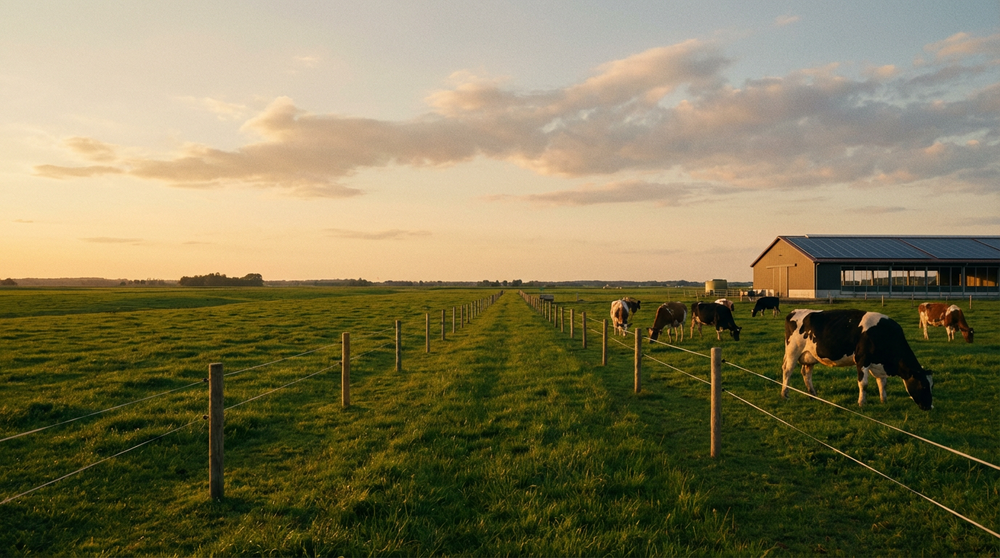
If you grew up around traditional fencing — wood posts, barbed wire, woven wire — electric fencing can seem almost too simple. A wire. A box. A pulse. How much can it really do?
The answer surprises most farmers the first time they use it properly. Electric fencing doesn't just replace a fence — it changes how you manage your land and animals. Here's an honest breakdown of what it actually does, in real farm terms.
The Core Idea: A Psychological Barrier, Not a Physical One
Traditional fencing works by being physically impossible (or at least very difficult) for an animal to push through. That means heavy posts, thick wire, and enough structural strength to stop a determined 600kg bull.
Electric fencing works differently. It teaches animals to choose not to approach the fence — through a brief, safe electric pulse that creates a sharp but harmless shock on contact.
After one or two experiences, most cattle, horses, and goats treat an electric wire with the same respect they'd give a solid wall — even when the power is temporarily off. The fence becomes a boundary in the animal's mind, not just in the ground.
This single difference — psychological vs. physical — is why electric fencing is lighter, cheaper, faster to install, and more flexible than every traditional alternative.
What Electric Fencing Actually Does on a Working Farm
1. Keeps Livestock Where You Put Them
The obvious one. But it's worth understanding why it works so well.
Animals that respect an electric fence don't lean on it, rub against it, or test it constantly the way they do with physical barriers. This means:
Posts stay in the ground longer — no constant pressure
Wire stays taut — no animals pushing it down
Breakouts happen far less often — even from determined animals
For horses especially — which are notorious for destroying traditional fencing — a two-strand electric fence often outperforms expensive post-and-rail setups that cost ten times as much.
2. Divides Pasture for Rotational Grazing
This is where electric fencing genuinely transforms farm management — and it's the reason so many progressive farmers consider it indispensable.
Rotational grazing — moving livestock between smaller paddocks on a schedule — is widely recognized as one of the most effective ways to improve pasture health, increase carrying capacity, and reduce feed costs. The problem has always been cost: subdividing a farm with permanent fencing is prohibitively expensive.
Electric fencing solves this completely:
Lightweight poly wire on plastic posts can be set up by one person in under an hour
Paddock boundaries can be redrawn in minutes as your grazing plan changes
Temporary cross-fences cost a fraction of permanent alternatives
The same energizer powers the entire rotational system
Farmers who switch to rotational grazing with electric fencing consistently report needing less supplementary feed, seeing faster pasture recovery, and being able to run more animals per acre over time. The fence pays for itself in improved land productivity.
3. Protects Animals from Predators
Coyotes, foxes, dogs, wolves, and bears kill livestock across North America and Europe in significant numbers every year. Traditional fencing — even woven wire — often isn't enough for determined predators that can dig under, climb over, or squeeze through gaps.
A properly configured electric fence stops predators at the boundary:
A low strand near the ground discourages digging
An outward-angled offset wire stops animals from getting close enough to jump
High-joule energizers deliver a shock powerful enough to deter large predators like wolves and bears — not just smaller animals
For sheep, poultry, and young animals that are most vulnerable, predator-proof electric fencing is often the difference between viable farming and constant losses.
4. Controls Animal Movement and Access
Beyond containment, electric fencing gives farmers precise control over where animals go — and where they don't.
Common uses include:
Protecting crops and gardens from livestock damage — a single low wire around a vegetable patch keeps pigs and cattle out without permanent fencing
Keeping animals out of waterways — a wire along a creek bank stops livestock from fouling water sources and eroding banks
Directing animal flow during mustering or veterinary work — temporary lanes guide animals without additional labor
Protecting young trees and plantings — a single wire around new plantings prevents browsing while trees establish
Hay and feed storage protection — keeps animals from accessing stored feed between feeding times
Because electric fencing is cheap and easy to move, farmers use it for short-term control tasks that would never justify permanent fencing investment.
5. Works in Remote and Off-Grid Locations
One of the practical limitations of traditional livestock management is that the best grazing land is often the furthest from infrastructure. Remote back paddocks, hilltop pastures, and seasonal grazing areas can be difficult or impossible to fence cost-effectively with traditional methods.
Modern electric fence energizers run on AC mains, 12V battery, or solar panels. A solar-charged energizer with a 60Ah battery can run continuously for weeks without any human intervention — meaning you can maintain a proper managed perimeter in locations you'd never run permanent fencing to.
This opens up land that was previously too difficult or too expensive to manage properly.
6. Alerts You When Something Goes Wrong
Smart energizers do more than just push current through a wire. They monitor fence performance and alert you to problems in real time.
Fault detection — if vegetation, a broken wire, or a downed post creates a short circuit, the unit detects the voltage drop and signals a fault. You know immediately, rather than discovering the problem the next morning when animals have already escaped.
Output monitoring — live voltage display shows whether the fence is performing at full output or has degraded. Low readings are an early warning of grounding or fence problems before they become failures.
Wireless alarm systems — a horn that sounds when the fence is contacted alerts you to predator activity or animal pressure on the perimeter — at night, in bad weather, or while you're working elsewhere on the property.
This monitoring capability changes the farmer's relationship with the fence from reactive (finding problems after they've caused damage) to proactive (being alerted before situations escalate).
What Electric Fencing Is Not Good At
Honest assessment matters. Electric fencing isn't the right tool for every situation:
Panicked animals — a frightened animal running at full speed may not respond to an electric shock in time to stop. Physical backup fencing is still important in high-stress areas like loading yards.
Very dry soil conditions — the electric circuit requires a return path through the ground. In drought conditions with extremely dry topsoil, grounding effectiveness drops and fence performance suffers. Solutions exist (ground-return wire systems), but it adds complexity.
Very young or wool-heavy animals — thick wool insulates sheep from the wire, and very young animals may not yet have learned to respond to the shock appropriately.
High-traffic public boundaries — electric fencing adjacent to public roads or shared property lines requires careful signage and may be subject to local regulations.
The Real-World Impact: What Farmers Notice After Switching
Farmers who move from traditional to electric fencing consistently report the same changes:
Less time on fence maintenance — no rotted posts to replace, no sagging wire to re-tension, no constant repairs from animal pressure
More flexibility in land management — ability to respond to pasture conditions, weather, and animal needs by moving fences, not waiting for contractors
Lower fencing costs over time — materials cost a fraction of traditional fencing, and the energizer lasts years with basic maintenance
Better pasture condition — rotational grazing becomes practical, improving land productivity measurably within one to two seasons
Fewer predator losses — particularly for sheep and poultry operations that had previously accepted predator losses as inevitable
A Simple Technology with Serious Results
Electric fencing has been around for decades, but modern energizers — with reliable multi-power options, digital monitoring, and wireless alarm systems — have made it more practical and capable than ever before.
At its core, it's still a simple idea: a pulse of electricity that teaches animals to respect a boundary. But the downstream effects on how you manage land, animals, costs, and time make it one of the highest-leverage investments available to working farmers and ranchers.
If you haven't tried it, it's worth understanding before you next invest in traditional fencing. The gap in cost, flexibility, and practicality is larger than most people expect.
LIFE-ALL Electric Fence — Built for farms. Trusted by ranchers.
Read article
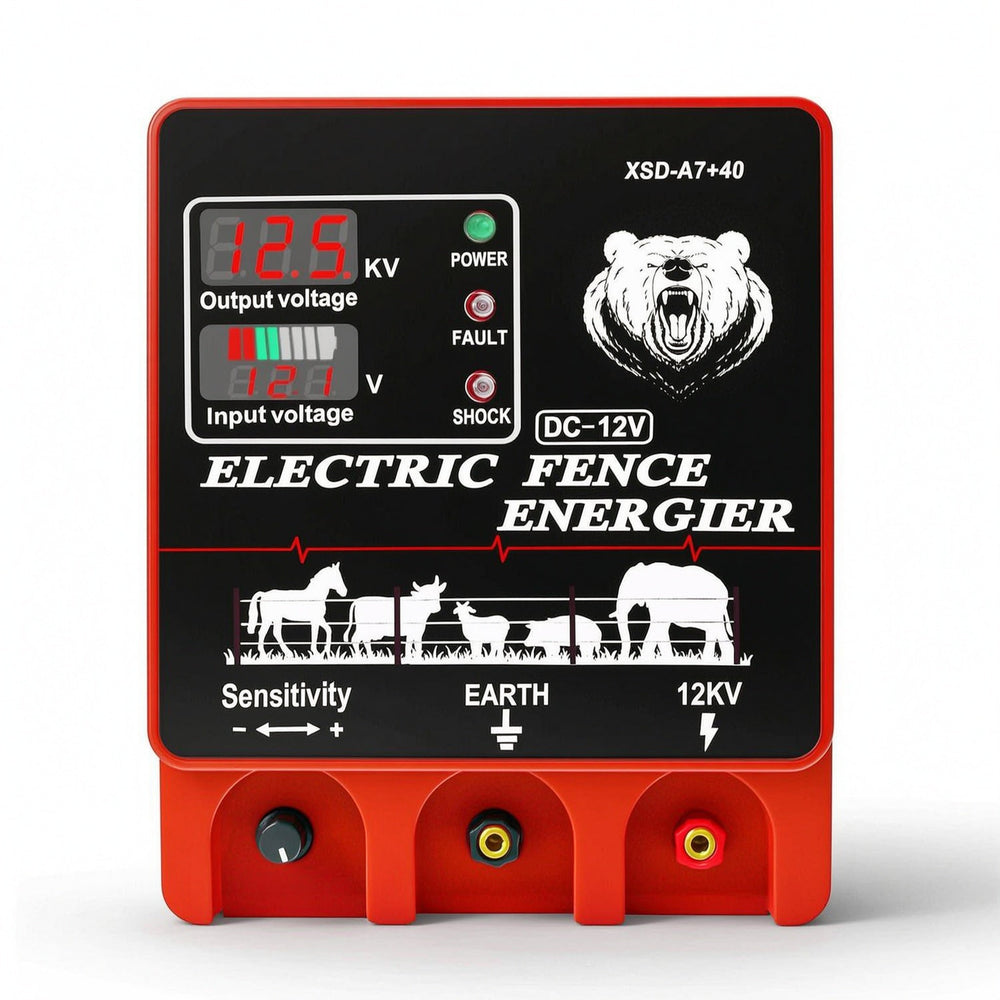
Setting up a high-powered electric fence energizer doesn't have to be complicated. This guide walks you through every step of installing the LIFEALL XSD-A7+40 9J Electric Fence Charger — from unboxing to powering on — so your livestock stays safe and predators stay out from day one.
What You'll Need
Before you begin, gather the following:
In the box:
LIFEALL XSD-A7+40 9J Fence Charger
Alligator clip cable (red + black)
Alarm horn
DC 12V power adapter
Wireless remote control
Mounting screws and washers
Tools & materials (not included):
1–3 galvanized steel grounding rods (1.5m / 5ft each)
Insulated fence lead wire (red for fence, green/black for ground)
Fence wire or poly wire already installed on insulators
Screwdriver or drill for mounting
Hammer or rod driver for grounding rods
Overview: How the System Works
The XSD-A7+40 is a dual-input energizer. It stores 9 Joules and delivers 8 Joules of output energy at up to 12KV, enough to power up to 20 miles (400 acres) of fence line. It can run on three power sources — AC mains, 12V battery, or solar panel — and includes a wireless alarm system that alerts you when an animal contacts the fence.
The basic circuit is simple:
Charger → fence wire (the "hot" side)
Charger → ground rod → soil (the return path)
When an animal touches the fence, it completes the circuit through the ground and receives a safe but firm shock
A well-grounded system is the difference between a fence that works and one that doesn't. Never skip the grounding step.
Step 1: Choose Your Mounting Location
Mount the charger in a location that is:
Sheltered from direct rain — under a roof overhang, inside a barn, or in a weatherproof enclosure. The unit is weather-resistant but not designed for direct rainfall.
Ventilated — leave at least 10cm clearance on all sides for heat dissipation.
Close to your power source — near an AC outlet, battery bank, or within reach of your solar panel cable.
Near the fence line — minimize the length of lead wire between the charger and fence to reduce energy loss.
Out of reach of children and animals.
Use the included screws and washers to secure the unit firmly to a wooden post, barn wall, or T-post. Make sure it cannot vibrate loose or fall.
Tip: If mounting outdoors, attach the unit to a north-facing wall or shaded surface to avoid solar heat buildup.
Step 2: Install the Grounding System
This is the most critical step. Poor grounding is the #1 cause of fence failures — and the most common mistake first-time installers make.
Rules for a proper ground:
Use galvanized steel rods long enough to drive at least 1.5 m (5 ft) into the ground, diameter ≥ 12mm
Drive at least 1 rod for low-output use; use 2–3 rods, each driven 1.5 m (5 ft) deep for maximum 9J performance
Ground rods must be installed in moist soil, not dry sand or gravel
Connect rods in series using bare copper wire or insulated green wire
How to install:
Drive rods vertically into the ground with a hammer or rod driver — leave only the top 5cm above soil
Attach a copper wire clamp to the top of each rod
Connect rods to each other in series with insulated wire
Run an insulated green or black ground wire from the last rod to the EARTH terminal on the charger (negative, black)
If the soil is dry: Water the ground rod area before installation, or consider a ground-return wire system where you add a second wire to the fence and connect it to the ground rod system at regular intervals.
Step 3: Connect the Fence Wire
With grounding in place, connect the "hot" side:
Run an insulated red lead wire from the 12KV terminal (positive, red) on the charger to the fence wire
Connect via a fence clamp or hook connector — ensure metal-to-metal contact with the fence wire
Make sure the lead wire does not touch the ground, posts, or any grounded metal between the charger and fence
Keep all fence connections on insulators — plastic or rubber — to prevent shorting to posts
Coverage guide:
Fence Condition
Effective Range
Clean wire, no vegetation
Up to 20 miles / 400 acres
Light vegetation contact
10–15 miles
Heavy weed contact
Under 5 miles
Tip: Regularly trim vegetation touching the fence wire. Even light contact significantly reduces output voltage.
Step 4: Connect Your Power Source
The XSD-A7+40 supports three power inputs. Choose the one that suits your setup:
Option A — AC Mains (110–240V)
Best for barn-side or grid-connected installations.
Plug the included DC 12V adapter into a standard wall outlet (110–240V universal)
Connect the DC output jack to the Power In port on the bottom panel of the charger
Switch the charger ON
Option B — 12V Battery
Best for off-grid locations or overnight backup.
Attach the red alligator clip to the positive (+) terminal of a 12V lead-acid battery (4.5–60Ah)
Attach the black alligator clip to the negative (−) terminal
The charger powers on automatically when clipped
A 12Ah battery typically powers the unit for 1–2 weeks. A 60Ah battery can run for 6–8 weeks between charges.
Option C — Solar Panel
Best for permanent remote installations.
Connect a 20–60W solar panel (DC 16–21V output) to the battery input
Use the solar panel to keep the battery charged continuously
The charger draws from the battery at night or during cloudy periods
Recommended: Combine solar + battery for true 24/7 off-grid operation without manual attention.
Step 5: Understand the Control Panel
Once powered on, here's what you're seeing on the front panel:
Indicator
Color
Meaning
POWER
Green
Unit is ON and operating normally
FAULT
Red
Short circuit detected — vegetation or broken wire shorting to ground
SHOCK
Red (pulsing)
Unit is discharging — fence is live
OUT-KV display
Red digits
Real-time output voltage (e.g. "9.5" = 9,500V)
IN-V display
Bar graph
Input battery/power supply voltage level
Sensitivity dial (on front face):
Turn toward "+" for more powerful shock — use for large animals (cattle, horses) or aggressive predators
Turn toward "−" for lighter shock — use for sheep, goats, or poultry
If the FAULT light stays on: Walk the fence line to find and remove the short (usually vegetation, broken wire, or a fallen post touching the wire).
Step 6: Set Up the Wireless Alarm System
The XSD-A7+40 includes a wireless alarm system that triggers a loud horn whenever an animal contacts the fence.
Alarm horn installation:
Mount the alarm horn in a location where you can hear it from your home or work area
Connect the horn cable to the Alarm output port on the bottom panel of the charger
The horn will sound with each discharge pulse when an animal contacts the fence
Remote control pairing:
With the charger powered on, press the button on the remote
The alarm toggles ON/OFF with each button press
Use the remote to silence the alarm after checking the fence line — no need to walk back to the unit
Tip: Mount the alarm horn near a gate or shelter where you regularly pass, so you notice it quickly during daily routines.
Step 7: Power On and Verify
With everything connected, you're ready for final checks:
Power ON the unit — POWER LED turns green immediately
Check OUT-KV display — should read 8.0–12.0KV depending on fence load and power source
Watch SHOCK indicator — should pulse every 1–2 seconds confirming discharge
Test the fence with a digital fence tester — touch probe to fence wire and ground probe to soil. Reading should match OUT-KV display.
Walk the perimeter — listen for any audible clicking sounds near fence posts (indicates a short)
Expected readings by power source:
Power Source
Typical OUT-KV
AC Mains
10.5–12.0 KV
12V Battery (full)
9.0–11.0 KV
Solar (daytime)
9.5–11.5 KV
Troubleshooting Common Issues
Problem
Likely Cause
Solution
FAULT light stays on
Short on fence line
Find and remove vegetation / broken wire contact
Low OUT-KV reading
Weak grounding or fence short
Check ground rods, water the ground area, check fence for shorts
Unit powers off unexpectedly
Battery too low
Recharge or replace battery; switch to AC
No reading on display
No power input
Check connections on all three power ports
Alarm not sounding
Horn not connected or remote turned off
Reconnect horn cable; press remote to re-enable alarm
SHOCK light not pulsing
Unit in fault mode
Resolve FAULT first; SHOCK resumes once fault clears
Maintenance Tips
Monthly: Walk the fence line to clear vegetation and check wire tension
Monthly: Inspect ground rods — re-drive if they've shifted or loosened
Quarterly: Check all connection terminals for corrosion; clean with a wire brush if needed
Before storms: Disconnect the charger from the fence line during severe lightning events
Winter: In very cold regions, check battery capacity — cold reduces lead-acid battery output significantly
Ready to Start?
The LIFEALL XSD-A7+40 is designed to be set up by one person in under an hour. With proper grounding, a clean fence line, and the right power source for your property, it will deliver reliable 9J protection around the clock — day and night, rain or shine.
Read article
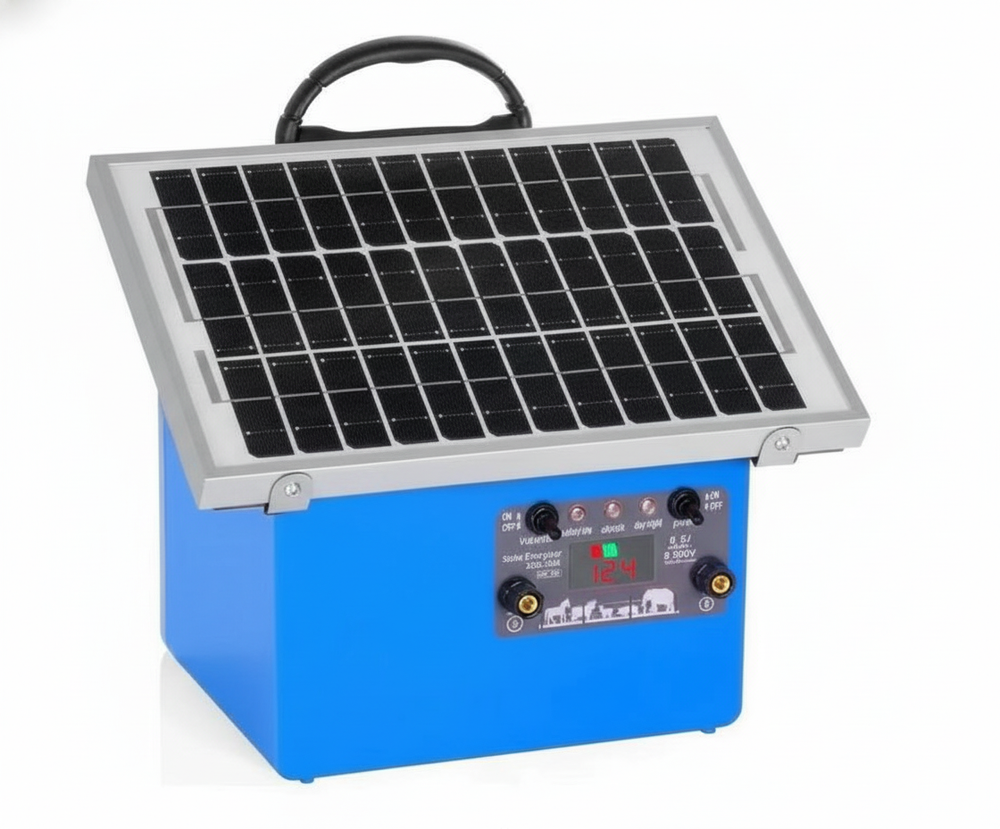
For ranchers and farmers managing large properties far from the power grid, keeping livestock safe 24 hours a day has always been a challenge. Extension cords don't reach. Batteries run flat overnight. Predators don't keep business hours.
Read article
 Buying Guide
Whether you're protecting cattle on a 100-acre ranch or keeping poultry safe from predators, an electric fence is one of the most effective, low-maintenance solutions available. This guide walks you through everything — from picking the right energizer to driving the last ground rod.
Read article
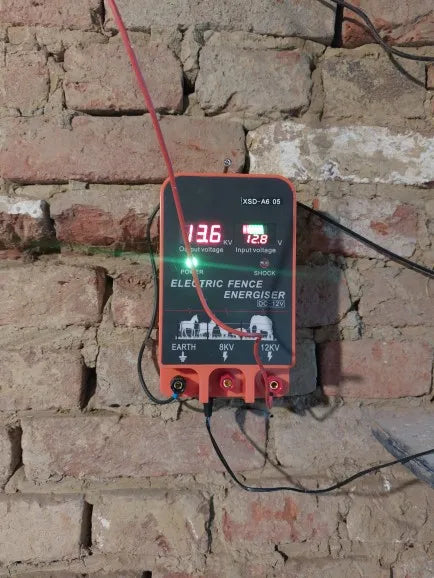
Electric fencing is the backbone of modern livestock management. Whether you're protecting cattle, horses, goats, or pigs from predators — or simply keeping animals within boundaries — choosing the right energizer and installing it correctly makes all the difference. This guide walks you through the full process, with a deep dive into fence energy ratings and coverage ranges.
Understanding Fence Energizer Energy & Range
Before picking up a single fence post, you need to understand two critical specs: output energy (Joules) and coverage range (km/acres).
Energy Output — Why Joules Matter
The Joule (J) rating tells you how much electrical energy is delivered per pulse. More Joules = more punch through vegetation, longer wire runs, and better control over larger or thicker-skinned animals.
Output Energy
Suitable For
Max Range (clear)
0.5J
Small animals (dogs, goats)
Up to 10 km
1.5–2J
Cattle, horses, pigs
Up to 15 km
2.5J
Large livestock, mixed herds
Up to 20 km
3–6J
Wild boar, elephant, camel
Up to 32 km
Note: Vegetation, wet grass, and poor grounding all drain energy. A fence in overgrown pasture needs 2–3x the Joules vs. a clean, bare-wire run.
Coverage Range — Acres & Kilometres
Range is quoted under ideal (weed-free) conditions. Real-world performance depends on:
Wire gauge and number of strands
Presence of vegetation touching the wire
Ground conductivity (dry soil = poor grounding)
Quality of insulators
Featured Energizer: LIFEALL A605 Electric Fence Energizer
For most farms and ranches, the LIFEALL A605 Electric Fence Energizer hits the sweet spot between power and versatility.
Key Specs at a Glance:
Output Voltage: Peak 12KV
Energy Storage: 2.5 Joules | Output Energy: 2 Joules
Best Load Distance: Up to 10 KM | Max Transmission: 20 KM
Coverage Area: Up to 100 acres (weed-free)
Power Modes: AC direct, 12V battery, or solar + battery combo
Display: LCD real-time input & battery voltage monitor
Weather Protection: Fully waterproof — rated for extreme conditions
Pulse Interval: 1.3 seconds | Pulse Duration: <0.1 seconds
The 2J output energy is ideal for cattle, horses, and mixed livestock. The LCD display lets you monitor voltage at a glance, so you always know if your fence is running at full strength — no guesswork.
Step-by-Step Installation
Step 1: Plan Your Perimeter
Map the fence line on paper first. Measure total distance, mark corners, gates, and any terrain changes. This tells you how many posts, insulators, and how much wire you need.
Rule of thumb: For 10 acres at standard 4-strand height, plan ~1,300 meters of wire per strand.
Step 2: Install Fence Posts
Drive posts every 8–12 feet along the line
Corner and end posts go at least 3 feet deep for stability
Use fiberglass or wood posts with insulators; avoid bare metal contact with the wire
Step 3: Attach Insulators & Run Wire
Insulators prevent the electrical charge from leaking into posts and ground. Thread your fence wire or electrified rope through each insulator. Keep wire at least 6 cm away from stakes, grass, or surrounding wire mesh to minimise energy loss.
Step 4: Ground Your Energizer Properly
Grounding is the #1 factor people get wrong. Poor grounding = weak fence, no matter how powerful your energizer.
Drive one to three ground rods, each driven at least 1.5 m (5 ft) into moist soil
Rods must be buried minimum 1.5 meters (59 inches) deep
Connect rods in series to the energizer's ground terminal
Step 5: Connect the Energizer
Connect your A605:
Ground terminal → ground rod system
Fence output terminal → fence wire
Choose your power source: plug into AC, connect a 12V battery, or attach a solar panel for remote areas
Step 6: Test Voltage
Use a fence voltage tester along the perimeter. You should read at least 2,000V at the farthest point from the energizer. If voltage is low:
Check for vegetation touching the wire
Verify ground rod depth
Check all insulator connections
Maintenance Tips
Trim vegetation under the wire monthly — grass contact is the biggest energy thief
Inspect insulators after storms; cracked insulators leak current
Check voltage at the far end of the fence, not just at the energizer
In remote areas, pair the A605 with a solar panel for uninterrupted operation year-round
Summary: Matching Energizer to Your Needs
Farm Size
Recommended Energy
Product
Up to 50 acres, small animals
0.5J
LIFEALL S050 Solar
Up to 100 acres, cattle/horses
2J
LIFEALL A605
100+ acres, large or wild animals
3–6J
LIFEALL A720 / MKF20
A properly installed electric fence powered by the right energizer is one of the most cost-effective and durable livestock management tools available. Start with solid grounding, choose an energizer matched to your acreage and animal type, and test regularly — your fence will perform reliably for years.
Ready to build your fence? → Shop LIFEALL A605 Energizer — $58.99, EU & US plug options available.
Read article




