 Electric Fence
Install an electric fence for livestock step by step: posts, insulators, conductors, energizer and grounding — with the checks that keep the fence live and safe.
Read article
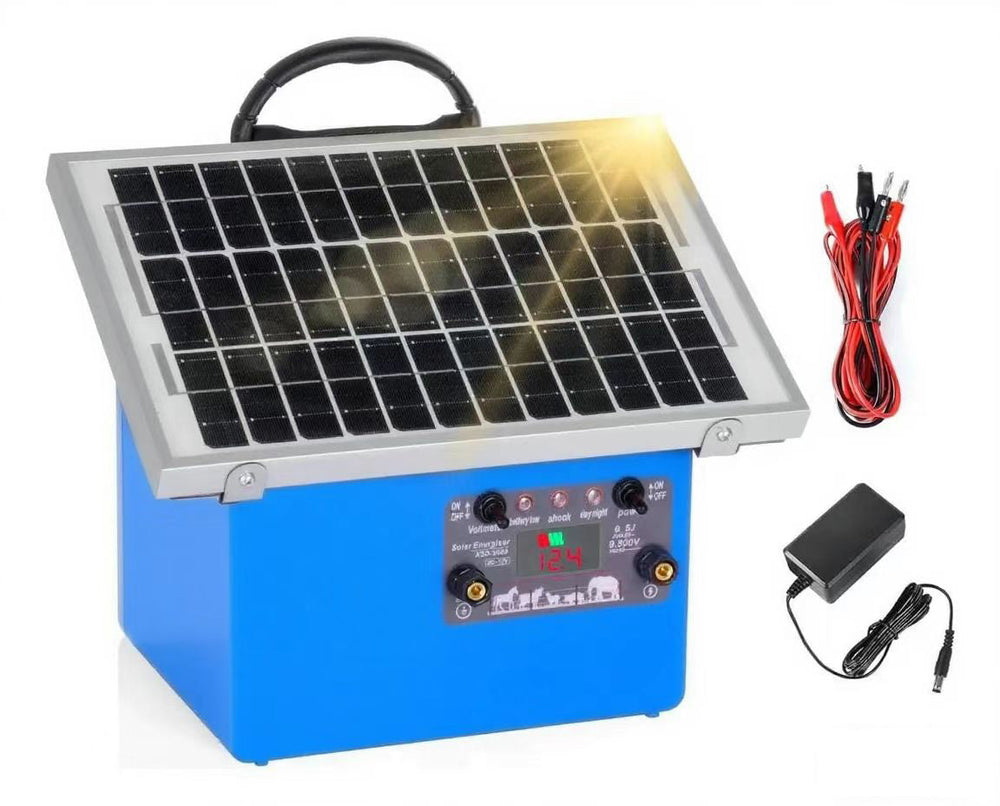
Hi everyone! This is a complete, easy-to-follow guide on how to properly install, operate, and maintain an electric fence energizer (also called a charger or fencer) specifically for deterring wildlife such as deer, wild boar, bears, raccoons, and other animals. Electric fences don’t seriously harm animals — they deliver a short, strong shock that teaches them to stay away.
A typical electric fence energizer used to protect farms and orchards from wildlife
What Is an Electric Fence Energizer?
An energizer converts low-voltage power (from mains electricity, a 12V battery, or solar panels) into high-voltage, short-duration pulses (usually 5,000–10,000 V) that are sent down the fence wires roughly once per second. When an animal touches the wire, it completes the circuit through the ground and receives a memorable (but safe) shock.
Common types:
Mains-powered (AC) – most powerful, best for permanent installations
Battery-powered (DC) – portable, great for remote areas
Solar-powered – eco-friendly, ideal for long-term off-grid use
Choose the joule rating based on the animal: 0.5–1 J for deer and smaller animals, 2–5+ J for bears and large wild boar.
Installation Steps
Choose a safe location – dry, sheltered from rain, away from flammable materials. Mount on a wall or post.
Connect the power source – plug in mains models, connect a deep-cycle battery, or wire the solar panel.
Install a proper ground system – drive at least three 6–8 ft (2 m) ground rods 10 ft apart and connect them to the energizer’s ground/earth terminal. Poor grounding is the #1 reason fences fail.
Connect the fence wires – run the hot (positive) wire from the energizer’s fence terminal to your fence lines using high-quality insulated cable.
Test the system – use a digital fence tester. You want at least 5,000 V on a clean fence; 3,000–4,000 V is the minimum for most wildlife.
Basic wiring diagram showing power, ground rods, and fence connection
Daily Operation
Clear vegetation touching the wires (grass, vines, branches cause leakage).
Turn on the energizer (most have a simple on/off switch or button).
Check the indicator light or built-in voltmeter — green/flashing usually means it’s working.
Walk the fence weekly with a tester and trim any new growth.
Adjust output (if your model allows) — higher joules for bears, lower for deer.
Maintenance & Troubleshooting
Clean solar panels regularly.
Replace deep-cycle batteries every 2–4 years.
Common problems and fixes:
No pulse / zero volts → dead battery, blown fuse, loose connections.
Low voltage → vegetation on wire, poor grounding, weak battery.
Arcing or clicking → broken insulator or wire touching a post.
Safety First!• Always post “Warning – Electric Fence” signs.• Teach children and visitors never to touch the wires.• Turn the energizer OFF before working on the fence.• Check local regulations — some areas require permits or specific signage for wildlife fences.
Real-world example: multi-strand electric fence protecting an orchard from deer and bears
Final Thoughts
A properly installed and maintained electric fence energizer is one of the most effective, humane, and cost-efficient ways to protect crops, livestock, and property from wildlife damage. Brands like Gallagher, Speedrite, Parmak, and Stafix are trusted worldwide.
Always read and follow the specific manual that comes with your energizer — this guide covers general best practices that apply to almost all models.
Feel free to leave questions or share your own wildlife fencing tips in the comments!
Happy fencing and keep those critters out!
Read article
Electronic fence energizer — examples of common real-world applications.
What is an Electronic Fence Energizer?
An electronic fence energizer (also called a fence charger) sends short, controlled high-voltage pulses down a fence line to deter animals or intruders. These pulses are non-lethal but memorable, teaching animals to respect boundaries and providing an effective, low-maintenance barrier.
1. Livestock Containment on Farms
Electric fence energizers are widely used to contain cattle, sheep, goats, horses, and other farm animals. When an animal touches the electrified wire, it feels a momentary shock and soon avoids the fence.
Prevents escapes and reduces risk of loss.
Enables flexible pasture subdivision for rotational grazing.
Costs less and installs faster than some permanent physical fences.
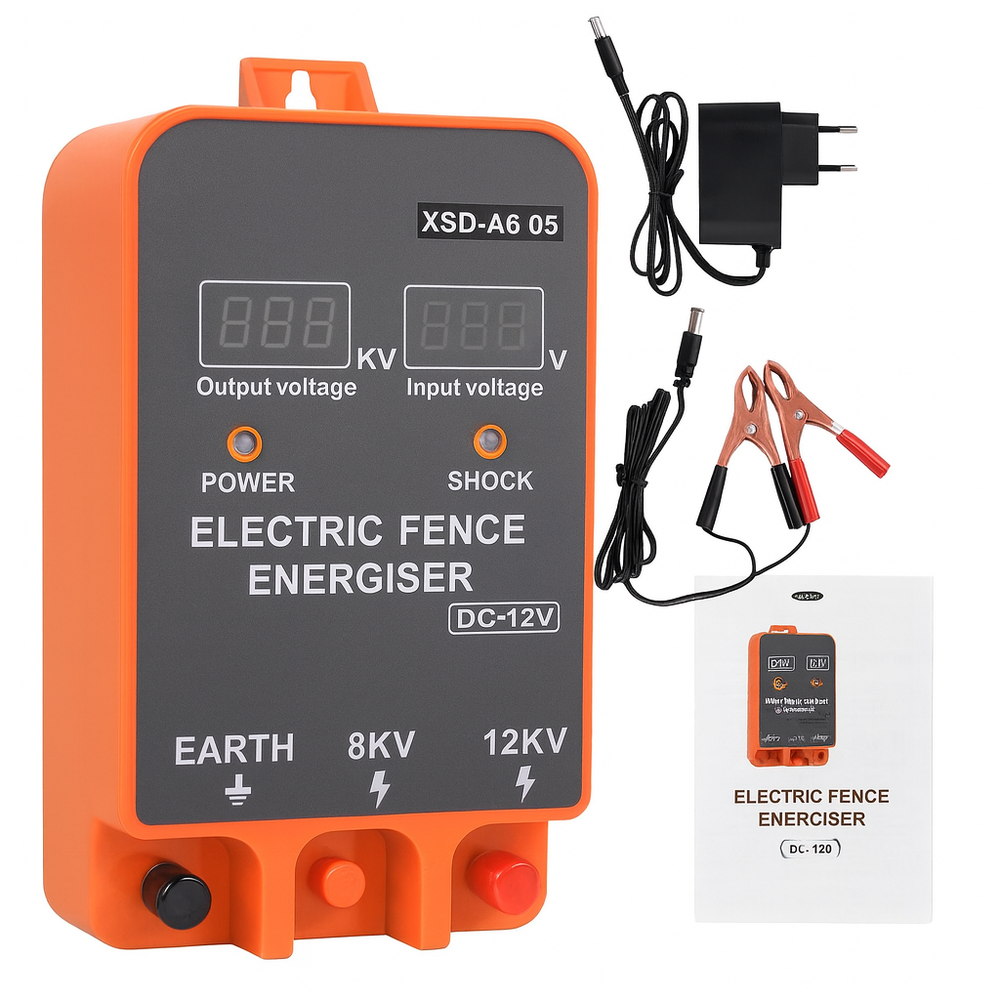
Typical energizer unit and included accessories (adapter, clips, manual).
2. Protection from Wildlife & Predators
Use electric fences to protect crops and livestock from wild animals—such as wild boar, deer, and predators—without resorting to lethal measures. The energizer delivers a deterrent that discourages animals from entering protected areas.
For long perimeters or vegetation-heavy zones, choose a higher-energy energizer (measured in joules) so the pulse remains effective across the entire fence.
3. Residential & Perimeter Security
In residential or commercial settings, an electronic fence provides an additional layer of security:
Acts as a psychological and physical deterrent to intruders.
Can integrate with alarm systems to notify owners on faults or tampering.
Some modern units support remote monitoring or on/off control for convenience.
4. Off-Grid & Solar Applications
Energizers can run on 12V batteries or solar panels, making them ideal for remote locations with no mains supply. This enables wildlife protection or livestock containment in distant fields and pastureland.
When deploying off-grid, ensure correct battery capacity and reliable solar charging to maintain consistent operation.
5. Animal Training & Behavioral Control
Beyond containment, an electronic fence can be used for training animals—teaching them boundaries (e.g., which parts of a yard are off-limits) and preventing damage to garden beds or sensitive areas.
6. Temporary & Emergency Enclosures
Electric fences are perfect for temporary situations: quarantining sick livestock, setting up temporary paddocks at events, or using mobile fencing for rotational grazing. They are fast to install and easy to remove.
7. Long-Distance, Low-Maintenance Fencing
For long fence lines, a powerful energizer ensures pulses reach the far end of the wire with enough strength to be effective. This reduces the need for intermediate power sources and keeps maintenance low.
Safety & Maintenance Tips
Proper grounding: Connect ground/earth terminals to dedicated ground rods—this completes the circuit safely and ensures performance.
Keep vegetation clear: Plants touching the wire cause shorts and reduce effectiveness.
Inspect hardware: Check insulators, posts and connections regularly for wear or damage.
Design to avoid entanglement: Fence geometry should minimize the chance animals or people get tangled in the wire.
Regular inspection and correct installation are essential for safety and effectiveness.
More Visuals
Close-up product shot — ideal for listing pages or product documentation.
Read article
XSD-A6 Electric Fence Energizer
Installation and Operation Guide
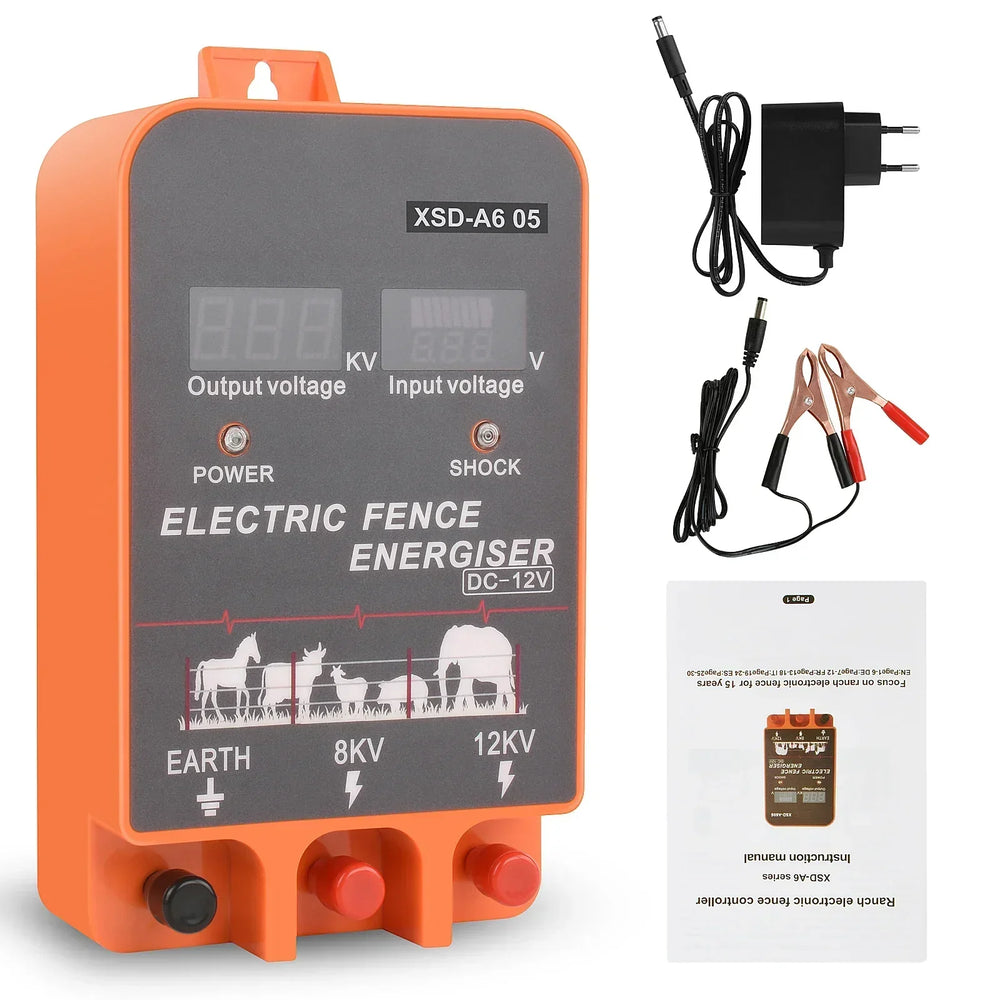
Figure 1: XSD-A6 Electric Fence Energizer – Front View
Introduction
The XSD-A6 Electric Fence Energizer is a high-performance, DC-powered electric fence system designed for agricultural, security, and livestock management applications. With an output voltage of up to 12KV, it delivers a safe but effective shock to deter animals or intruders while ensuring reliability and energy efficiency.
WARNING: Always disconnect power before installation or maintenance. Use insulated tools and wear rubber gloves during setup. Ensure the fence is clearly marked with warning signs. Keep children and pets away from the fence line.
Installation Steps
1.Choose a Location
Mount the energizer in a dry, sheltered area near a reliable 12V DC power source (e.g., battery or solar panel). Ensure the unit is protected from direct rain and extreme temperatures.
Figure 2: Example of a suitable mounting location
2.Connect the Ground (Earth) Wire
Drive a ground rod (at least 1–2 meters long) into moist soil near the energizer. Connect the EARTH terminal of the energizer to the ground rod using a thick, insulated wire.
Figure 3: Proper grounding setup
3.Connect the Fence Line
Attach the output terminal of the energizer to the fence wires using high-tension, weatherproof cables. Use insulators to separate live wires from posts and structures.
Figure 4: Fence wire connection example
4.Power On
Connect the energizer to a 12V DC power source (battery or solar panel). Switch the POWER button to the "ON" position. Adjust the SHOCK intensity as needed (start low and increase gradually).
Operation Tips
Regularly test the fence with a voltmeter to ensure proper voltage.
Keep vegetation clear of the fence to prevent energy loss.
Check ground rod connectivity periodically, especially in dry seasons.
Inspect the fence line for damage after severe weather conditions.
Troubleshooting
Issue
Solution
No output shock
Check power supply, ground connection, and fence line for shorts.
Weak shock
Clean vegetation, improve grounding, or check battery voltage.
Intermittent operation
Inspect wiring for damage or corrosion.
Energizer not powering on
Check DC power source and connections.
Product Specifications
Model: XSD-A6
Input Voltage: DC 12V
Output Voltage: 8KV - 12KV (adjustable)
Power Consumption: Low (Solar Compatible)
Fence Length: Up to 10 km
Weight: 1.5 kg
Dimensions: 200 x 150 x 100 mm
Required Tools
Insulated screwdrivers
Wire cutters/strippers
Grounding rod (1-2m)
High-tension fence wire
Insulators
Voltmeter (for testing)
Rubber gloves
Safety Information
Always comply with local regulations regarding electric fence installation and use. This unit delivers a high-voltage shock that can be dangerous to humans and animals.
Important: Install warning signs every 50 meters along the fence line to alert people of the electric fence.
Read article
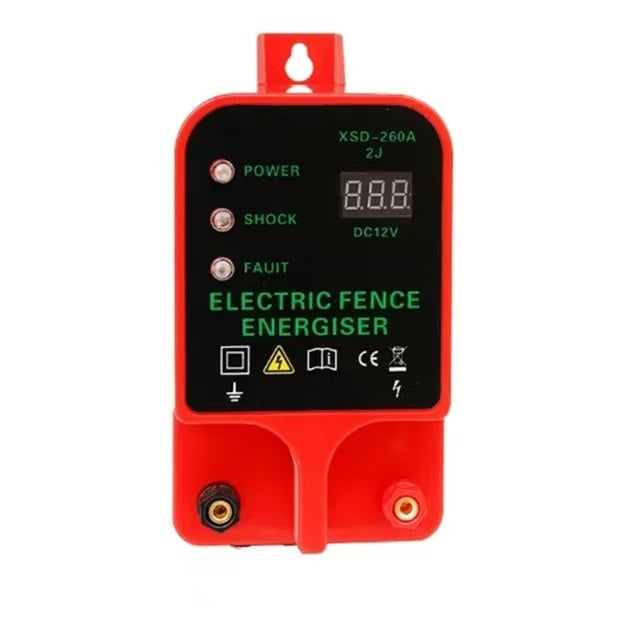
If you are a livestock owner, you know the importance of keeping your animals safe. One of the most effective methods is to use an electric fence energizer. With the advancement of technology, 10KM electronic fence energizers have now appeared, which have a series of functions such as waterproof, high-voltage pulse, high-decibel alarm, and LCD voltage display. In this guide, we’ll walk you through the key factors to consider when choosing the right electric fence motivator for your livestock. Waterproof: When used outdoors, waterproofing your energizer is critical to ensuring its longevity and performance in all weather conditions. Look for energizers specifically designed to withstand rain, snow, and other environmental elements. High Voltage Pulses: The effectiveness of electric fences lies in their ability to deliver high voltage pulses to stop animals from crossing the boundary. Make sure the energizer you choose provides strong and consistent pulses for effective control of your livestock. High-decibel alarm: If a fence breach or malfunction occurs, a high-decibel alarm can alert you to the problem so you can quickly intervene and prevent a potential escape or intrusion. LCD voltage display: Clear and accurate voltage display is crucial for monitoring the performance of electronic fences. This feature allows you to easily assess voltage levels and identify any potential issues that may arise. When choosing a 10KM electric fence energizer, it is important to consider the specific needs of your livestock and the size of the area that needs to be protected. Additionally, make sure the stimulator meets safety standards and regulations to ensure the health of your animal. All in all, investing in a high-quality 10KM electric fence exciter that features waterproofing, high-voltage pulses, high-decibel alarms, and LCD voltage display can give you peace of mind, knowing your livestock are protected. By carefully evaluating these features, you can make an informed decision and choose the best electric fence energizer for your specific requirements.
Read article



 Electric Fence
