 energizer range
One of the most common questions farmers ask is:
“How far can my electric fence energizer actually power the fence?”
The LIFEALL 15.5J Electric Fence Charger (YMD-Q780BJ) is a great choice for this application. Key specifications: 15.5J stored / 14.5J output, 600 acres / 30 miles, AC 110-240V + DC 12V + Solar 3-in-1, 12KV output, LCD display, alarm & remote control, for cattle & horses.
The answer depends on much more than just the energizer itself. Fence length, conductor type, grounding quality, vegetation, and fence design all affect how far electricity can travel effectively.
In this guide, you’ll learn what really determines electric fence distance and how to make sure your fence stays powerful from start to finish.
1. Fence Distance Depends on More Than Joules
Many people think a higher joule rating automatically means longer fence distance. While output power is important, it is only part of the system.
Actual fence performance depends on:
Fence conductor quality
Grounding efficiency
Fence layout
Vegetation contact
Number of connected fence lines
Fence type (wire or netting)
A strong energizer connected to a poorly designed fence can still perform badly.
2. Understanding “Effective Fence Distance”
Manufacturers often list an “effective distance” or “maximum fence length” for energizers.
However, these numbers are usually based on ideal conditions:
Clean fence line
Good grounding
Minimal vegetation
Proper wire tension
No major power leakage
Real farm conditions are rarely perfect, so actual performance may vary.
3. Fence Netting Requires More Power Than Fence Wire
Not all fencing systems place the same load on the energizer.
General comparison:
Polywire is efficient for long-distance temporary fencing
Polyrope offers better visibility but slightly higher resistance
Electric fence tape creates more wind resistance and requires good tension
Electric fence netting consumes more energy because of multiple horizontal strands
This is why the same energizer may power a much longer polywire fence than a netting system.
4. Fence Length vs Fence Area
A larger pasture does not always require a larger energizer.
For example:
A long narrow pasture may require more fence distance
A square pasture may use less total fence wire
Multiple paddocks increase electrical load
You should calculate total fence length instead of only acreage.
5. Grounding Greatly Affects Fence Distance
Poor grounding is one of the biggest reasons fences lose power over long distances.
Electricity must travel:
From the energizer
Through the fence
Through the animal
Back through the soil
If grounding is weak, voltage drops much faster over distance.
Small fences may work with one grounding rod, while larger systems often perform better with additional grounding support.
6. Vegetation Contact Reduces Effective Range
Grass and weeds touching the fence continuously drain electricity.
This is especially common with:
Lower polywire strands
Electric fence netting close to the ground
Seasonal grazing systems
Even a powerful energizer can lose effectiveness if vegetation constantly pulls power away from the fence.
7. Fence Connections Matter More Than Most Farmers Expect
Every connection creates potential resistance.
Check regularly for:
Loose wire joints
Rusted clips
Weak netting connectors
Damaged gate handles
Poorly tied polywire knots
Small connection problems become larger over long fence distances.
8. Choosing the Right Energizer for Your Fence Size
Different fence systems require different energizer capacities.
Small systems:
1. Short temporary fences
2. Small paddocks
3. Light livestock control
Medium systems:
1. Rotational grazing
2. Mixed fencing layouts
3. Multiple pasture sections
Large systems:
1. Long perimeter fencing
2. Large livestock operations
3. Extensive electric fence netting setups
Planning for future expansion is also important.
9. Solar vs AC Energizers for Long Distance Fencing
Both solar and AC energizers can support long fences when sized correctly.
AC energizers:
1. Stable continuous power
2. Suitable near buildings or barns
Solar energizers:
1. Ideal for remote pasture
2. Depend on battery condition and sunlight
For long-distance fencing, stable voltage matters more than power source type.
10. How to Maintain Strong Voltage Across Long Fences
To maximize fence distance and performance:
Keep vegetation away from the fence
Maintain clean wire connections
Test voltage regularly
Use quality insulators and fence posts
Upgrade grounding when needed
Match energizer size to fence type
A balanced fence system always performs better than simply using a larger energizer.
Final Thoughts
There is no single answer to how far an electric fence energizer can power a fence. Real performance depends on the entire fence system working together.
The right energizer, proper grounding, quality conductors, and regular maintenance all help maintain strong voltage over longer distances.
LIFEALL designs energizers to support different fence setups, including polywire, polyrope, electric tape, and electric fence netting systems for farms of different sizes.
Recommended Products
LIFEALL 15.5J Electric Fence Charger (YMD-Q780BJ)
15.5J stored / 14.5J output, 600 acres / 30 miles, AC 110-240V + DC 12V + Solar 3-in-1, 12KV output, LCD display, alarm & remote control, for cattle & horses
LIFEALL 20 Miles Solar Electric Fence Charger 0.5J
20 miles, 0.5J, solar powered, off-grid controller for livestock
LIFEALL A605 5-10KM Electric Fence Energizer 2.5 Joule LCD
5-10KM, 2.5 joules, LCD display, 12V, farm livestock
Read article
 electric fence conductor
Introduction
Choosing the right electric fence wire is just as important as selecting the right electric fence energizer.
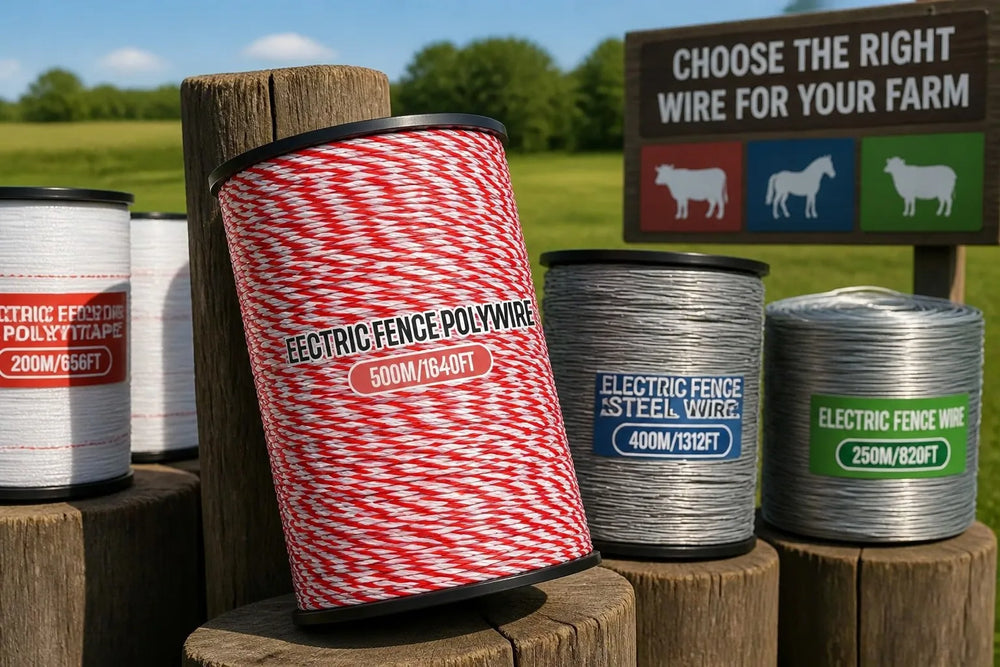
The LIFEALL Electric Fence Polywire 2mm – 200m/500m is a great choice for this application. Key specifications: 2mm polywire, high-visibility red & white, 200m/500m reels.
Different conductors offer different levels of conductivity, visibility, strength, and durability. Whether you are fencing cattle, horses, sheep, goats, or poultry, selecting the appropriate wire can improve fence performance, reduce maintenance, and keep your livestock safely contained.
1. Why Electric Fence Wire Matters
The fence wire carries the electrical pulse from the energizer throughout the entire fencing system.
If the conductor has poor conductivity or becomes damaged, voltage will drop and the fence will become less effective. A high-quality conductor helps maintain consistent voltage, reduces energy loss, and improves the overall performance of your electric fence.
Selecting the right wire is the foundation of a reliable fencing system.
2. Understand the Different Types of Electric Fence Wire
There are several types of conductors available, and each is designed for different farming applications.
The most common options include:
Polywire
Polyrope
Polytape
High tensile wire
Each type offers its own advantages depending on your livestock, fence length, and installation requirements.
3. When to Choose Polywire
Polywire is one of the most popular choices for temporary electric fencing.
It is lightweight, flexible, and easy to install, making it ideal for rotational grazing and portable fencing systems.
Polywire is recommended for:
Temporary paddocks
Cattle grazing
Sheep grazing
Strip grazing
Seasonal fencing
Because it is easy to rewind and relocate, polywire is widely used by farmers who frequently move their fence lines.
4. When to Choose Polyrope
Polyrope contains more conductive strands than polywire and is generally stronger.
Its larger diameter also makes it easier for livestock to see, reducing accidental contact with the fence.
Polyrope is commonly used for:
Horse fencing
Permanent livestock fencing
Long-distance fence lines
High-visibility applications
For larger animals, polyrope often provides an excellent balance between durability and visibility.
5. When to Choose Polytape
Polytape is designed to provide maximum visibility.
Its wide profile makes it highly noticeable, especially for horses, which rely heavily on visual boundaries.
Polytape is best suited for:
Horse paddocks
Equestrian facilities
Temporary horse fencing
High-visibility fence systems
Although polytape is easy for animals to see, it may experience more wind resistance than polywire or polyrope.
6. When to Use High Tensile Wire
High tensile wire is commonly used in permanent fencing installations.
It offers excellent conductivity, high strength, and a long service life.
High tensile wire is suitable for:
Permanent cattle fencing
Large ranches
Long perimeter fences
Heavy-duty livestock systems
Although installation requires more time and specialized tools, high tensile wire provides outstanding long-term durability.
7. Consider Conductivity and Fence Length
Not all fence wires conduct electricity equally.
As fence length increases, conductivity becomes more important.
For long fences, choose conductors with multiple stainless steel or copper strands to reduce resistance and maintain higher voltage throughout the system.
A properly matched conductor helps your electric fence energizer perform at its full potential.
8. Match the Wire to Your Livestock
Different animals require different fencing solutions.
General recommendations include:
Cattle — Polywire or high tensile wire
Horses — Polyrope or polytape
Sheep — Electric fence netting or polywire
Goats — Electric fence netting with a powerful energizer
Poultry — Electric fence netting
Choosing the right conductor improves both animal control and fence efficiency.
9. Don't Forget the Other Fence Components
Even the best conductor cannot perform well without a properly designed fencing system.
Make sure your installation includes:
A reliable electric fence energizer
High-quality fence posts
Durable insulators
A properly installed grounding system
Secure wire connectors
Every component contributes to maintaining consistent fence voltage.
10. Maintain Your Fence Wire for Long-Term Performance
Regular maintenance helps extend the life of your electric fence wire.
Inspect the fence routinely for:
Broken conductive strands
Loose connections
Excessive wire sagging
Weather damage
Vegetation touching the fence
Replacing damaged sections promptly helps maintain reliable voltage and reduces long-term repair costs.
Conclusion
The best electric fence wire depends on your livestock, fencing layout, and management goals. Polywire is ideal for temporary fencing, polyrope offers excellent strength and visibility, polytape is a popular choice for horses, and high tensile wire provides outstanding durability for permanent installations. Combined with a quality electric fence energizer, strong fence posts, and an effective grounding system, the right conductor will help you build a dependable fencing system that performs season after season. LIFEALL Fence offers a complete range of electric fencing products designed to meet the needs of modern livestock farms around the world.
FAQ
What is the best electric fence wire for cattle?
Polywire is ideal for temporary grazing systems, while high tensile wire is often preferred for permanent cattle fencing.
Is polyrope stronger than polywire?
Yes. Polyrope is generally stronger, contains more conductive strands, and offers better visibility for larger livestock.
Is polytape only used for horses?
Polytape is most commonly used for horses because it is highly visible, but it can also be used for other livestock where visibility is important.
Which fence wire conducts electricity the best?
High tensile wire usually provides the best conductivity, while premium polywire and polyrope with multiple conductive strands also deliver excellent electrical performance.
Recommended Products
LIFEALL Electric Fence Polywire 2mm – 200m/500m
2mm polywire, high-visibility red & white, 200m/500m reels
LIFEALL Electric Fence Jumper Lead Cables
Red & green crocodile clips, connect energizer to fence & ground
LIFEALL Electric Fence Ring Insulators Screw-in 50/100 Pcs
Screw-in, UV resistant, for wood posts, 50/100 pcs
Read article
 electric tape
1. Introduction: Why Fence Choice Matters
Choosing the right electric fence type is not just about budget—it directly affects livestock safety, grazing efficiency, and ease of management.
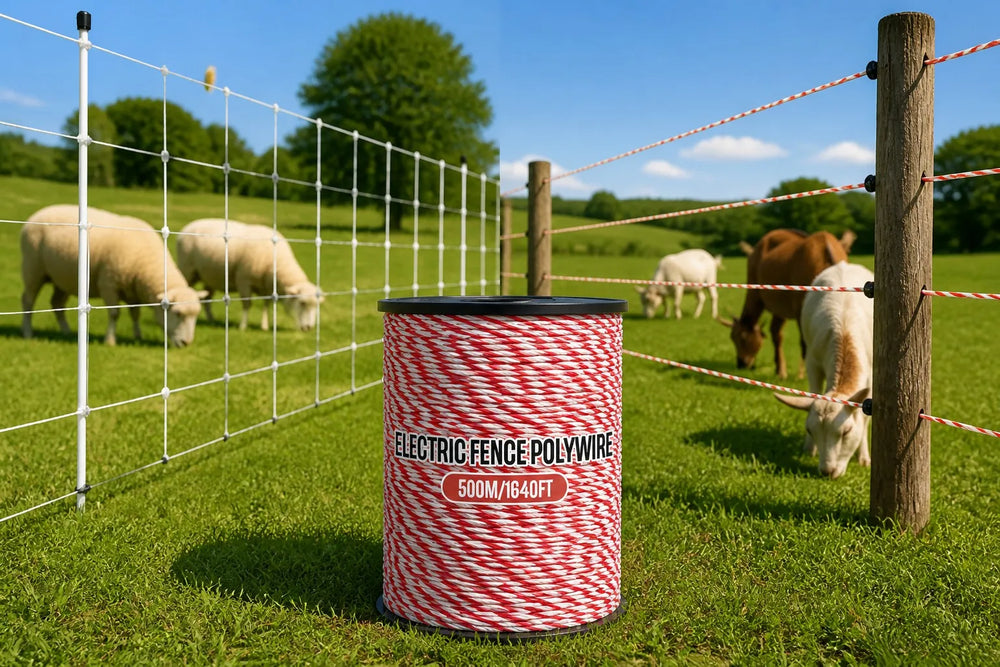
The LIFEALL Electric Fence Polywire 2mm – 200m/500m is a great choice for this application. Key specifications: 2mm polywire, high-visibility red & white, 200m/500m reels.
Two of the most common fencing solutions are electric fence netting and electric fence wire systems (including polywire, polyrope, and tape). Each has unique benefits depending on your animals and land setup.
2. What Is Electric Fence Netting?
Electric fence netting is a pre-fabricated mesh with conductive wires woven into vertical and horizontal lines, usually with step-in posts already attached. It’s designed for fast setup and secure containment.
✅ Best for: Poultry, goats, sheep, or areas with predator risks
Pros:
- Quick installation, minimal tools required
- Tight spacing prevents animals from slipping through
- Offers some predator protection
Cons:
- Heavier and harder to move
- More expensive per meter
- Difficult to repair if damaged
3. What Is Electric Fence Wire (Polywire, Polyrope, Tape)?
Wire-based fencing uses polywire, polyrope, or electric fence tape stretched between posts (plastic, fiberglass, pigtail, or metal). It’s widely used for rotational grazing and larger pastures.
✅ Best for: Cattle, horses, pigs, and goats
Pros:
- Lightweight and highly portable
- Cost-effective for long distances
- Easy to store, repair, and customize
- Works with a variety of post types
Cons:
- Requires reels and insulators
- Less effective against predators
- Needs proper tension to prevent sagging
4. Installation & Maintenance Comparison
Netting: Faster for small enclosures, but bulky to move or store; harder to untangle if rolled incorrectly.
Wire systems: Require more setup, but easier to repair, adjust, and extend over large areas.
5. Which Fence Works Best for Which Animals?
Animal
Recommended Fence
Why
Chickens
Netting
Prevents escape and deters ground predators
Sheep
Netting
Wool makes single wires less effective
Goats
Netting or multi-strand wire
Netting blocks escapes; wire works if set with multiple strands
Cattle
Polywire/Polyrope
Strong visual barrier, easy to move for grazing
Pigs
Low-strand polywire
Keeps them from rooting under the fence
Horses
Electric tape/rope
High visibility prevents accidents
6. Conclusion
There’s no single “best” electric fence—it depends on your animals, terrain, and management style.
Use netting for smaller animals and predator-sensitive areas.
Use polywire/rope/tape for larger animals and flexible grazing systems.
By choosing the right fencing method, you ensure safety, reduce labor, and improve efficiency on your farm. LIFEALL provides a wide range of products including high-quality polywire and energizers to support your choice.
Recommended Products
LIFEALL Electric Fence Polywire 2mm – 200m/500m
2mm polywire, high-visibility red & white, 200m/500m reels
LIFEALL 10KM Electric Fence Energizer with Battery Power Clip
10KM range, LCD display, battery power clip connector, cattle/sheep/poultry
LIFEALL Electric Fence Charger 12V Battery – 2 Joules 6 Miles
2 Joules, 6 miles / 40 acres, 12V battery, cattle/horse/pig
Read article
 battery care
1. How a Solar Fence Energizer Works
A solar fence energizer converts sunlight into stored energy and releases it in controlled electrical pulses through your fence line.
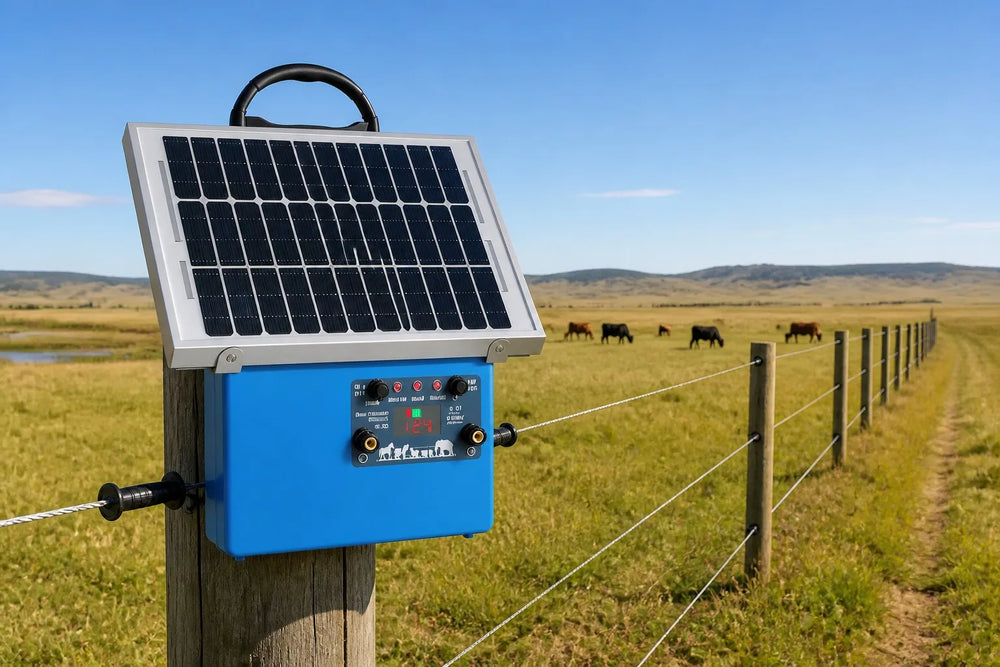
The LIFEALL 20 Miles Solar Electric Fence Charger 0.5J is a great choice for this application. Key specifications: 20 miles, 0.5J, solar powered, off-grid controller for livestock.
A complete system includes:
Solar panel
Battery (usually 12V lead-acid or lithium)
Fence energizer unit
Fence conductor (polywire, polyrope, tape, or fence netting)
Grounding system
If any one of these components is neglected, overall fence performance will drop.
2. Keep the Solar Panel Clean and Unshaded
Solar panels are the most exposed part of the system and the easiest to overlook.
Best practices:
Clean dust, mud, or bird droppings every 2–4 weeks
Use water and a soft cloth only
Avoid abrasive cleaners
Make sure no grass, trees, or fencing materials shade the panel
Even partial shade can significantly reduce charging efficiency.
3. Check Battery Health Regularly
The battery stores energy for night use and cloudy days. Most solar fence failures start here.
Maintenance tips:
Inspect battery terminals for corrosion
Ensure tight connections
Test battery voltage periodically
Replace batteries that no longer hold charge
If your fence weakens after sunset, the battery is usually the cause.
4. Monitor Fence Voltage, Not Just the Energizer Light
Many solar energizers have indicator lights, but these do not tell the full story.
You should:
Use a digital fence tester
Measure voltage at the energizer output
Test again at the far end of the fence
Compare readings during day and night
Consistent voltage matters more than peak voltage.
5. Maintain a Proper Grounding System
Grounding is critical for solar energizers, especially in dry soil conditions.
Good grounding practices include:
Using galvanized grounding rods
Ensuring firm soil contact
Keeping connections clean and tight
Improving soil moisture during dry seasons
Poor grounding can make even a high-quality solar energizer feel weak.
6. Control Vegetation Along the Fence Line
Solar energizers are more sensitive to constant energy drain caused by vegetation.
Pay special attention to:
Grass touching lower fence wires
Weeds contacting electric fence netting
Fast-growing pasture during rainy seasons
Regular trimming helps maintain stable voltage and reduces battery load.
7. Inspect Fence Conductors and Connections
Fence conductors affect how efficiently energy travels.
Routine checks should include:
Tight knots and clips on polywire and polyrope
Proper tension on electric fence tape
Clean stainless-steel contacts on netting
No broken or rusted connectors
Small connection problems can cause large voltage losses.
8. Posts and Insulators Also Need Attention
Fence posts and insulators protect electricity from leaking into the ground.
Check for:
Cracked insulators on metal posts
UV-damaged plastic posts
Loose fence lines rubbing against posts
Even a strong solar energizer cannot overcome poor insulation.
9. Adjust Maintenance by Season
Solar fence systems behave differently throughout the year.
Seasonal tips:
Winter: clean panels more often, monitor battery capacity
Spring: control fast vegetation growth
Summer: ensure full sun exposure, prevent overheating
Rainy seasons: check grounding and waterlogged areas
Season-specific care prevents sudden fence failures.
10. Know When the System Needs an Upgrade
Sometimes maintenance reveals that your fence system has grown beyond its original design.
This may happen if:
Fence length increases
Fence netting is added to wire systems
More animals are enclosed
Additional fence lines are connected
In these cases, upgrading to a higher-capacity solar energizer is a better solution than pushing a small unit too hard.
Final Thoughts
A solar fence energizer is not a “set it and forget it” device. With simple, regular maintenance, it can deliver reliable performance for many years—even in challenging farm environments.
When the solar panel, battery, grounding system, fence conductors, and posts work together, your electric fence stays strong day and night.
LIFEALL designs solar fence energizers to work with polywire, tape, fence netting, and common fence posts—making long-term maintenance easier for modern farms.
Recommended Products
LIFEALL 20 Miles Solar Electric Fence Charger 0.5J
20 miles, 0.5J, solar powered, off-grid controller for livestock
LIFEALL Electric Fence Voltage Tester – 8-Level LED
8-level LED, 600V to 12000V, works with all energizer types
Read article
 DIY electric fence
Installing an electric fence system may seem simple, but small details can make a big difference. Even a minor mistake, like weak grounding or using the wrong energizer, can cause major voltage loss. This guide helps you avoid common installation mistakes, using LIFEALL’s professional energizers as examples.
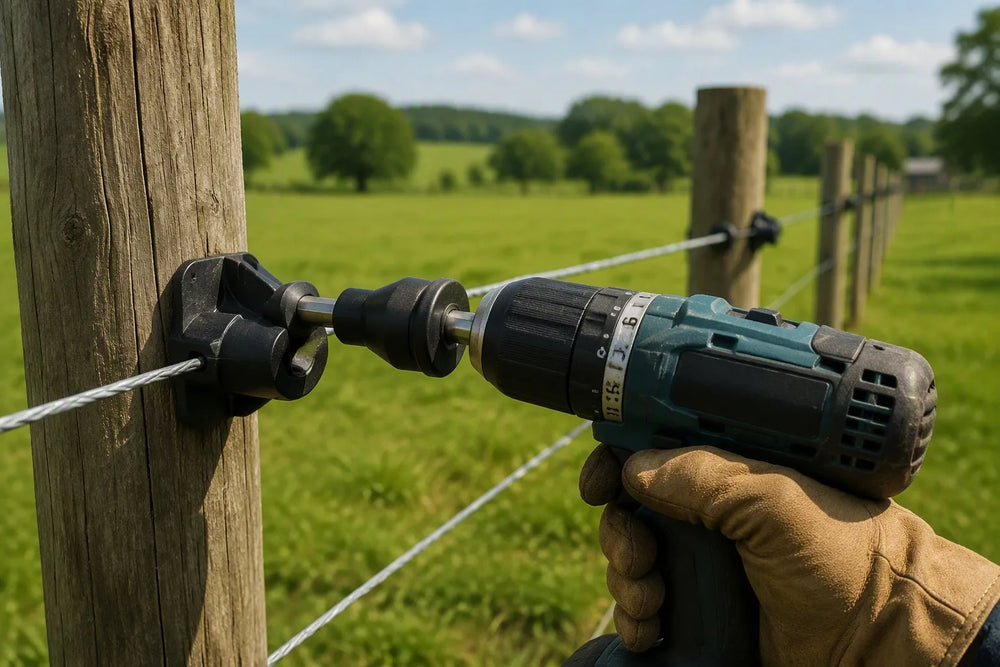
The LIFEALL Electric Fence Insulator Driver is a great tool for this application. Key specifications: Drill attachment socket bit for screw-in post insulators.
1. Poor Grounding System
A fence is only as strong as its grounding. In most cases, voltage issues come from poor grounding, not from the energizer.
How to Fix It:
a) For small fences (below 8 acres), one galvanized ground rod driven at least 1.5 m (5 ft) into moist soil is usually enough.
b) For medium or large systems, use one to three galvanized ground rods, each driven at least 1.5 m (5 ft) deep in moist soil, to ensure stable current return.
c) In dry or sandy soil, pour water or add a little mineral salt around rods to improve conductivity.
d) Make sure grounding wires are clean, tight, and corrosion-free.
2. Using the Wrong Energizer Size
Selecting the right electric fence energizer is crucial for stable voltage and animal control. LIFEALL offers different models for various farm sizes and power conditions.
Model
Type
Effective Area
Fence Length
Output Energy @500Ω
Power Source
Peak Output Voltage
LIFEALL P8
AC Powered
—
12 km / 7.5 mi
3 J
AC 110-240V
12 kV
Solar 0.5J
Solar
—
20 Miles
0.5 J
Solar + Battery
9.5 kV day / 7.1 kV night
LIFEALL 15.5J
3-in-1
600 Acres
30 mi / 48 km
14.5 J
AC/DC/Solar
12 kV
LIFEALL 9J
High-Power
400 Acres
20 mi / 32 km
8 J
Solar + Battery
12 kV
How to Choose:
a) Use LIFEALL P8 for small paddocks near a power outlet.
b) Choose LIFEALL Solar 0.5J for portable solar-powered systems.
c) Select LIFEALL 15.5J if you want flexibility between AC, battery, or solar power.
d) Pick LIFEALL 9J for large-scale ranches needing high energy output and long-distance performance.
3. Vegetation Touching the Fence
Overgrown grass and weeds can “leak” voltage by grounding parts of the fence line, especially on polywire or electric netting fences.
How to Fix It:
a) Regularly mow or trim vegetation beneath the fence.
b) Maintain at least 10 cm clearance from the ground.
c) Use fiberglass or plastic fence posts to keep lines tight.
4. Loose Connections or Poor Insulators
Loose wire joints and cracked insulators can cause energy loss and reduce voltage.
How to Fix It:
a) Use high-quality plastic or porcelain insulators, especially on metal or pigtail posts.
b) Check stainless steel clips regularly for rust or damage.
c) Keep wire joints tight but not overstretched.
5. Neglecting Regular Maintenance
Many farmers install their fences once and forget to check them again. Over time, weather, dust, or vegetation can reduce voltage.
How to Fix It:
a) Test voltage weekly using a digital fence tester.
b) Keep connectors dry and clean.
c) Re-tighten or replace worn posts and insulators seasonally.
d) For solar energizers like LIFEALL Solar 0.5J or LIFEALL 9J, clean the solar panel regularly to ensure charging efficiency.
6. Conclusion
A reliable electric fencing system depends on three things: solid grounding, the right energizer, and regular maintenance.
For smaller areas, use LIFEALL P8 (AC).
For portable setups, go with LIFEALL Solar 0.5J (solar).
For flexible dual power use, choose LIFEALL 15.5J.
For large, high-energy systems, rely on LIFEALL 9J.
LIFEALL provides complete fencing solutions including energizers, netting, polywire, posts, and accessories, trusted by farmers worldwide.
Recommended Products
LIFEALL Electric Fence Insulator Driver
Drill attachment socket bit for screw-in post insulators
LIFEALL Electric Fence Ring Insulators Screw-in 50/100 Pcs
Screw-in, UV resistant, for wood posts, 50/100 pcs
LIFEALL Electric Fence Polywire 2mm – 200m/500m
2mm polywire, high-visibility red & white, 200m/500m reels
LIFEALL Electric Fence Voltage Tester – 8-Level LED
8-level LED, 600V to 12000V, works with all energizer types
Read article
 electric fence care
Introduction
Proper electric fence maintenance is essential for keeping your fencing system reliable throughout the year. Even the best electric fence energizer cannot deliver consistent performance without regular inspections and maintenance.
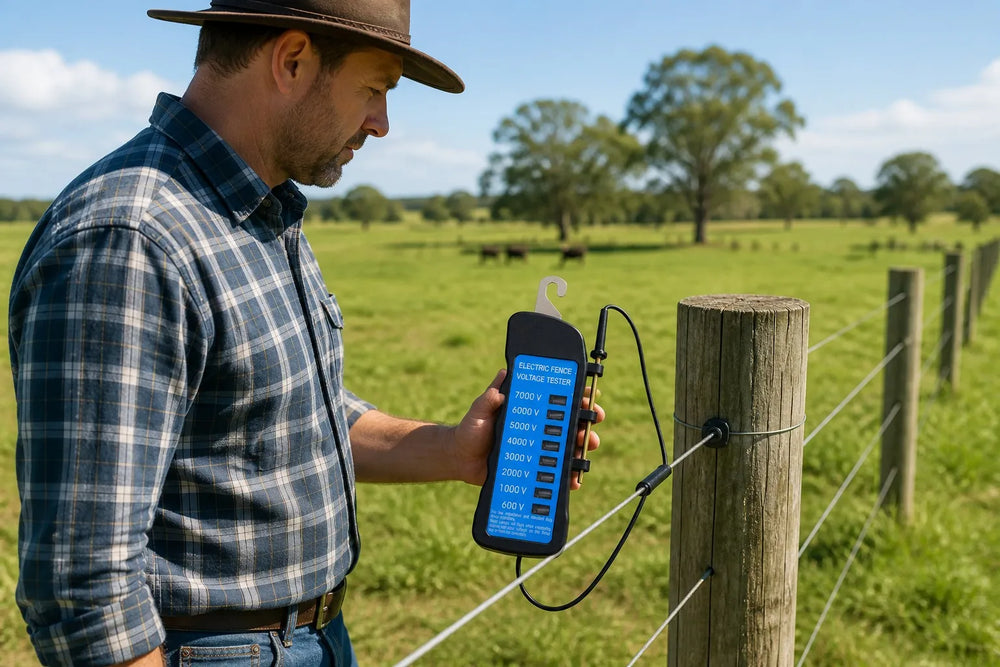
The LIFEALL Electric Fence Voltage Tester – 8-Level LED is a great tool for this application. Key specifications: 8-level LED, 600V to 12000V, works with all energizer types.
By following a simple maintenance routine, you can reduce voltage loss, prevent costly repairs, extend the lifespan of your equipment, and keep your livestock safely contained.
1. Check Your Electric Fence Voltage Regularly
The easiest way to monitor fence performance is by checking the voltage on a regular basis.
Use a digital fence tester to measure the voltage at different points along the fence line, including near the energizer, in the middle of the fence, and at the far end. Consistent readings indicate that your system is working efficiently, while sudden voltage drops usually signal a problem that requires attention.
Regular voltage testing helps identify issues before they affect livestock control.
2. Inspect the Electric Fence Energizer
The electric fence energizer is the heart of the entire fencing system.
Inspect the energizer for signs of damage, loose wiring, or moisture. Make sure the power supply is stable and that all electrical connections remain secure.
If you use a solar fence energizer, clean the solar panel regularly and check the battery condition to ensure reliable charging.
A well-maintained energizer provides consistent output and improves the overall performance of your fence.
3. Keep Vegetation Away from the Fence
Grass, weeds, vines, and low-hanging branches can continuously drain power from an electric fence.
Walk along the fence line regularly and remove any vegetation that touches the conductors. This is especially important during spring and summer when plant growth is at its fastest.
Maintaining a clear fence line helps preserve voltage and reduces unnecessary strain on the energizer.
4. Inspect Polywire, Polyrope, and Polytape
Fence conductors should always be in good condition.
Check your polywire, polyrope, or polytape for broken conductive strands, frayed sections, excessive sagging, or worn connectors. Damaged conductors increase electrical resistance and reduce fence efficiency.
Replacing worn materials before they fail completely helps maintain consistent fence performance.
5. Examine Fence Posts and Insulators
Fence posts and insulators play an important role in supporting the fence and preventing electrical leakage.
Inspect all posts for damage or movement, especially after storms or heavy livestock pressure. Examine insulators for cracks, UV damage, or loose fittings that could allow electricity to escape into the post.
Replacing damaged components promptly helps maintain proper voltage throughout the fence.
6. Test the Grounding System
An effective grounding system is essential for any electric fence.
Inspect all grounding rods, clamps, and cables to ensure they remain secure and corrosion-free. During dry weather, the soil around the grounding rods may become less conductive, reducing fence performance.
Adding additional grounding rods or improving soil moisture can significantly improve the effectiveness of your electric fence.
7. Check Gates and Connectors
Gate handles, underground cables, and wire connectors should be inspected regularly.
Loose or corroded connectors create resistance that reduces fence voltage. Tighten all fittings and replace damaged components whenever necessary.
Maintaining strong electrical connections helps ensure that power flows efficiently throughout the fence system.
8. Prepare Your Fence for Seasonal Changes
Weather conditions affect electric fence performance throughout the year.
During the growing season, vegetation requires more frequent trimming. In winter, inspect the fence after snow, ice, or strong winds that may damage conductors or fence posts.
Seasonal inspections reduce unexpected failures and help maintain reliable operation in changing conditions.
9. Replace Worn Components Before They Fail
Waiting for components to fail completely often results in larger repairs and unexpected downtime.
Inspect your fencing system regularly and replace worn insulators, damaged conductors, weak batteries, and aging connectors before they affect fence performance.
Preventive maintenance is usually less expensive than emergency repairs.
10. Create a Routine Maintenance Schedule
The best way to keep an electric fence working efficiently is to follow a regular maintenance schedule.
A simple monthly inspection should include:
Testing fence voltage
Inspecting the energizer
Checking the grounding system
Removing vegetation
Examining conductors and insulators
Tightening electrical connections
Routine maintenance helps ensure your fence continues to perform reliably throughout the year.
Conclusion
Regular maintenance is the key to maximizing the performance and lifespan of your electric fence system. By inspecting your electric fence energizer, maintaining a strong grounding system, controlling vegetation, and replacing worn components before they fail, you can reduce maintenance costs and improve livestock security. LIFEALL Electric Fence offers electric fence energizers, polywire, polyrope, electric fence netting, fence posts, insulators, and fencing accessories designed to help farmers build dependable and long-lasting electric fencing systems.
FAQ
How often should an electric fence be inspected?
A visual inspection should be performed every week, while a complete maintenance check is recommended at least once a month.
Why does my fence voltage drop over time?
Voltage loss is commonly caused by vegetation touching the fence, poor grounding, damaged conductors, or loose electrical connections.
How do I know if my grounding system is working?
Use a digital fence tester to measure voltage and inspect all grounding rods and connections regularly for corrosion or loose fittings.
Can regular maintenance extend the life of an electric fence energizer?
Yes. Routine maintenance reduces unnecessary electrical load and helps your energizer operate efficiently for many years.
Recommended Products
LIFEALL Electric Fence Voltage Tester – 8-Level LED
8-level LED, 600V to 12000V, works with all energizer types
LIFEALL Electric Fence Jumper Lead Cables
Red & green crocodile clips, connect energizer to fence & ground
LIFEALL Electric Fence Insulator Driver
Drill attachment socket bit for screw-in post insulators
Read article
 electric fence components
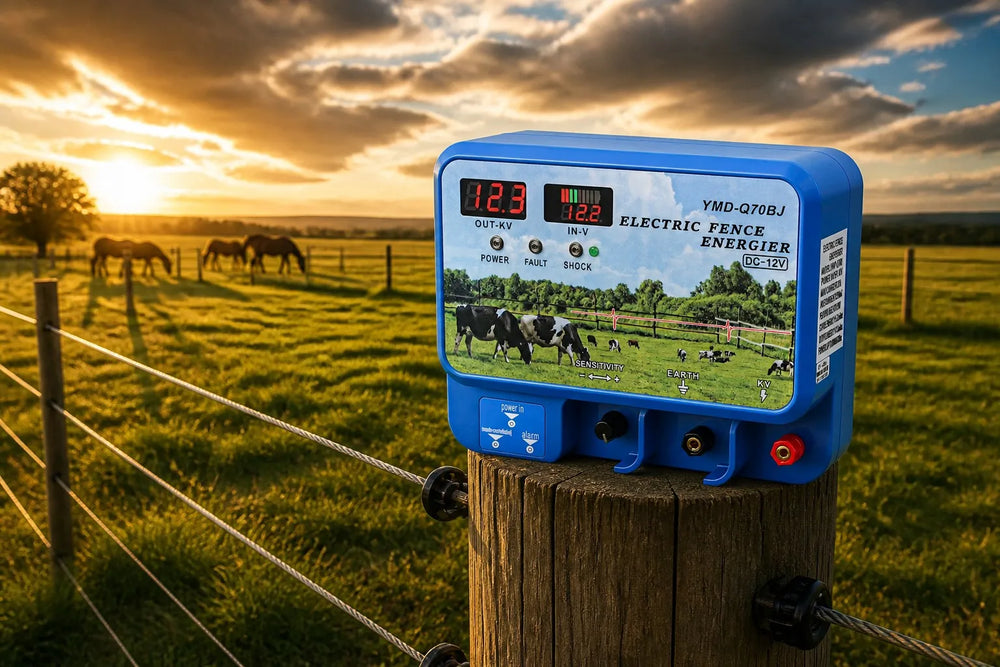
What an electric fence is made of and how the parts must match: energizer, wire, insulators, posts, grounding, connections and test equipment.
Read article
 electric fence safety
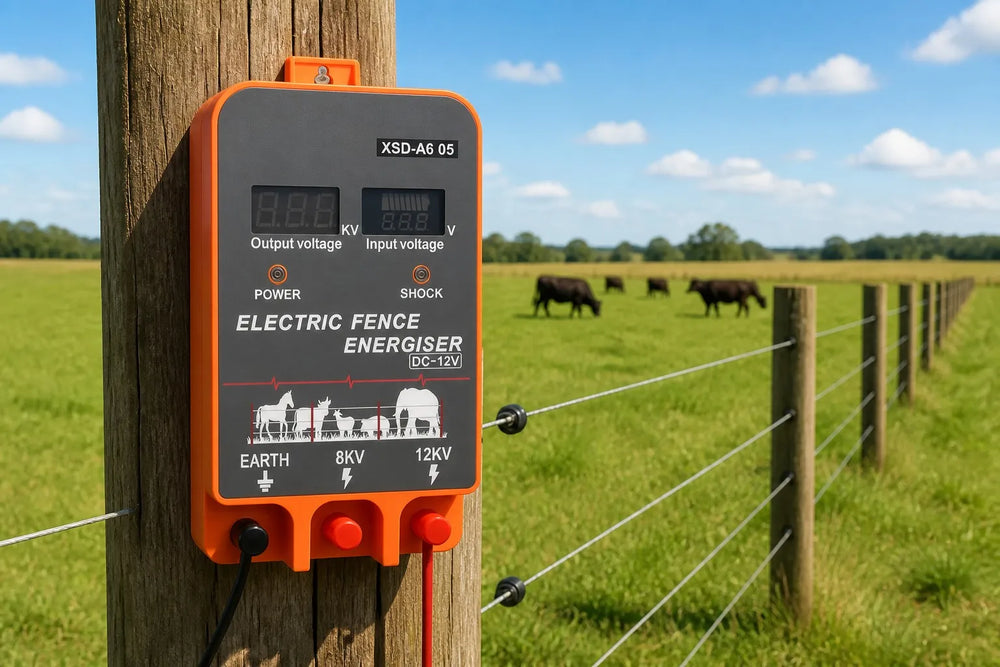
Ten electric fence safety precautions before you install: testing, warning signs, RCD protection, grounding, bridging risks and legal requirements.
Read article
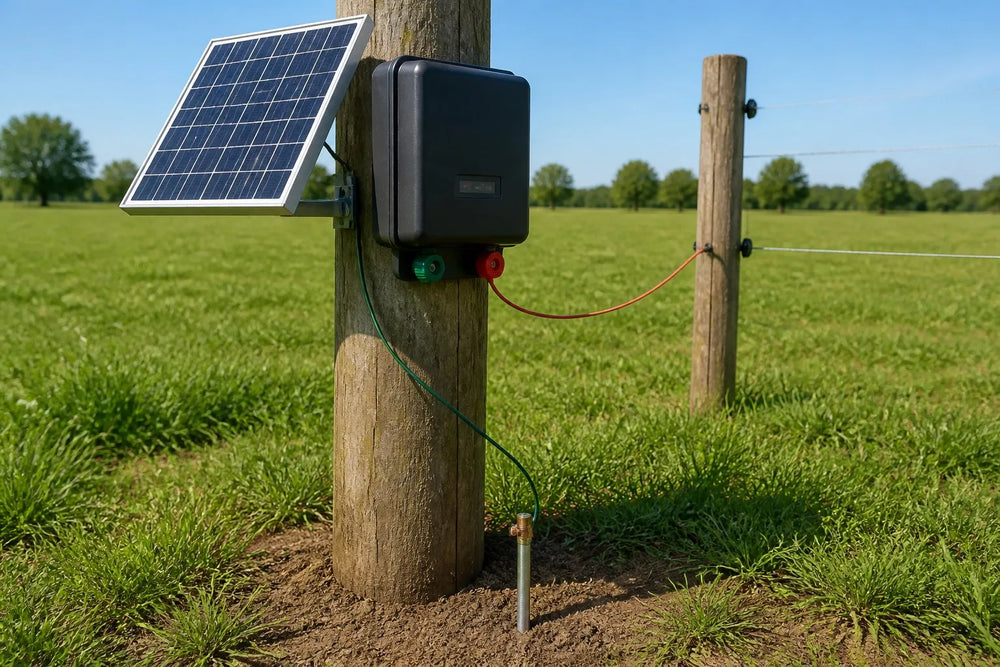
How to Install an Electric Fence Energizer: Wire, Ground Rod, Solar & Battery Connections
An electric fence is only as good as its connections. The energizer itself is simple — it produces the pulse — but everything that makes the fence work happens in four connections: the fence wire, the ground rods, the solar panel, and the battery. Get any one of them wrong, and the fence gets weak, works intermittently, or fails outright.
This guide walks through each connection in the correct order, with the wiring layout that keeps your fence at full voltage. You need only basic tools: a screwdriver, insulated lead-out cable, connectors, and a fence tester for the final check.
What You Need
Insulated lead-out cable — high-voltage rated wire from the energizer to the fence
Ground rods — galvanized steel, at least 1.5 m (5 ft) long, one to three rods
Connectors — clamps or splice connectors rated for your fence type
12V battery and/or solar panel — depending on your energizer model
Fence tester — to verify voltage before trusting the fence
Step 1 — Connect the Fence Wire
The energizer has two high-voltage terminals: the fence (KV) terminal and the earth terminal. The fence wire connects to the fence terminal only.
Run a short piece of insulated lead-out cable from the energizer's fence (KV, red) terminal to the fence line.
Join the lead-out cable to the fence wire with a proper connector — the join must be clean, tight, and corrosion-free.
Keep the lead-out run as short as possible and keep it off the ground and off posts. A lead-out wire lying on the soil leaks voltage before it ever reaches the fence.
Use only insulated cable for the lead-out; bare wire on the way to the fence is a short circuit waiting to happen.
If you are choosing wire for the fence itself, our wire type guide compares poly wire, poly tape, and steel.
Step 2 — Install the Ground Rods (The Most Important Step)
The fence circuit only works when the pulse can return to the energizer through the soil. That return path is the ground rod system — and poor grounding is the #1 cause of weak or dead fences. It is also the most common reason energizers get damaged.
Drive one to three galvanized ground rods at least 1.5 m (5 ft) into the ground, in moist soil if possible.
Connect the rods together with 1.5 mm² insulated copper or aluminum wire.
Run insulated cable from the rods to the energizer's earth (black) terminal.
Make every connection tight, clean, and corrosion-free — a loose or rusty clamp silently kills fence power.
Wiring order that matters: ground rod → earth terminal on the energizer. Never connect the ground rods to the fence wire, and never skip the earth connection — an ungrounded energizer can be damaged the first time the fence is loaded. In dry, sandy, or rocky soil, add extra rods. For the full theory, read our complete grounding guide.
Step 3 — Connect the Solar Panel (Solar Models)
If your energizer is solar-powered or 3-in-1 (AC/DC/solar), the panel feeds the internal battery through a built-in charge controller.
Mount the panel where it gets unshaded sun for most of the day. In the northern hemisphere face it south; in the southern hemisphere (Australia, New Zealand) face it north.
Tilt the panel at about 30–45° so rain runs off and winter sun still reaches it.
Plug the panel cable into the energizer's solar input terminals, matching the + and − markings.
Check the display or charge indicator — it should show charging in daylight.
A shaded panel is the most common cause of "solar fence keeps dying at night". Trim vegetation and reposition before blaming the energizer. Our solar fence guide covers sizing and off-grid operation in more detail.
Step 4 — Connect the Battery (Battery Models)
Battery-powered and solar units store energy in a 12V battery so the fence runs 24 hours a day.
Use a 12V lead-acid battery (typically 4.5–60 Ah depending on your fence length).
Clip the red lead to the battery + terminal and the black lead to −. Polarity matters — check the markings before clamping.
Place the battery in a dry, ventilated, protected spot, off the ground if possible.
If the battery is not included with your unit, choose a battery rated for daily cycling; a car battery works, but a deep-cycle battery lasts far longer in fence service.
Step 5 — Power On and Test
Power the energizer on (AC adapter, battery, or solar). The power LED should light.
Walk to the far end of the fence and test with a fence tester — a healthy fence reads well above 3,000 volts.
Check the energizer's fault indicator: if it shows a short, walk the line looking for vegetation or wire touching posts.
Learn the correct testing technique in our voltage tester guide, and if the fence still underperforms, start with the troubleshooting guide.
Safety Notes
Never touch the energizer terminals or fence wire while the unit is powered on.
Keep children and pets away from the fence line.
Disconnect power before adjusting any connection.
Conclusion
Four connections, one rule: fence wire to the fence terminal, ground rods to the earth terminal, panel and battery to their marked inputs — then test at the far end. Do this and your energizer will deliver its rated power for years.
Need ground rods, insulated lead-out cable, connectors, or a fence tester? Browse the LIFEALL range of electric fence equipment, or contact our team with your fence length and energizer model — we will help you complete the installation correctly.
Read article



 energizer range
