

 Earthing
乾燥地や砂質土で電気柵をアース(接地)する(干ばつに強いアース)
エナジャイザーでは電圧が良好なのに放牧地で弱く感じるなら、通常、問題はエナジャイザーではなく大地にあります。乾燥した、砂質の、岩の多い、あるいは凍結した土壌でも機能し続けるアース(接地)システムの作り方をご紹介します。
Read article
電気柵の実践的なガイド、製品知識、現場から得たアイデアをお届けします。
69 articles
Earthing
エナジャイザーでは電圧が良好なのに放牧地で弱く感じるなら、通常、問題はエナジャイザーではなく大地にあります。乾燥した、砂質の、岩の多い、あるいは凍結した土壌でも機能し続けるアース(接地)システムの作り方をご紹介します。
Read article Electric fencing
Most wildlife-conflict fences fail for one reason: they were designed for livestock, not for the animal on the other side. This guide covers the design, power and maintenance changes that hold up against primates, wild dogs, big cats, otters and burrowing wildlife — wherever in the world you farm.
Read article Electric fencing
Farm energizers deliver short, high-voltage pulses — painful, but engineered to be non-lethal. This guide explains how the safety limits work, what the law typically expects from fence owners, and the practical rules that protect people, pets and visitors.
Read article
Almost every herd problem on a small farm traces back to an animal that looked perfectly healthy on the day it arrived. Buying in stock — a ram, a heifer, a pair of goats, a few replacements — is how you improve a herd. It is also how you import its worst weeks. An animal that looks clean at the sale barn can be incubating something, carrying a parasite load that hasn't shown itself yet, or simply be days away from crashing under the stress of transport, new water, new feed and a new pecking order. An isolation pen — sometimes called a quarantine pen or a receiving pen — is the separate space where a new animal spends its first weeks on your property, well away from the herd, under daily observation. The arithmetic is why it's standard practice rather than a regulatory chore. A small pen and a few weeks of patience cost almost nothing. One infection that reaches your whole herd costs production, veterinary bills, deadstock and months of your time. Here's the part most small farms get stuck on: people rarely skip isolation because they disagree with it. They skip it because they don't have a spare permanent yard. Permanent pens cost money, eat a paddock, and need fencing. A temporary electric fence removes that excuse — which is what this guide is about. Why isolation earns its place A healthy-looking animal is not a tested animal. Many problems pass through an incubation period with no visible sign, and the animal can pass them on the whole time. Transport stress exposes what was hidden. Movement, new water, new feed and a new hierarchy all press on the immune system. The first days are exactly when latent problems surface — which is precisely when you want the animal somewhere you can see it. One infection in the herd costs far more than a pen. Production loss, treatment, losses and weeks of disruption versus a small fenced area and some patience. Isolation protects the new animal too. It gets to adapt to your feed, your water and your climate without competing at the trough with animals that already know the routine. Why temporary electric fencing is the right tool for a receiving pen You are not building a permanent facility. You are creating separation and observation for a few weeks: Real distance, not a single fence. A permanent yard forces you to isolate inside your existing layout, often only a fence-width away from the herd. A portable electric pen can sit 15–30 m away, with a lane or a paddock between it and your main fence line — so there's no nose-to-nose contact over the wire. No permanent build, no wasted space. The pen comes down when isolation ends, and the posts and wire go back into service for strip grazing or a temporary paddock. Cheap enough to keep ready. A few posts, a spool of polywire and an energizer you probably already own means the pen is standing before the animal arrives — not improvised the same afternoon. It's genuinely stock-proof. Two or three strands of polywire on well-placed posts will hold cattle, sheep and goats reliably, provided the fence is powered and grounded properly. See our beginner's guide to rotational grazing with temporary electric fencing for the basic post-and-strand layout. Setting up the pen Distance and separation Put real space between the pen and the herd. Aim for at least 15–30 m, and never a shared fence line where animals can touch noses. No shared anything. Separate troughs, separate water, separate hay rack, separate handling tools. A separate pen with shared feed equipment is isolation in name only. Drainage first. Pick ground that drains. Wet footing and a damp pen is the environment that turns a mild problem into a serious one, and it makes the next three weeks miserable for both of you. Shade and airflow. A shaded, well-ventilated spot with dry bedding that you can replace regularly. In hot weather, ventilation matters as much as shade. Make it easy to stand and watch. The whole point is daily observation, so put the pen where your normal morning and evening rounds already take you. The fence itself Two to three strands of polywire or polytape on lightweight posts is enough for cattle, sheep and goats. On a small pen, keep the bottom strand low enough that a horned or determined animal meets it at nose height. Corner posts matter more than straight runs. Brace your corners properly — a pen that leans over in week two isn't containing anything. Give the isolation pen its own energizer, or at least its own section. This is the detail that gets skipped and then causes confusion: if the pen shares one energizer with the whole farm, a fault in the pen drops voltage on the main line, and a fault on the main line drops voltage on the pen. You then can't tell which side has the problem. Separate power (or a cleanly separated section) means a separate diagnosis. Power and grounding A small perimeter needs modest power. A 2-joule low-impedance energizer is more than enough for a small pen holding a few animals — the constraint is distance and weed load, not animal count. Ground it properly. Voltage is only half a circuit; the ground is the other half. As a working rule, allow roughly 3 ft of ground rod per joule of output, driven into damp soil. Our complete grounding guide covers rod placement and the mistakes that quietly halve your voltage. Test at the far end. Never at the energizer terminals. Walk to the far corner of the pen and read the voltage there with a fence voltage tester. If the far end reads low, the problem is in the line, the joints or the ground. No mains nearby? A 12V battery energizer, or a solar unit, keeps the pen independent of your farm's power. The 12V LCD energizer with remote and alarm is a good fit for a pen you check twice a day but don't want to babysit — an alarm tells you if a wire has gone down. The daily routine — this is the real work Isolation without daily observation is just a separate paddock. Two short visits a day, morning and evening, is the standard worth holding to. Order of work matters. Serve the main herd first, the isolation animal last. Keep a dedicated pair of boots, a dedicated coat and dedicated tools for the pen, and don't carry anything back from the pen to the main yard without cleaning it. You are the most likely route between the two. What to look at each visit: Appetite and drinking. Is it cleaning up feed and drinking normally? Rumination. In cattle and sheep, quiet cudding after a meal is a good sign; standing off feed is not. Demeanour and movement. An animal that stands apart, hangs its head, or won't get up needs attention now, not tomorrow. Discharge. Any abnormal discharge from nose, eyes or mouth. Breathing. Unusual rate, audible breathing, or a repeated cough. Droppings and urine. Consistency, colour and frequency — often the earliest warning you'll get. Coat and skin. Persistent rubbing, hair loss, scurf or anything crawling. Gait and feet. Lameness or reluctance to stand. Write it down. A dated note in a notebook or on your phone — what you saw, when — is worth real money when you're describing the animal to a vet, and it's how you learn which suppliers to trust next season. Call the vet immediately when you see Complete refusal to eat or drink · severe dullness or an animal that won't rise · obvious difficulty breathing · severe or persistent diarrhoea · marked bloating · rapid decline over a few hours. In any of those cases, phone the vet and describe exactly what you're seeing. Don't experiment with treatments of your own, and don't move the animal back to the herd. Diagnosis and treatment is the vet's job; your job is observation, prevention and sound judgement. How long should isolation last? There is no single number that suits every animal, source and farm — which is why the sensible answer is to agree the duration with your vet when the animal arrives, based on its species, its origin and your herd's situation. Plan for weeks, not days: incubation periods are longer than a weekend, and "it looks fine" is not a diagnosis. A vet check-up during the isolation period is part of the routine, not an optional extra. The mistakes that defeat a quarantine pen Cutting isolation down to a day or two because the animal looks well. Isolating the space but not the equipment — a separate pen with shared buckets, boots and scoops isn't isolation. Forgetting that you are a carrier. Hands, boots and clothing move things you can't see. Adding a "companion" from the herd. You've just put one of your own animals at risk and undone the whole exercise. Treating the pen as storage. The value is in the daily look, not the fence. Skipping the veterinary check because the days passed without symptoms. Letting the fence go soft. Once the animals have learned the wire, voltage creeps down with grass contact and a loosened joint. Troubleshooting a fence that's lost voltage takes ten minutes and is far cheaper than a breakout. In wet weather especially, re-check the ground — see the checks in our wet-weather fence care and livestock health overview. Ending isolation and joining the herd When the period your vet recommended is complete, and the animal has been eating, drinking and behaving normally throughout: Choose a mild day with no heat stress and no storm coming through. Move calmly and keep the first introduction short and observable. Expect some jostling. Re-sorting the hierarchy is normal — what you're watching for is an animal that gets pushed off feed or water, or is being persistently chased. Keep watching for several days after. The move itself is fresh stress, and problems that were held in check can surface afterwards. Leave the pen up. The next purchase is already on the calendar somewhere. Quick checklist before the animal arrives ☐ Pen sited 15–30 m from the herd, with a lane or paddock in between ☐ No shared troughs, water, hay racks or tools ☐ Shade, drainage and dry bedding ready ☐ Two to three strands on braced corners, own energizer or own section ☐ Ground rod driven; far end tested with a voltage tester before the animal arrives ☐ Dedicated boots, coat and tools set aside for the pen ☐ Isolation duration and vet check agreed ☐ Log started, with dates The bottom line An isolation pen isn't a facility you build once — it's a habit you keep. A few posts, a spool of polywire and an energizer you already own will give a new animal its own space, real distance from your herd, and a few weeks of daily attention at the exact moment those weeks matter most. For a pen of your own, a 12V energizer or a remote-alarm unit will run a receiving pen anywhere on the property — and the same kit goes back to work on grazing strips the moment isolation ends. Browse the large-farm and multi-paddock range if you'd rather buy once and cover both jobs.
Read article Electric fencing
One wrong grazing day in wet weather can damage pasture for the whole season. Learn the paddock strategies — priority groups, tighter cells, sacrificial areas — that keep grass and soil healthy when the ground softens.
Read article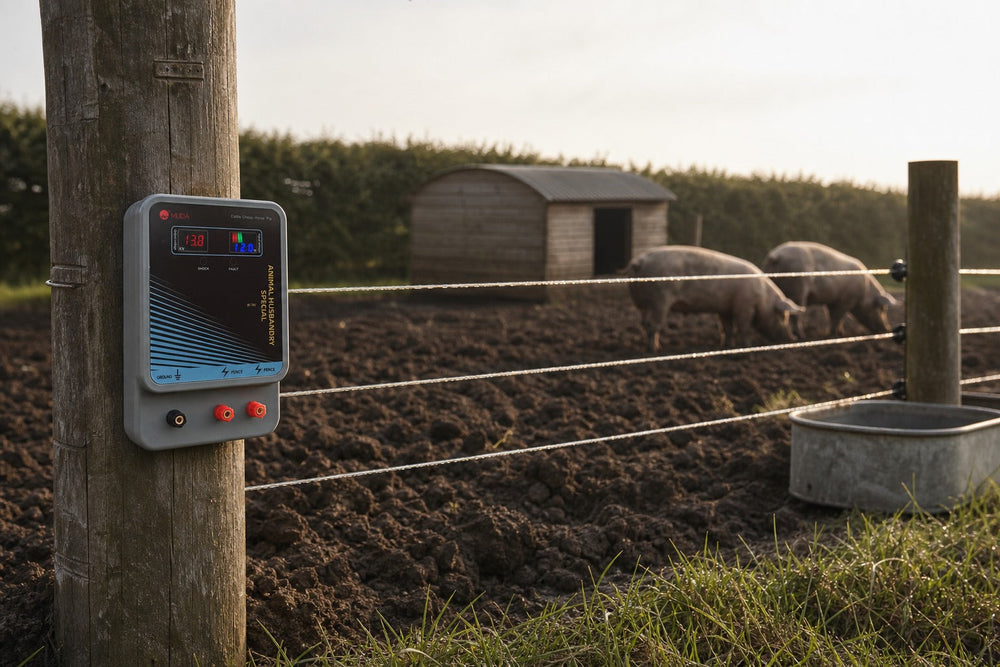 Electric fencing
Pigs are smart, strong, and root for a living — yet they are among the easiest animals to hold with electric fencing. This guide covers how many strands and at what height, how much power you need, and the training trick that stops escapes.
Read article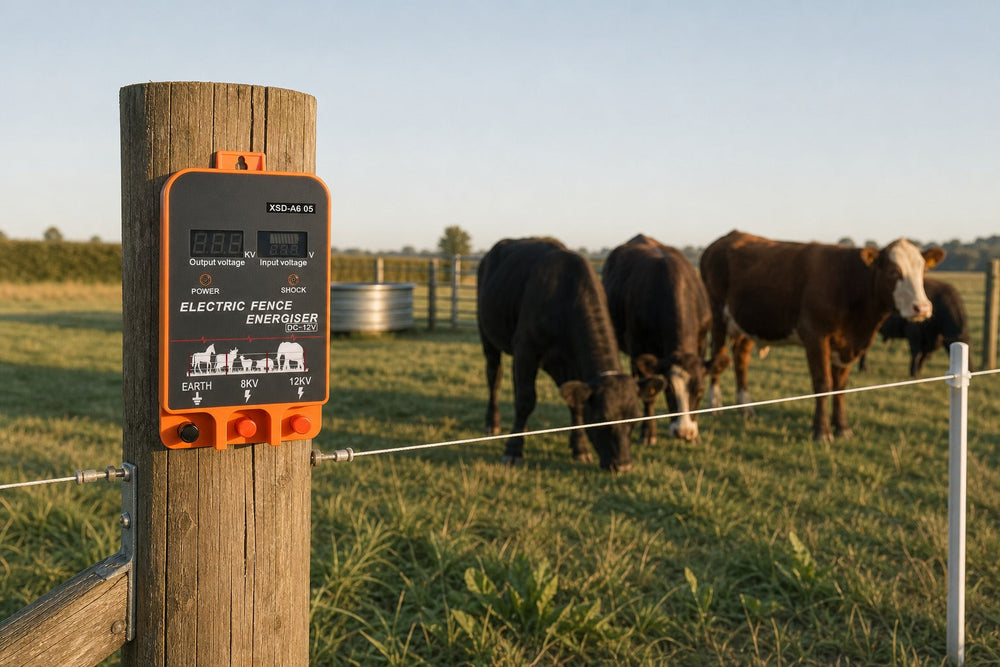 Cattle
「電気柵が家畜を留めるのではなく、訓練された家畜が柵を守るのです。」正しく設置された柵と数日間の根気強い導入があれば、ほとんどの群れは何年もそのラインを守ります。このガイドでは、成功を決める3つのことを扱います。まず柵を正しく整えること、家畜を正しい方法で導入すること、そして家畜がなおもワイヤーに挑むときに何を直すべきかを知ることです。
Read article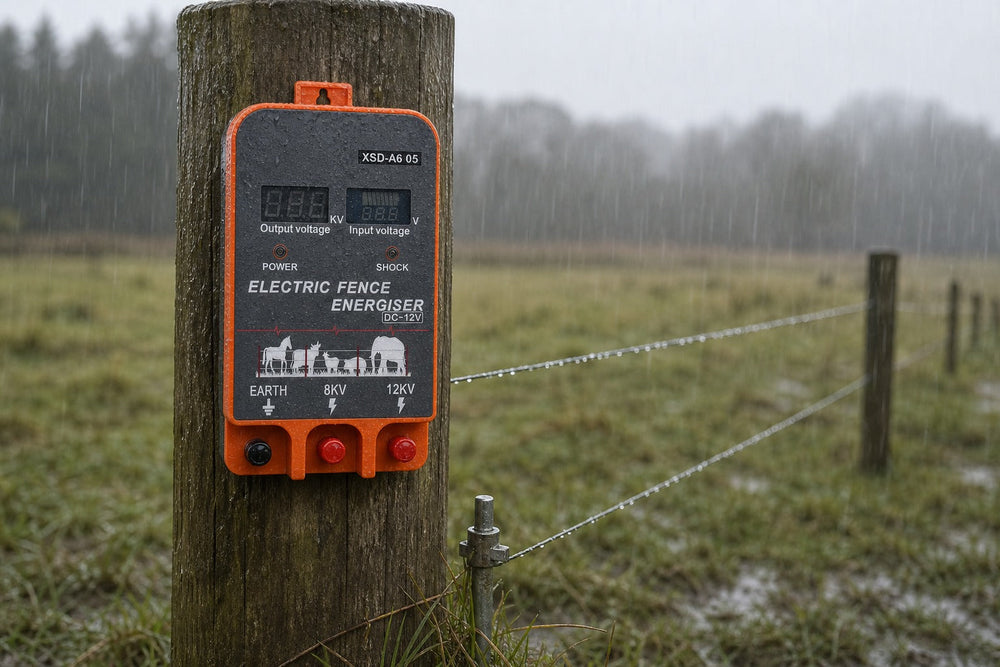
Look at the spec sheet of any outdoor electronic device and you will see a two-letter code with two numbers — IP44, IP65, IP66 — that most buyers skim past. On an electric fence charger, that code is the difference between a unit that survives ten seasons in the weather and one that dies in the first thunderstorm. Here is how to read IP ratings, what level your fence actually needs, and where the rating stops protecting you. What the IP Code Actually Means IP stands for Ingress Protection (some manufacturers call it International Protection). It is an international standard (IEC 60529) that grades how well a housing keeps out solid objects and water. The two digits are independent: First digit — solids (0 to 6): 0–1: no protection / large objects 4: protection against objects over 1 mm (most wires and tools) 5: dust-protected — some dust can enter, but not enough to harm operation 6: dust-tight — no dust ingress at all Second digit — water (0 to 9): 0–3: none / dripping / spraying up to 60° 4: splashing water from any direction 5: water jets from any direction 6: powerful water jets (roughly fire-hose force) 7: temporary immersion in water 8: continuous immersion So IP65 = dust-protected + protected against water jets. IP66 = dust-tight + powerful jets. IP44 = protected against small objects and splashes — fine for a light drizzle, not for a pressure washer. What a Fence Charger Actually Faces Your energizer lives outdoors for years. The real-world threats are: Rain and snow — falling water, splash-back from the ground, and water running down the mounting surface. Dust, pollen and grass chaff — in dry seasons and harvest dust, fine particles work into housings. Condensation — the invisible killer. Warm days and cold nights pull moisture inside a sealed housing even when it never rains. Pressure washing — many owners clean the fence area and spray the energizer without thinking. For a permanently outdoor unit, IP65 is the sensible minimum; IP66 adds a margin for exposed positions and hard weather. A unit rated below IP54 should live inside a weatherproof box, not on an exposed post. Where the Rating Does Not Protect You Here is the part the label does not tell you: The rating applies to a properly mounted, undamaged unit. A cracked housing, a missing grommet, or a cable entering from above (letting water run down into the case) defeats the rating instantly. Route cables so they loop downward before entering the unit. Terminals and connections are usually outside the rated zone. Battery clips, fence wire connections and solar leads are not IP-tested with the housing. Coat exposed terminals with dielectric grease and keep connections above splash level. Mounting matters. Fix the unit off the ground, under an eave or overhang where possible, with the controls facing down-and-away from driving rain. Ventilation can conflict with sealing. A fully sealed unit that also needs to shed battery heat needs a quality housing — cheap "waterproof" clones often skip the pressure-equalizing vent, and condensation does the damage. Matching the Charger to the Job AC (plug-in) energizers usually live near a building or in a shed — a rating of IP44–IP54 is often adequate if the location is genuinely sheltered. Outside in the open, choose IP65+. Solar energizers are the true outdoor animals — they sit in open pasture with zero shelter by design. Choose IP65 or IP66, and check that the solar panel connector and battery compartment are protected too. Every unit in the LIFEALL solar series is sealed for open-pasture life. Battery 12V units mounted on a post in the elements need the same IP65+ logic — rain does not care whether the power comes from the wall or a battery. One More Number That Matters: The Display If your energizer has an LCD display (like the LIFEALL range — live voltage, battery and fault readouts), the display window is part of the waterproofing story. A properly sealed display keeps reading correctly through years of weather. That live readout is also your early warning system: voltage drops from rain-driven shorts show up on screen before animals find the weak spot. Browse the AC power series for sheltered installations and the solar series for open pasture — and when in doubt, pick the higher IP. Weather is the one thing every fence has in common.
Read article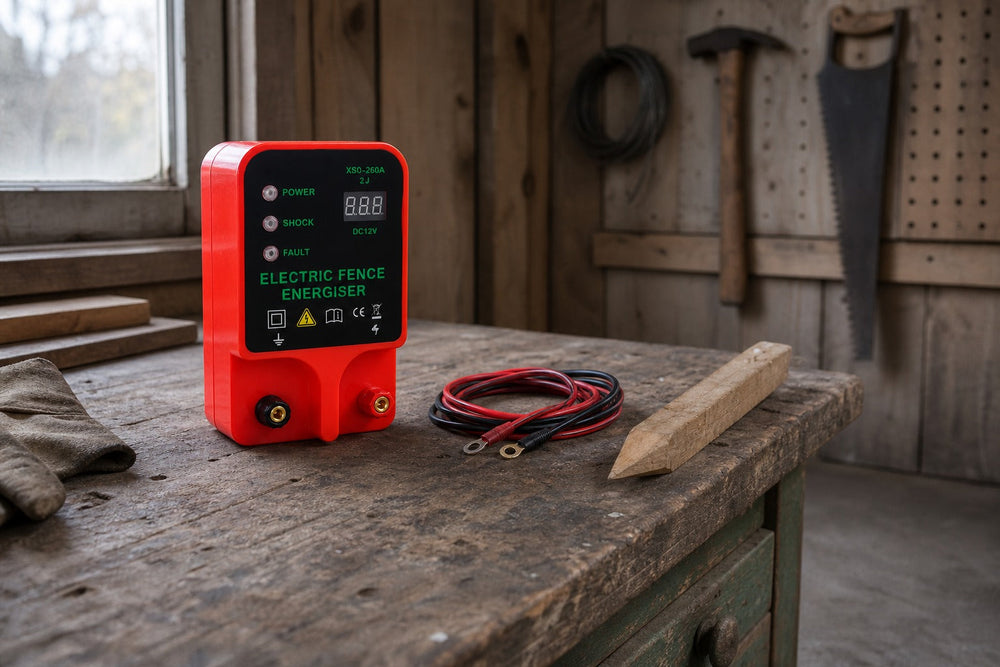
十数人の農家に先週なぜ柵が停止したのか尋ねると、その半数は同じ言葉で答えます。「バッテリーだ」。バッテリーは、バッテリー駆動の電気柵で最も誤解され、最も酷使される部品です。間違った化学組成を選べば、毎月柵のラインまで歩いて行くことになります。正しいものを雑に扱えば、一冬で寿命が尽きます。 ここでは、9Vと12Vの柵用バッテリーシステムの実用的な違いと、どちらでも長年使う方法を説明します。 ふたつのバッテリーの世界 9V乾電池システムは、エナジャイザー内部に使い捨てのアルカリまたは炭素亜鉛9V電池を使用します。小さく短い柵向けの、配線不要でそのまま入れるだけの定番の構成です。 12Vシステムは、充電式の12Vバッテリー(密閉型鉛蓄電池、AGM、またはリチウム)をクリップやリードでエナジャイザーに接続します。本格的な柵の標準であり、ソーラー充電の基盤でもあります。 9Vが適している場合 短い柵 — 数百フィートから約1マイルの軽いライン(養鶏用ネット、庭、小さな放牧地)。 時折または季節的な使用 — トレイルカメラのように、柵が何週間も連続して稼働し、めったに確認しない使い方。 携帯性 — エナジャイザー全体を片手で持ち運び、数秒でバッテリーを交換できます。 ただし注意点があります。使い捨ての9V電池は蓄積エネルギーが限られています(良質なアルカリ9Vでもおよそ500〜600 mAhで、寒い時期はさらに早く消耗します)。実際に働いている柵、つまり負荷の下でパルスを出し、軽い雑草の接触と戦っている柵では、9Vシステムは2〜6週間ごとに新しい電池が必要になることがあります。1個$3〜6では積み重なり、週の途中で止まる柵は動物が無視することを学ぶ柵です。 12Vが優位な場合 約1マイルより長い柵、または植生との接触が多い柵。 一年中使う恒久的な柵 — バッテリー1個で数か月稼働。 ソーラー設備 — ソーラーパネルはもともと12Vバッテリーを充電するため、市場のほぼすべてのソーラー式柵用チャージャーは12Vシステムです。 高出力(ジュール)のエナジャイザー — 5 J以上の機器は、9V電池が現実的に供給できる以上の電力を消費します。 高品質な12V 7〜9Ahバッテリーで小型の12Vエナジャイザー(LIFEALL A605、LCD付き2.5Jなど)を動かす場合、稼働中の柵では通常1回の充電で4〜8週間持ちます。そして最終的に低下すると、LCDの低電圧インジケーターが柵が沈黙する前に知らせてくれます。 寒い時期:バッテリーの大敵 低温はすべてのバッテリーに影響しますが、その度合いは同じではありません。 アルカリ9V電池は氷点下で容量の大部分を失います。夏に3週間持った柵が、1月には毎週電池が必要になることがあります。 密閉型鉛蓄電池(SLA)12Vも寒さで容量を失いますが、はるかに少なく、ソーラーパネルが晴れた冬の日に充電し続けます。 リチウム12Vは寒さの中でも電圧を最もよく保ちますが、初期費用は高くなります。 柵を冬の間も動かさなければならないなら、バッテリーを寒冷地用の部品として扱ってください。バッテリーボックスを断熱し、接続部を清潔に保ちグリースを塗り、そして9Vシステムの場合は、最初の本格的な凍結の前に、寒冷地向けの新しいアルカリ電池に交換するか、12Vの構成へ移行してください。 寿命を倍にするバッテリーのお手入れ 12Vバッテリーを放電したまま放置しないでください。深放電がSLAバッテリーを壊す原因です。低電圧アラームが鳴ったらすぐに充電してください。空のまま1日ごとに実際の容量が失われます。 適切な充電器で充電してください。バッテリーの化学組成に合ったトリクル/メンテナンス充電器は、どんな「急速」カー充電器よりも優れています。 端子を清潔に保ってください。腐食した端子は、実際には接続不良である「バッテリー不良」の第1位の診断です。端子を清掃し、締め付け、絶縁グリースでコーティングしてください。 保管時は接続を外してください。長期間使用しない前(冬の休止期間、オフシーズン)に、バッテリーを完全に充電し、涼しく乾燥した場所に保管してください。理想的にはメンテナンス充電器につないだままにします。 バッテリーだけでなく、システム全体をテストしてください。「バッテリーをすぐに消耗する」柵は通常、問題を抱えた柵です。雑草による短絡や不十分なアースは、エナジャイザーをより激しく働かせ、より多く消耗させます。柵を直せば、バッテリーは突然2倍長持ちします。 バッテリー式かソーラー式か:その判断 ゼロから始める場合: 小型・移動式・予算優先 → 9Vエナジャイザーで十分です。予備を持ち歩きましょう。 恒久的な柵、1マイル超、または冬場の使用 → 12V。その場所に少しでも日が当たるなら、ソーラーパネルを取り付けましょう。ソーラー12Vシステムは「バッテリー切れのための往復」をほぼ完全に解消します。当社のソーラーシリーズは、パネルとバッテリーをひとつの密閉ユニットにまとめています。 すでに12Vエナジャイザーを持っている → 冬になる前にバッテリーとソーラーのお手入れガイドを確認してください。 正直な結論 バッテリーを用途に合わせてください。短距離・季節用には9V、本格的・通年用には12V。どちらを選んでも、寒さ、深放電、腐食から守れば、柵の最も弱い部分が最も信頼できる部品のひとつになります。 すべてのLIFEALL 12VエナジャイザーはLCD画面にバッテリーと柵の電圧をリアルタイムで表示します。バッテリー低下の警告は、柵が止まった後ではなく、家畜が出る前の数日前に届きます。LIFEALLのラインナップでモデルを比較して、あなたに合うサイズを見つけてください。
Read article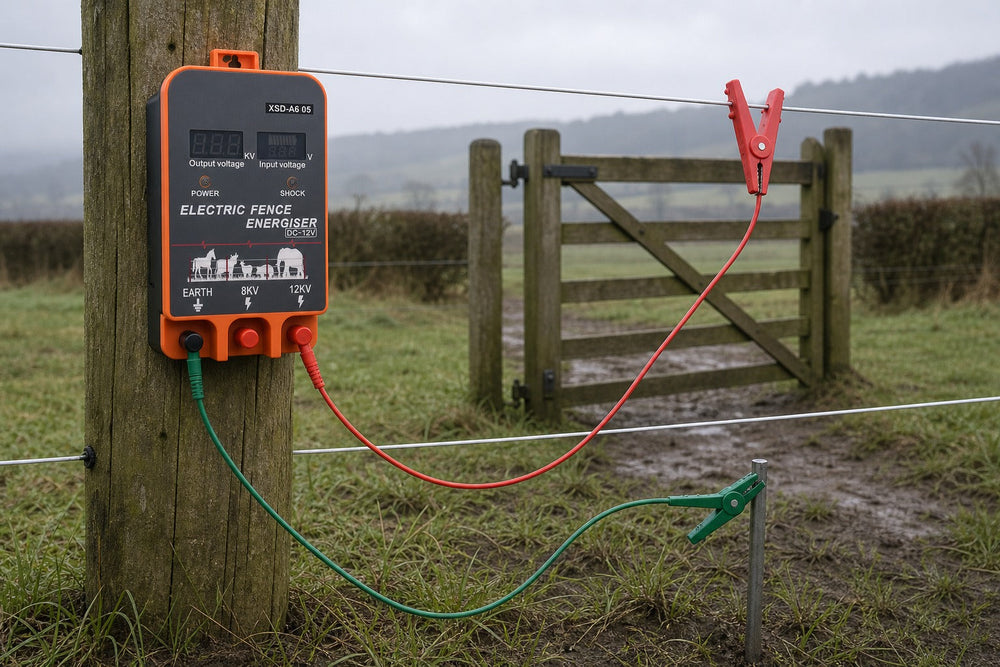
Every electric fence eventually needs an opening — for tractors, trailers, livestock, or your own daily shortcut. Done badly, a gate becomes the weakest link: wires dragged through mud, broken connections, and animals that learn exactly where the fence is "off." The good news is that a reliable electric fence gate is simple to build. Here is how to do it right the first time. Step 1: Decide Where the Gate Goes Plan gates before you tension any wire: Corners over mid-runs. A gate in the middle of a straight run means cutting every line; a gate near a corner cuts fewer wires and keeps tension simpler. On firm, level ground. A gate in a low, muddy spot will be opened less and used as an escape route more. Wide enough for your biggest vehicle. Livestock trailers are usually 8–10 ft wide — plan for at least 12 ft of opening so the gate clears the fence line on both sides. Step 2: Choose Your Gate Style Wood or metal panel gate — for permanent fence lines where you drive vehicles regularly. Mount on sturdy posts set in concrete, with the latch end well supported so it never sags into the electric line. Electric "rope" gate with spring handle — the standard for electric fence openings. A spring-loaded gate handle keeps tension on the line across the opening, so the fence stays hot and tight. When you need through, unhook the handle, lay the line aside, and drive through. Polywire drop gate — a lightweight option for temporary or rotational fences. One or two strands of polywire with insulated handles, unhooked and dropped for access. Not for daily vehicle traffic. Step 3: Never Create a "Dead End" The single biggest gate mistake is leaving a gap where the electric circuit stops. When an animal touches the fence line on either side of a dead gate, it gets no shock at all — and it learns that the fence is a suggestion. Every conductor that crosses the gate opening must be reconnected across it: Use a spring gate handle sized to the conductor (tape handles for tape, wire handles for wire). Anchor the handle end to an insulated post or bracket on the opposite side. Keep the handle under tension so the line stays at the same height as the rest of the fence. Step 4: Carry Power Across Properly Here is the detail most first-time builders miss: the two sides of the gate must be electrically joined — through the handle when closed, and that connection must be clean. Practical tips: Where the live line meets the gate handle, use crimp connections or galvanized connectors, never bare twisted wire that corrodes. Corrosion at gate connections is one of the top voltage-loss points on any fence. For multiple strands, run a jumper lead from the power source side to each strand's handle — or use a gate handle bar that carries several lines. If you run a wire underground to bypass the gate (common for buried lead-outs), use proper underground-rated insulated cable — and never bury standard fence wire where it can be cut by a cultivator. Step 5: Test the Gate Like It's the Weakest Point — Because It Is After installation: Close the gate and hook all handles. Walk to the far end of the fence and test voltage — it should read the same whether the gate is open or closed (when the gate is open, the fence beyond it naturally reads zero — that is expected). Test again on the gate handle itself while the fence is live. If the handle reads low or zero with the fence hot, the connection is the problem — clean it and re-tension. Re-test after rain and after heavy use. Gate connections need attention more than any straight-line joint. Tools That Make the Job Easier You do not need much: insulated gate handles, a good connector kit, jumper leads with croc clips for temporary spans and testing, and a voltage tester to verify your work. A Gate That Works Is a Fence That Works A fence is only as strong as its weakest opening. Take the extra hour to fit proper handles, clean connections and buried lead-outs, and your gate will carry power and hold livestock for years — no different from the fence on either side of it. And when you choose the energizer for that fence, pick one with a live voltage display so gate and line problems show up on the screen before animals find them. Browse the LIFEALL energizer range — every model shows real-time fence voltage, turning gate maintenance from guesswork into a 10-second check.
Read article$0.00 USD