Every electric fence has joints — where a reel runs out, where a line turns a corner, where a gate handle meets the conductor. And every joint is a place where voltage quietly leaks away. Corroded splices, loose knots and conductors that barely touch are the reason a fence reads 4,000V at the energizer and 800V at the far end.
The good news: joining fence line correctly is a 5-minute skill that pays off for the life of the fence. Here is how to splice, knot and connect each type of conductor without turning your fence into a voltage sieve.
The Golden Rules of Every Joint
Before the specifics, four rules apply to every splice on every fence:
Metal must touch metal. The current travels in the conductor's metal strands — a knot that only grips the plastic jacket carries almost nothing.
No bare wire touching anything but the joint. A splice that touches a post, a gate frame or the ground is a short, not a joint.
Corrosion is the enemy. Bare twisted steel left in weather corrodes and adds resistance every month. Protect splices or use purpose-built connectors.
Tension after the joint, not through it. The knot or connector should not be the load-bearing point of the line — pull tension on the line itself, with the joint left slack enough not to strain apart.
Joining Steel Wire (the Standard Fence Splice)
Steel wire (galvanized or high-tensile) is joined with a figure-eight knot — the classic fence splice:
Cross the two wire ends, then wrap each end around the other wire to form two loops — one on each side — shaping a figure eight.
Pull the loops tight with pliers, then wrap each tail tightly around its own standing wire for 2–3 turns.
Trim the tails short and pinch them flat against the wire so nothing snags animals or clothing.
For high-tensile wire, use purpose-made wire splices (compression sleeves or clamp connectors rated for HT) — HT wire is too springy for a reliable knot and the tension is too high for twisted joints.
Joining Polywire: Knot It Right
Polywire is braided plastic with thin steel strands woven through it — which means a simple overhand knot can work if the strands touch. The reliable method:
Use a figure-eight knot, the same as steel — it keeps the wire strands in contact through the knot.
Pull it very tight. A loose polywire knot is a dead spot.
Where polywire is under real tension (permanent lines), back the knot with a purpose-made polywire connector or a crimp sleeve designed for the strand count — cheaper than losing the fence at 2 a.m.
Joining Polytape and Polyrope
Wide polytape and round polyrope need a joint that keeps the whole width conducting — a skinny knot wastes half the tape's metal:
Tape-to-tape: overlap the two ends by 4–6 inches, fold each end over the other, and secure with a tape connector (the plastic buckle-style joiners sold for exactly this) — or sew/lace the overlap with UV-resistant thread through both layers so the strands interlock.
Tape to wire: use a proper tape-to-wire connector or an insulated clamp; never just hook tape metal around a wire end and hope.
Rope to rope: splice with a long taper — unbraid 3–4 inches of each end, interleave the strands, and re-braid or bind tightly. This keeps current flowing strand-to-strand along the splice.
Knots are acceptable for temporary tape fences; permanent horse fences deserve connectors, because a tape knot that corrodes or slips is a fence a horse will learn to cross.
Connecting Different Conductors (and Gates)
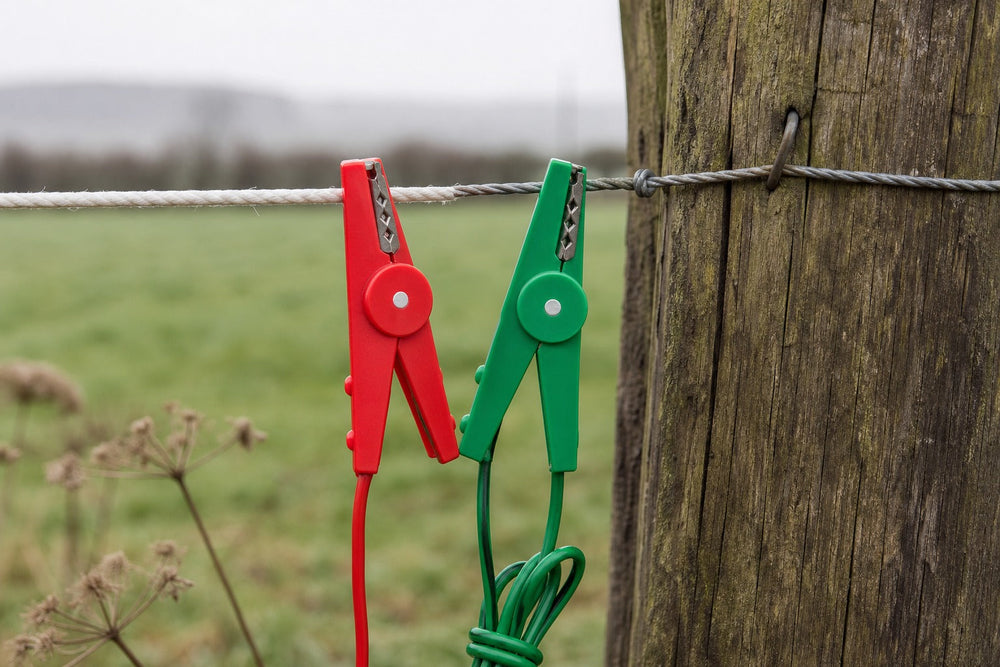
When you need a temporary connection — joining tape to wire for a gate span, or jumping across a gate — use jumper leads with crocodile clips. LIFEALL jumper leads are built for exactly this: clip to the live line, run across the opening, and clip to the conductor on the other side. No cutting, no knots, and the connection is easy to check and clean.
Why Your Splices Are the First Thing to Check When Voltage Drops
When a fence reads low or an animal pushes through, the instinct is to blame the energizer. Do this first instead:
Walk the line and inspect every joint — corrosion, loose knots and rusted connectors are the #1 cause of "fence got weak" complaints.
Test at both ends and at each major splice with a voltage tester. Voltage that is fine at the energizer but dead at the far end means the problem is in the line — and the joints are where to look first.
Re-do any splice that is corroded, and treat new joints with a dab of corrosion inhibitor or keep them in a dry position where possible.
A Fence Is Only as Good as Its Worst Joint
Good splices are invisible — you make them once and forget them for years. Bad splices are the hidden tax on every underperforming fence: voltage you paid for, leaked into the ground a joint at a time.
Learn the knot, keep the connectors clean, and carry a set of jumper leads for gates and repairs. Then match that careful work with an energizer that shows real fence voltage on an LCD screen — the LIFEALL range turns "is the fence working?" into a glance at the display, every time.
Read article
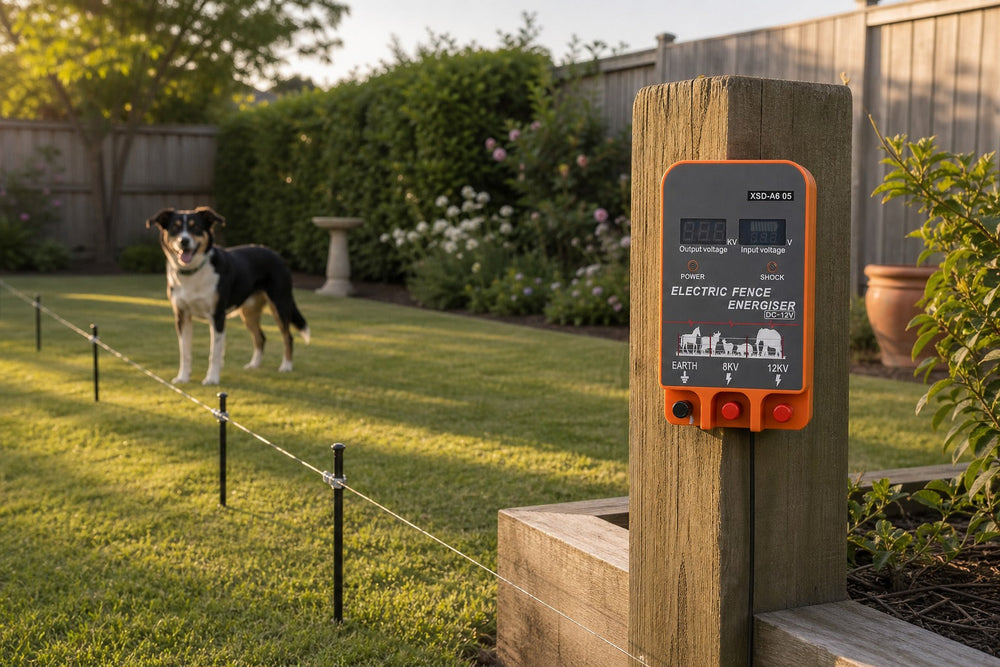
An electric fence for dogs is not a punishment — done right, it's a boundary your dog learns to respect within a week, and it keeps your pet safe without a wall blocking your view or your yard. The system is simple: a buried or above-ground wire carries pulses from an energizer, and your dog learns where the line is through short training sessions with boundary flags.
Before anything else, three honest notes:
Electric fences for dogs work best as a training aid for healthy, well-behaved dogs. They are not a solution for an aggressive, anxious or escape-obsessed dog — that needs a trainer.
The pulse is unpleasant, not harmful. Fence energizers deliver a high-voltage, very short, low-energy pulse. Every reputable system is designed to startle, never to injure.
Check local rules — some municipalities regulate electric fences, including pet containment versions.
Choosing the right energizer for a dog fence
Dog fences are short lines — typically 100–500 m (300–1,600 ft) — so you do not need a ranch-scale energizer. What you need is a unit that:
Delivers a consistent pulse along the whole line. Dogs test boundaries from any point, so voltage should stay strong at the far end.
Runs on 12V battery or solar, since most yard lines don't have a convenient mains outlet at the boundary.
Can be turned down or sized right. Match the energizer to your line length; a unit rated for 10–20 km on a 200 m yard line is far more power than you need.
A compact 12V unit with an LCD voltage readout makes setup and troubleshooting much easier — you can see the fence is holding power instead of guessing.
What you'll need
Energizer (12V battery or solar unit)
Polywire or steel wire and posts — or direct-bury-rated wire if you want the line underground
Boundary flags (the white flags you see on professional dog fence installs)
A ground rod — the part people skip, and the part that makes or breaks the fence
Insulators and connectors as needed
Step 1: Lay out the boundary
Walk the line you want your dog to respect. Keep it at least 1–2 m (3–6 ft) away from the fence your dog already knows (like the front boundary) — you want your dog to learn the electric line as its own boundary. Flag every 3–5 m (10–15 ft) along the line. The flags are the visual cue your dog learns to associate with the boundary.
Step 2: Install and ground it properly
Run the wire around the boundary on low posts or just below the top of an existing fence. Connect one wire terminal on the energizer to the fence line, and the other to a proper ground: one to three galvanized ground rods, each driven at least 1.5 m (5 ft) into damp soil, as close to the energizer as possible.
The most common failure is a bad ground. If the fence feels weak, check the ground first — a dry, shallow ground rod can cut fence power by half or more.
Step 3: Test the line before the dog ever sees it
Use a fence voltage tester along the line — at the energizer, at the midpoint, and at the far end. A healthy reading at the far end means the whole boundary is working. Fix any weak spot (vegetation touching the wire, a loose splice, a dry ground) before training starts.
Step 4: Train in stages — never just "turn the dog out"
This is the step that decides whether the system works. Dogs that are simply left to discover the fence on their own often bolt through it once and never trust it again.
Days 1–3 — leash walks. Walk your dog on a leash along the flagged boundary several times a day. Let it sniff the flags and the wire. Reward calm behavior. The goal is awareness, not fear.
Days 4–6 — introduce the boundary. With the fence on, walk the dog toward the line on a leash. When it reaches the warning zone, give a calm, firm "no" or "back" as it feels the pulse — then immediately reward it for moving back inside. One or two experiences is usually all it takes.
Days 7–10 — off-leash, supervised. Let the dog move freely inside the boundary while you watch. If it approaches the line, the flags and memory should do the work; repeat the "back" cue if needed.
After two weeks — normal use. Keep the flags in place for the first month or two, then remove every other flag, and finally the rest once the dog reliably stops at the line.
Common mistakes that make dog fences fail
Skipping the ground rod — a weak fence teaches the dog it can cross safely.
Undersized or oversized energizer — too weak and it won't hold; wildly oversized for a short line is unnecessary and can be harder for a sensitive dog to accept.
No flags — dogs learn boundaries visually first. Without flags, the first "lesson" often happens when the dog is already mid-run.
Letting the dog discover the fence alone — a startled, unguided first encounter can create a dog that runs through the fence and off the property.
Vegetation on the line — grass and weeds touching the wire drain power; trim the line monthly.
The result: a yard that keeps the dog in
An electric dog fence is a two-week project: one afternoon to lay the line, a few days of training walks, and a dog that treats the boundary as a fact of life. The payoff is real — your dog gets the whole yard instead of a kennel, and you get the peace of mind that comes from knowing exactly where your dog will stop.
LIFEALL A605 — 12V Energizer with LCD
Compact 12V unit with LCD voltage display — easy to see the fence is holding power.
Shop the A605
Read article
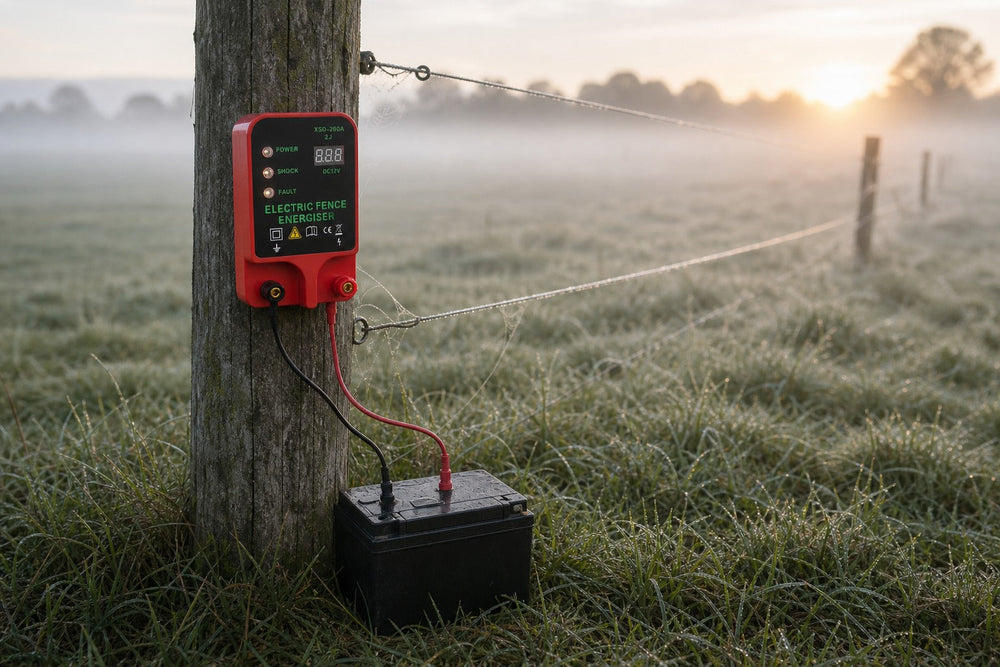
If you run a battery-powered electric fence — anything from a small paddock unit to a multi-mile ranch setup — the battery under the energizer is doing more work than you might think. It delivers every pulse, survives every night of frost, and quietly decides how much fence your energizer can actually hold. For years the default was a lead-acid battery. Now lithium (specifically LiFePO4, lithium iron phosphate) is moving onto farms, and the question is worth asking: should you switch?
Why the battery matters more than most people assume
An energizer doesn't run on a steady trickle. It stores energy and dumps it in short, high-voltage pulses, sometimes several times per second. That means the battery needs to deliver current in sharp bursts, not just hold a charge. A tired or undersized battery is one of the most common reasons a fence goes "soft" — the energizer looks fine, but the shock weakens because the battery sags under load.
So when you compare battery chemistries, you're really comparing three things: how many times the battery can be discharged and recharged, how deeply you can drain it without damage, and how it behaves when the weather turns.
Lead-acid: the affordable workhorse
Lead-acid batteries (flooded, AGM, or gel) have powered electric fences for decades, and they still make sense in plenty of setups.
What lead-acid does well
Low upfront cost. A quality 12V lead-acid battery costs a fraction of a lithium equivalent.
Forgiving in cold weather. A lead-acid battery can be charged at below-freezing temperatures, which matters for winter paddocks if your solar panel is small.
Widely available. Any farm store stocks them, and almost every energizer and charge controller is built around lead-acid voltage profiles.
Where lead-acid hurts
Cycle life. Expect roughly 300–500 full discharge cycles. If you deep-cycle a lead-acid battery regularly, you'll be replacing it every couple of seasons.
Depth of discharge. You should only drain about 50% of a lead-acid battery's rated capacity. Draining it deeper dramatically shortens its life. In practice, a "100 Ah" lead-acid battery really gives you about 50 Ah of usable energy.
Weight and maintenance. A 100 Ah flooded battery weighs around 25–30 kg (55–65 lb). Flooded types also need periodic water checks and can sulfate if left partially charged.
Voltage sag. Under a heavy pulse load, lead-acid voltage dips more than lithium, which can cost you fence power exactly when vegetation loads the fence hardest.
Lithium (LiFePO4): the quiet upgrade
Lithium iron phosphate is the chemistry that actually suits electric fences. It is not the same as the lithium-ion in your phone — LiFePO4 is built for deep cycling and long service life.
What LiFePO4 does well
Long cycle life. Typical LiFePO4 cells are rated for 2,000–5,000 cycles. For a seasonal fence battery, that can mean a decade or more of service — several lead-acid batteries' worth.
Deep discharge without damage. You can safely use 80–100% of rated capacity. That same "100 Ah" lithium battery gives you nearly twice the usable energy of a lead-acid one.
Light and compact. Lithium weighs roughly a quarter to a third of lead-acid for the same energy. Easy to carry to a remote paddock, easy to swap.
Stable voltage under load. Lithium holds voltage much flatter while discharging, so your energizer keeps delivering full-strength pulses until the battery is nearly empty.
No maintenance. No water levels, no sulfation, no terminal corrosion routine.
What to watch out for
Higher upfront price. Expect to pay two to three times more per amp-hour. The math only works if you keep the battery long enough — and for most fence setups, you will.
Charging in deep cold. LiFePO4 cells should generally not be charged below about 0°C (32°F). Quality lithium batteries include a battery management system (BMS) that protects them, and the right solar charge controller will handle temperature compensation. If your fence runs all winter on solar in a hard-freeze climate, check the battery's low-temperature charging spec before buying.
Charger compatibility. Your solar controller or AC charger must support a lithium profile (or at least be lithium-safe). Many modern controllers do; older lead-acid-only units may not.
The decision, in plain terms
| | Lead-acid | LiFePO4 lithium | |---|---|---| | Upfront cost | Low | 2–3× higher | | Usable capacity | ~50% of rating | 80–100% of rating | | Cycle life | 300–500 | 2,000–5,000 | | Weight (100 Ah class) | 25–30 kg | 8–12 kg | | Deep-cold charging | OK | Needs BMS protection | | Maintenance | Water/cleaning (flooded) | None | | Best for | Budget setups, hard-winter solar | Remote paddocks, year-round use, portable fences |
Choose lithium if you run a permanent or semi-permanent fence that stays out year-round, you rely on solar in a remote location where carrying batteries is a chore, or you're tired of replacing lead-acid batteries every couple of seasons. The higher upfront cost pays back through usable capacity and lifespan.
Stick with lead-acid if your fence is seasonal, your budget is tight this year, or your setup lives in an extreme-cold climate with an older charger that can't manage lithium.
Making the switch without replacing your energizer
The good news: most 12V fence energizers don't care what chemistry supplies the 12V — they just need clean, stable power. If your energizer takes battery clips or connects to a 12V battery, a drop-in LiFePO4 battery of the right capacity is usually a straight swap. Just confirm three things first:
Your charger or solar controller supports lithium charging (check for a lithium/LiFePO4 setting).
The lithium battery has a built-in BMS rated for your energizer's pulse current.
You size capacity to cover your fence length and the worst-case stretch of cloudy days.
Then wire it up exactly as you would a lead-acid battery — and enjoy not hauling 30 kg of battery to the back forty next spring.
LIFEALL A620 Energizer — 5.5J, LCD Display, 12V
Runs on AC, a 12V battery, or solar + battery — ready for a lithium battery upgrade.
Shop the A620
Read article
 animal health
Animals Feel the Heat Too
You're not the only one the summer heat drains — livestock get heat exhaustion just like we do, and pigs, horses, cows and goats are the most common victims. Each species shows it differently, but the treatments follow the same principle: cool the animal down, fast, without shocking its system. The sooner you catch the signs, the better the outcome.
Warning Signs by Animal
Pigs
Open-mouth breathing (panting), vocalizing, blotchy skin, stiffness, muscle tremors and a reluctance to move. They'll also eat less — digestion generates internal heat, so they slow their intake to cool down.
Horses
Restlessness, rapid pulse and breathing, increased sweating, excessive salivation, redness of the tongue and mouth, high body temperature and muscle spasms. In severe cases a horse may try to roll or throw itself to the ground.
Cows
It starts with open-mouth breathing and slobbering, then trembling and loss of coordination. If a cow goes down, it will most likely not get up — heat exhaustion in cattle is best treated by never letting it happen.
Goats
Continual panting, rapid breathing, weakness and an inability to stand; some goats can't walk or get up at all.
Know your animals' normal behavior so abnormal behavior stands out. The moment you spot any of these signs, start treatment.
How to Treat Heat Exhaustion
Pigs: gently sprinkle cool water over the body — don't dump a large amount or you may send the pig into shock. A wet towel on the neck and back also helps; in severe cases, offer an electrolyte rebalancing solution.
Horses: apply cold water to the skin (ice in extreme cases), fan the horse and move it to shade. Walking it in circles in the shade moves air across its skin, creating a breeze that brings the temperature down.
Cows: hose the animal continuously from head to toe with cold water, paying extra attention to the back of the head; move it to shade and give cool water.
Goats: move to shade and spray the coat with water — not too cold, which can cause shock — focusing on the head, legs and stomach. An air-conditioned space helps in severe cases.
Prevention Is Easier Than Treatment
Clean, cool water, always — refilled and changed daily. Hydration is how animals regulate body temperature on hot days.
Shade in every pasture — trees or a roof over a resting spot. Livestock rest after eating, and digestion raises body temperature; shade lets them cool down.
Avoid handling, transporting or processing animals on hot days — stress raises temperature under anxiety. If you must move livestock, do it in the early morning, and never crowd animals into tight spaces.
Ventilation in barns — fans, open doors or access to shaded outdoor areas keep air moving.
The Fencing Connection
Good pasture management prevents a lot of summer stress: rotational grazing with temporary electric fencing keeps animals on fresh, shaded paddocks and lets them rest and digest away from the heat of overgrazed ground. For the rest of summer livestock care — water, shade and daily observation — the routine is simple: check, cool, and never wait for a cow to go down.
Read article
 electric fence
Why You See Purple Marks on Fences and Trees
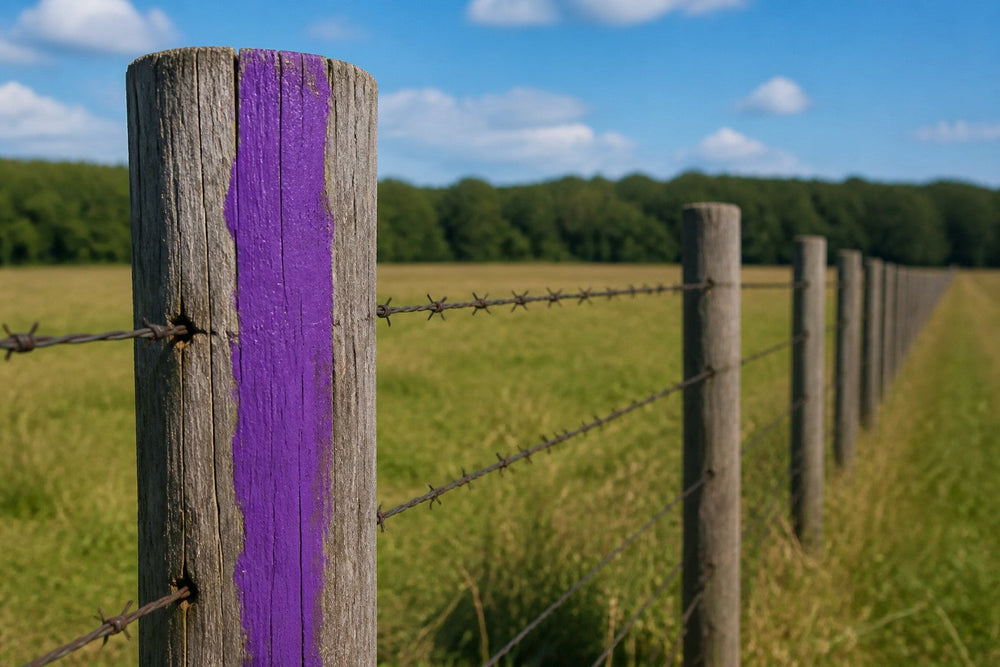
If you've hunted, hiked or driven through rural areas, you've probably seen purple paint on fence posts, trees and utility poles — and wondered what it means. In many states it means one thing: "no trespassing." The Purple Paint Law lets landowners legally signal to hikers, hunters and others to stay off private property, with the same legal force as a posted sign.
What the Purple Paint Law Does
Purple marks on trees, fences or other objects mean the land is private. Ignore the mark and you can legally be held responsible for trespassing. Landowners use paint instead of signs because:
It's permanent — signs get knocked down by weather, animals or vandals; paint stays up 24/7.
It's visible from a distance — recognizable from farther away than a printed sign.
It's cost-effective — for busy farmers who can't watch every border, marking trees costs pennies compared with buying and replacing signs.
The Marking Standard
It's not just any purple spray. State laws generally require:
Marks 8 inches long and 1 inch wide, painted at 3–5 feet above the ground.
Marks on multiple trees or objects, no more than 100 feet apart.
Paint that is plainly visible at eye level as you approach the property.
States with Purple Paint Laws
Purple paint is recognized in: Alabama, Arkansas, Arizona, Florida, Illinois, Indiana, Kansas, Maine, Missouri, North Carolina, Pennsylvania, South Carolina, Tennessee and Texas. Two states use orange instead: Idaho and Montana.
The Meaning Varies by State — Check Yours
The same purple mark means different things in different places. In Texas, purple paint closes the land to trespassing of any kind. In North Carolina, it indicates that hunting, fishing and trapping are prohibited specifically. Before relying on the law, research your own state's regulations — and remember that a posted notice or paint marking is only as strong as the law behind it.
Protecting Your Land and Your Livestock
Marking the boundary keeps people out; fencing keeps livestock in and predators out. On a farm, the two work together: purple paint (where legal) posts the land, while a properly built electric fence does the daily work of containing animals and deterring wildlife. For the fencing side, our installation and predator-proofing guides cover the setup, and the LIFEALL shop stocks everything from energizers to wire.
Read article
 electric fence
Profit Depends on What You Bring to the Table
The most profitable livestock to raise depends heavily on the facilities you already own, the improvements you're willing to make, your ability to raise feed — and current market prices. But some animals consistently outperform for small farms. Before you buy, do the math: initial cost of the animal, monthly feed, fencing or stabling you'll need to build, vaccinations — multiplied by the months until the animal is ready to sell.
Space Requirements at a Glance
Animal
Space needed
Horses
1–2 acres per horse
Beef cattle
1–2 acres per animal
Dairy cattle
1–2 acres per cow
Goats
½ acre per animal
Sheep
½ acre per animal
Pigs
12–14 sows per acre
Chickens
Minimal space
The 5 Most Profitable Animals for Small Farms
1. Cattle — the reliable income engine
Beef cattle are generally the most profitable and easiest livestock to raise for money: good pasture, hay in winter, fresh water, vaccinations and room to roam. A smart entry point is buying half-bred calves from dairy farms — Holsteins bred to Angus, Charolais or Hereford bulls produce fine beef animals that the dairy industry doesn't want, sold cheap at dairy farms or local auctions. Pasture them to 12–24 months for peak meat quality and price. Fencing: electric poly rope for rotational grazing to cut feed costs, high-tensile on the outer boundary.
2. Chickens — eggs are the real money-maker
Even before the meat, eggs drive the income — they're in daily demand everywhere. Constant egg production plus breeding capability makes chickens a fantastic small-farm generator, and the organic or "locally sourced" angle boosts margins further. Fencing: wire mesh with an electrified top line and an exterior-facing hot line to deter predators — see our poultry fencing guide.
3. Goats — meat, milk and rental income
About 65% of red meat consumed globally is goat meat, and demand in North America is climbing fast through ethnic markets. Beyond milk, cheese and meat, goats can be rented out for vegetation control — property owners pay you to let your goats clear brush. Fencing: goats climb, so tall, high-tensile fences are required — our goat fencing guide covers the details.
4. Honey bees — hands-off livestock
Bees are the most self-sufficient "livestock" on this list. Rent hives to neighboring farms for pollination, sell local honey and beeswax — products with strong demand, especially among allergy sufferers. Fencing: protect hives from bears, skunks, raccoons and opossums with a small multi-line enclosure on a battery energizer. Note that determined bears may need stronger deterrents than a fence can provide.
5. Rabbits — a growing niche
Rabbit meat is high-protein, low-calorie; pelts sell for crafts; manure is one of the best organic fertilizers; and pet breeds find homes easily. Multiple income streams from one small animal. Fencing: meat and pelt breeds attract predators, so a perimeter fence around the pens is essential.
The Bottom Line: Profit Is Relative
Raising a few head of cattle each year is a solid bonus income; eggs and honey turn over fast; goats and rabbits open niche markets. The best way to learn what's profitable in your area is to talk to local farmers — check what your neighbors raise, and pick their brains at the co-op or market. Knowledge is power and profit.
Whichever animals you choose, the fencing math is the same: match the fence to the animal, size the energizer with headroom, and keep the boundary secure. Our animal-specific fencing guides walk through each setup.
Read article
 A740
A740
Cold Weather Doesn't Have to Be Miserable
Intense cold can leave cattle struggling — trouble putting on weight, slipping milk production, and visible stress. But frigid temperatures don't have to be miserable for your herd. Keep them comfortable and they stay healthy, and healthy animals produce more. Six essentials cover most of the battle.
1. Always Have Water Available
Cattle need roughly 1–2 gallons of water per 100 pounds of body weight every day. Water sources freeze, and snow or mud can make existing ones unreachable. Cattle can't make up the difference by eating snow or licking ice — that takes hours and reroutes valuable body heat away from feeding and growth. Dehydrated cattle are at higher risk for colic and impaction.
The easiest fix is tank heaters in water sources (follow manufacturer instructions to avoid shocks or fires). No heater? Provide unfrozen water several times a day, in multiple locations.
2. Keep Cattle Well Fed
Without enough energy, cattle can't generate body heat — their core temperature drops and, in the worst case, death follows. Options, cheapest to most effective:
Limit waste: feed hay in a feeder rather than scattering it on the ground, where up to 50% can go uneaten. Make sure there's enough feeder space for every animal to eat at once.
Switch to a higher-nutrient feed with guaranteed fat and protein — effective but pricey.
Best long-term: keep a few fields of cold-hardy grass and use rotational grazing with your electric fence to section off paddocks. A tall, nutritious grass that peaks out from under snow keeps cattle grazing happily through winter.
3. Provide Proper Shelter
When a winter storm hits, cattle need somewhere safe or they panic and stress — and chilled livestock need more energy, raising feed costs. Three-sided sheds scattered through pastures let cattle escape harsh weather; hills, gullies, tree thickets and shelterbelts also work as windbreaks. When a storm is forecast, use temporary electric fencing to keep cattle close to the barn or nearest shelter — one of the big advantages of an electric fence is that you control where the herd is at all times.
4. Avoid Mud
Winter mud hits cattle twice: it's a breeding ground for foot rot and thrush, and mud-caked legs make it hard for cattle to stay warm. Add gravel or woodchips to muddy areas, rotate paddocks to prevent overgrazed pasture turning to mud, and use your electric fence to give muddy fields time to recover.
5. Assist Pregnant Cattle
Monitor pregnant cows closely through winter. Check with your vet about vaccinations, nutritional supplements and deworming. Shield them from extreme temperatures, keep food and water accessible no matter the snow depth, and consider segregating pregnant cows into paddocks for close monitoring — it makes delivery-time care far easier, and a healthy, well-fed mother pays big dividends.
6. Keep Cattle Comfortable
Udder cream soothes cracked, sore skin on milking cows.
Sand beds ease stress on knees and hocks; some operations use sloped water beds.
Bedding helps especially when cows are wet and it's cold.
Give cows space — extra bed and feed space, and keep herd size appropriate to your capacity.
Bonus: Is Your Hay Prepped to Survive Winter?
Hay prices keep climbing, so stored hay deserves proper care. Bale at the right moisture: hay cut at ~80% moisture must drop to under 15% before baling (ideally 12–15%) to avoid bacteria-driven heat and spontaneous combustion. Too dry and leaves shatter.
Store inside when possible; outside storage risks dry-matter loss.
Elevate on pallets to let air circulate underneath — concrete or dirt lets moisture seep up.
Stack cut side up, string on the sides to protect twine from rodents; use a pyramid stack outside so water runs off.
Cover outdoor stacks with tarps; keep vents or windows open for air circulation indoors.
Keep hay away from heat sources — it's highly flammable.
Rotate stock: older bales in front, used first.
Bonus: Six Ways to Winterize the Barn
Deep-clean everything in fall — power-wash stalls, mats, feeders and waterers, and lime the ground to kill bacteria and viruses that would overwinter.
Complete repairs while it's warm — that gate hinge is far harder to fix in a blizzard. Clear pallets, look for loose nails, clean heaters.
Prepare water for freezing temps — check tanks and electric waterers; test daily by hand for stray current (a shocked horse won't drink), remove old hay trapped in tanks, and knock ice out of the corral where a horse could trip.
Prevent rodent infestations — mice move into warm barns for winter; ramp up traps before the cold arrives.
Evaluate drainage — every corral and pasture needs a runoff plan; install drainage while the ground is still soft, and re-level low spots around feeders and waterers.
Check your animals every day — two minutes of observation catches problems before they become emergencies.
The Bottom Line
Winter livestock health is mostly logistics: water that doesn't freeze, feed that isn't wasted, shelter, mud control and daily checks. Electric fencing quietly supports all of it — from rotational grazing paddocks to keeping the herd near shelter in a storm. For the fencing side of winter, our winterizing your electric fence guide has you covered.
Read article
 ammonia
Persistent Foul Odor Is a Symptom, Not a Fact of Life
A healthy, well-managed chicken coop shouldn't reek. Persistent odor is almost always a symptom of excess moisture, poor ventilation, inadequate litter or infrequent cleaning. Odor doesn't come from the chickens themselves — it comes from a reaction between waste, moisture, bacteria and oxygen (or the lack of it). Fix the causes and you solve 80% of the smell.
The Chemistry of Coop Odor
The primary odor compound is ammonia (NH₃), produced when uric acid in chicken waste is broken down by soil bacteria — especially in warm, wet conditions. Even 10 ppm can irritate a chicken's respiratory tract, and above 25 ppm it causes measurable tissue damage over time. Secondary odors come from hydrogen sulfide and volatile organic compounds produced by anaerobic decomposition — which happens when litter becomes compacted and oxygen can't penetrate.
The Top 6 Odor Culprits
Wet or compacted litter — the single biggest driver of ammonia buildup.
Poor ventilation — traps moisture and gases inside.
Overcrowding — too many birds, too much waste per square foot.
Damp feed spills — mold and bacterial hot spots.
Leaking waterers — saturate bedding near the ground.
Infrequent cleaning — waste layers build up over weeks.
Ventilation: Your First Line of Defense
No matter how often you clean, a coop that doesn't breathe will stink. Proper ventilation can cut coop ammonia levels by up to 60% compared with poorly ventilated structures. The rule of thumb: at least 1 square foot of ventilation per 10 square feet of floor, with vents positioned above roosting height to avoid drafts on sleeping birds.
Common mistakes: sealing the coop in winter, vents placed too low, only one vent opening (no cross-flow), blocked vent holes, and moisture-trapping flat roofs. For the full airflow setup, see our coop ventilation guide.
Choose Bedding for Odor, Not Just Comfort
Bedding
Odor absorption
Moisture control
Rating
Pine shavings
High
Excellent
Best choice
Hemp
Very high
Superior (4× straw)
Best choice
Straw
Moderate
Poor (molds quickly)
Use carefully
Sand
Low
Good (drains)
Run areas only
Cedar shavings
—
—
Toxic to birds — never use
Cedar's aromatic phenols are toxic to birds' respiratory systems and can cause liver damage even at low exposure — keep it out of every coop.
The Deep Litter Method: Nature's Own Solution
The deep litter method works with biology instead of against it: instead of removing soiled bedding constantly, you layer fresh bedding on top and let beneficial microorganisms break down waste aerobically.
Start with 4–6 inches of clean pine shavings or hemp.
Add beneficial microbes (optional): EM-1 or a handful of garden soil accelerates composting and suppresses ammonia producers.
Stir regularly — weekly, reintroduce oxygen so aerobic bacteria (which suppress odor) outcompete anaerobic ones.
Top up, don't replace — add 2–3 inches of fresh bedding over wet spots; remove only if truly saturated.
Full cleanout once or twice a year (spring and autumn) — the old litter becomes premium finished compost.
Bonus: a well-managed deep litter system generates gentle composting warmth — enough to raise coop temperature 3–5°F in winter.
A Cleaning Schedule That Actually Works
Frequency
Task
Time
Daily
Scrape droppings under roost boards; check waterer for leaks
5–10 min
Weekly
Stir litter; add fresh bedding to wet spots; clean feeders
15–20 min
Monthly
Deep-stir all litter; inspect and clean vents
30–45 min
Bi-annually
Full litter replacement; scrub surfaces; natural disinfectant
2–3 hours
The droppings board is your secret weapon: chickens produce 65–70% of daily droppings at night while roosting. A removable tray under the roost bars collects that concentrated waste, and a quick daily scrape keeps it from contaminating the main litter bed — the highest-ROI upgrade you can make.
Natural Deodorizers That Work
Food-grade diatomaceous earth (DE) — sprinkle lightly on litter to dry moisture and deter mites and odor bacteria (wear a mask when applying).
Baking soda — a light dusting in problem corners neutralizes ammonia smells.
Vinegar wash — clean surfaces with diluted white vinegar instead of harsh chemicals.
Good ventilation and dry bedding do more than any deodorizer — treat odor at the source, not the symptom.
The Bottom Line
Odor control is moisture control plus airflow plus the right bedding. Get those three right and your coop stays fresh, your neighbors stay happy, and your flock breathes easier all year. For the rest of the flock system — from predator-proof electric poultry fencing to seasonal coop care — our other guides have you covered.
Read article
 backyard farming
Your Nose Knows Before You Do
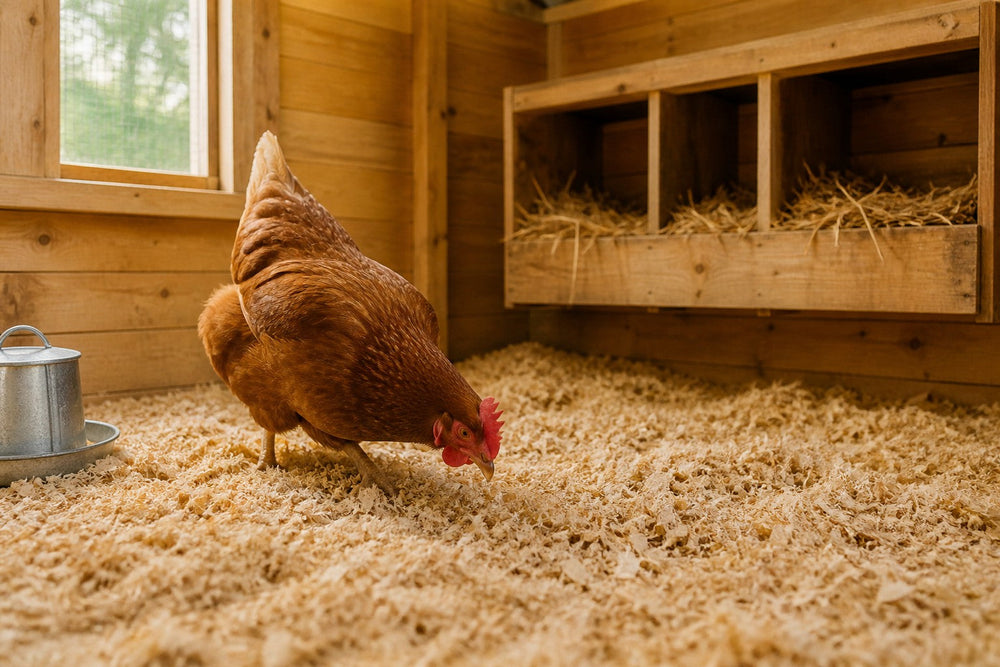
Walk into any chicken coop and your nose tells you immediately whether the bedding is working: ammonia stings your eyes and moisture mats the floor — or everything smells earthy, hens scratch contentedly and eggs come out clean. The difference almost always comes down to the material beneath their feet.
Bedding (also called litter) affects respiratory health, foot integrity, egg cleanliness, parasite pressure, winter warmth, labor hours and annual costs. It's one of the most consequential decisions a poultry keeper makes.
Why Bedding Is About More Than Comfort
Ammonia control: fecal decomposition releases ammonia; above ~25 ppm, chickens suffer corneal damage and chronic respiratory inflammation. Adequate depth and absorbency keep it safe between cleanouts.
Moisture management: wet litter drives bumblefoot, coccidiosis and respiratory illness; litter moisture above 35% dramatically increases pathogen load on the coop floor.
Thermal insulation: a deep, dry litter layer — especially with the deep litter method — generates microbial heat that can raise floor temperature 8–12°F (4–7°C) in winter.
Behavioral enrichment: loose, scratchable bedding enables dust-bathing, essential for feather maintenance and ectoparasite control.
Egg cleanliness: clean, dry nesting material means cleaner eggs with less washing (which strips the protective bloom).
The 6 Best Bedding Materials
1. Pine shavings — the gold standard
Medium pine shavings absorb moisture well, smell pleasant, are affordable in bulk and compostable. Depth 4–6 in, refresh every 2–4 weeks. Pros: high absorbency, good odor control, low cost, easy to find. Cons: medium dust, clumps when wet.
2. Straw — winter insulation, weak on moisture
Wheat or oat straw is cheap and abundant; hollow stalks insulate well, making it excellent for winter. But absorbency is below average and it molds fast when wet. Depth 4–8 in, refresh every 1–2 weeks in wet weather. Cons: harbors mites, poor odor control.
3. Coarse sand — litter-box style
Construction-grade coarse sand dries droppings quickly for daily scooping, with very little odor and near-zero mite risk — ideal for hot, humid climates. But it offers no winter insulation and needs daily surface cleaning. Depth 3–4 in, replace annually.
4. Hemp bedding — premium performance
Hemp hurd absorbs up to 4× its weight in water, controls ammonia far better than shavings, and is nearly dust-free — the pick for birds with respiratory sensitivities. Depth 3–5 in, refresh every 4–6 weeks. Cons: higher upfront cost, less available.
5. Shredded paper — free but short-lived
Shredded paper and cardboard are near-zero-cost and compostable, but compact quickly, get slippery when wet and mold fast. Best used in nesting boxes rather than full-coop bedding. Replace every 1–2 weeks.
6. Rice hulls — sustainable regional option
A rice-milling byproduct with reasonable absorbency, very low dust and silica content that naturally deters some parasites. Depth 4–5 in, refresh every 2–3 weeks. Worth sourcing where available.
Head-to-Head at a Glance
Material
Absorbency
Odor control
Dust
Cost
Best for
Pine shavings
High
Good
Medium
Low
Everyday backyard flocks
Straw
Below average
Poor
Low
Very low
Winter insulation
Coarse sand
Dries, doesn't absorb
Excellent when scooped
Low
One-time
Hot, humid climates
Hemp
Highest (4× weight)
Excellent
Nearly none
Higher
Respiratory-sensitive birds
Shredded paper
Good (compacts)
Fair
Low
Free
Nesting boxes
Rice hulls
Reasonable
Good
Very low
Low
Regions where available
Seasonal Strategy
Winter: go deep (4–6 in+) and use the deep litter method — straw on top of shavings is a classic cold-climate combo that adds insulation and microbial warmth.
Summer: switch to sand or lighter shavings, scoop more often, and keep moisture out — heat plus wet litter is the fastest route to ammonia and flies.
Transition seasons: replace the full bedding at least twice a year (spring and autumn) and always after a wet spell.
Quick Rules
Never use cedar — its oils are toxic to chickens.
Keep nesting boxes lined with clean, dry shavings or paper; change whenever soiled.
If ammonia stings your eyes when you open the door, add depth or switch materials — ventilation helps, but bedding is the first line of defense.
Pair good bedding with good air flow — see our coop ventilation guide — and keep the flock safe outside the coop with electric poultry fencing.
Read article
 backyard farming
If the Air Smells Stale, Your Flock Is Already Stressed
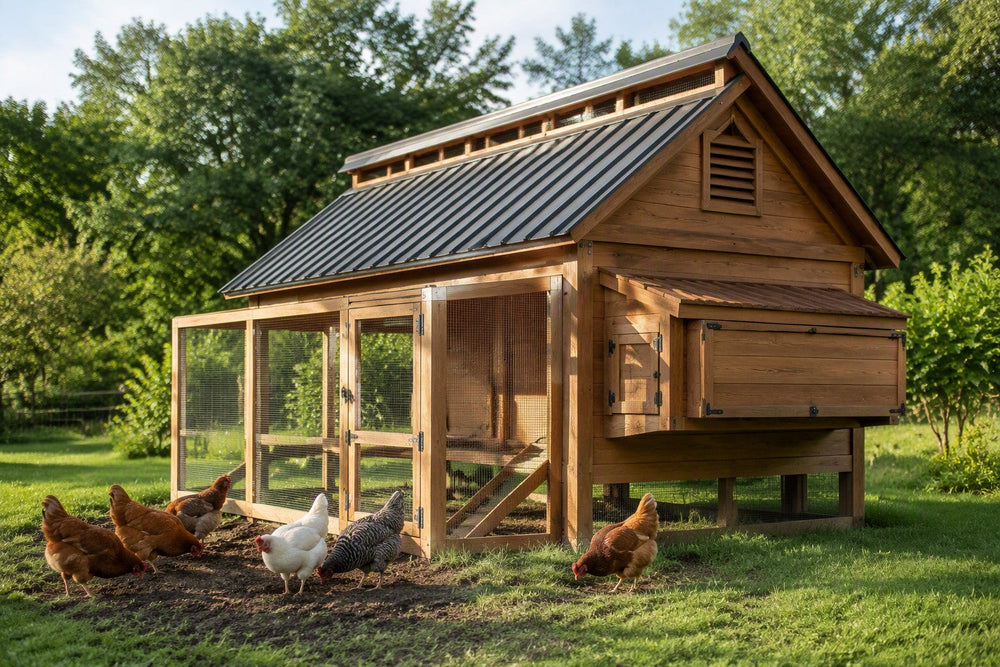
Ventilation is the single most under-rated management factor in backyard poultry keeping. Poor airflow drives a cascade of problems: respiratory disease, feather pecking, reduced egg production and — in extreme summer heat — heat stroke. The good news: once you understand how coop airflow works, the fixes are straightforward and low-cost.
The Three Invisible Dangers
1. Ammonia (NH₃)
Ammonia forms as bacteria break down uric acid in droppings. At just 10 ppm — below the level most humans can smell — it starts damaging the delicate mucous membranes of a chicken's trachea, making birds far more vulnerable to Mycoplasma and Newcastle disease. At 50 ppm+, acute toxicity is possible.
2. Moisture and humidity
One laying hen exhales roughly 0.4–0.5 litres of water vapour per hour. Above 70% relative humidity, condensation forms on walls and bedding, and wet litter breeds Aspergillus fungus (aspergillosis) and E. coli — and accelerates frostbite on combs and wattles in winter.
3. CO₂ and heat
Inadequate airflow traps radiant heat on hot days. Heat stress above 85°F suppresses laying and causes panting; above 104°F it can be fatal.
How Coop Airflow Actually Works
The stack effect (thermal buoyancy): warm, stale, ammonia-laden air is lighter and rises to escape through high openings, while cool fresh air enters through low ones. This convection loop runs 24/7 — even with no wind — as long as you have both high and low vents.
Cross-ventilation (wind-driven): air enters the windward side and exits the leeward side. Put openings on at least two opposing walls, aligned with prevailing breezes, for much higher air-change rates in warm weather.
Ventilation Math: How Much Airflow Do You Need?
Rule 1 — the 1:10 area ratio
Total vent opening area should equal at least 1 square foot per 10 square feet of floor area. A 6×8 ft coop (48 sq ft) needs a minimum of 4.8 sq ft of vent area — more in hot climates.
Rule 2 — the CFM method
Roughly 1 CFM per bird in winter, 5 CFM per bird in summer. A 12-bird flock needs 60 CFM in summer — a small box fan or multiple large passive vents.
Coop floor area
Min. vent area (1:10)
Birds (4 sq ft/bird)
Summer CFM
Winter CFM
24 sq ft (4×6)
2.4 sq ft
~6
30
6
48 sq ft (6×8)
4.8 sq ft
~12
60
12
80 sq ft (8×10)
8.0 sq ft
~20
100
20
120 sq ft (10×12)
12.0 sq ft
~30
150
30
Hot-climate coops should add a 25–50% buffer.
Where to Put Your Vents
Vent type
Position
Function
Draft risk
Ridge vent
Roof peak
Hot air exhaust (stack effect)
Very low
Gable vent (high)
Upper wall, both ends
Cross-ventilation + exhaust
Low–medium
Side wall vent (lower)
18–24 in above bedding
Fresh-air intake
Medium
Window (hardware cloth)
South or east wall
Daylight + summer intake
High in winter
The critical rule: high vents must be higher than the roost bar, so stale air rises above where the birds sit and exits before it concentrates at beak level. Intake vents below roost level let fresh air sweep upward without blowing directly on roosting birds at night. Best practice: combine a ridge or high gable vent with a lower side vent on the opposite wall.
Seasonal Strategies
Summer: open everything, add a box fan on the cross-ventilation axis, shade the roof, watch for panting and pale combs.
Winter: keep high vents open year-round (moisture kills faster than cold); close only ground-level intakes on freezing nights; insulate walls, never air pathways; check for condensation — it signals insufficient exhaust; never seal a coop completely.
Spring: deep-clean and replace bedding after winter; inspect vent hardware — damp old bedding is the top aspergillosis risk.
Autumn: prepare adjustable closures before the first frost, check roof vent seals, and transition to a deeper litter system.
Design Factors That Help
Roof pitch: steeper pitch = stronger stack effect; minimum 4:12, 6:12+ for hot climates.
Elevated floor: raise the coop 12–18 in to stop moisture wicking into litter and reduce rodent harborage.
Roost placement: 18–24 in below the ceiling, with exhaust vents above roost level.
Orientation: main windows south in cold climates, east in hot ones.
The Bottom Line
Ventilation is about moving stale air out and fresh air in — every hour of every day, all year. Follow the 1:10 area rule, keep high vents above roost level, and adjust seasonally. Your birds will repay you with better health and steadier egg production. For the rest of your flock setup — from predator-proof electric poultry fencing to coop management — the rest of our guides cover it.
Read article




