 Electric fencing
One wrong grazing day in wet weather can damage pasture for the whole season. Learn the paddock strategies — priority groups, tighter cells, sacrificial areas — that keep grass and soil healthy when the ground softens.
Read article
 Electric fencing
Pigs are smart, strong, and root for a living — yet they are among the easiest animals to hold with electric fencing. This guide covers how many strands and at what height, how much power you need, and the training trick that stops escapes.
Read article
 Cattle
"Electric fences don't hold animals — trained animals hold the fence." With a correctly set-up fence and a few days of patient introduction, most herds respect the line for years. This guide covers the three things that decide success: getting the fence right first, introducing the animals the right way, and knowing what to fix when stock still challenges the wire.
Read article
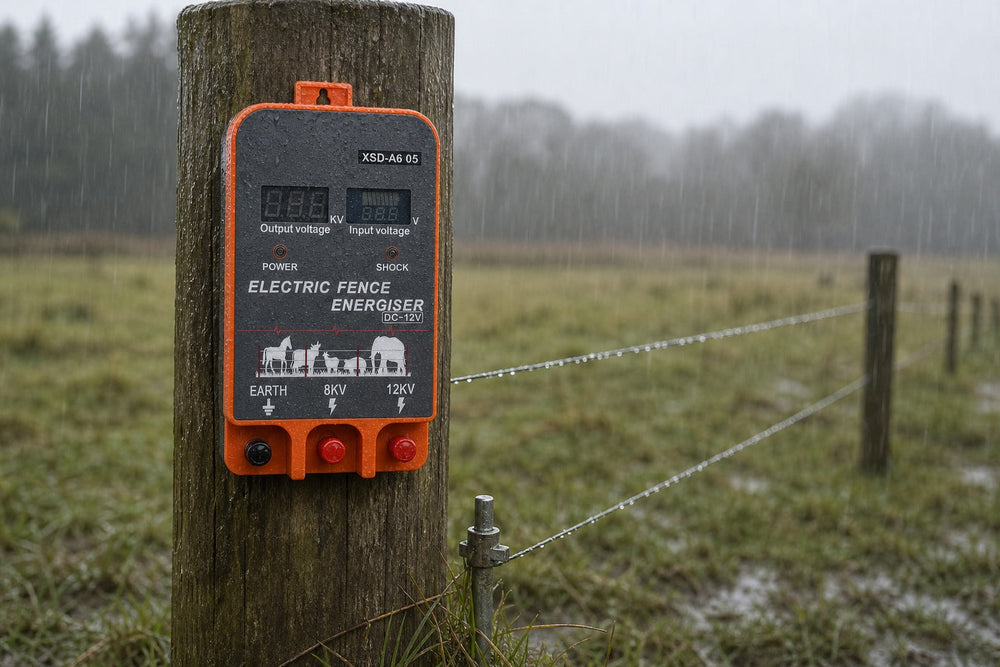
Look at the spec sheet of any outdoor electronic device and you will see a two-letter code with two numbers — IP44, IP65, IP66 — that most buyers skim past. On an electric fence charger, that code is the difference between a unit that survives ten seasons in the weather and one that dies in the first thunderstorm.
Here is how to read IP ratings, what level your fence actually needs, and where the rating stops protecting you.
What the IP Code Actually Means
IP stands for Ingress Protection (some manufacturers call it International Protection). It is an international standard (IEC 60529) that grades how well a housing keeps out solid objects and water. The two digits are independent:
First digit — solids (0 to 6):
0–1: no protection / large objects
4: protection against objects over 1 mm (most wires and tools)
5: dust-protected — some dust can enter, but not enough to harm operation
6: dust-tight — no dust ingress at all
Second digit — water (0 to 9):
0–3: none / dripping / spraying up to 60°
4: splashing water from any direction
5: water jets from any direction
6: powerful water jets (roughly fire-hose force)
7: temporary immersion in water
8: continuous immersion
So IP65 = dust-protected + protected against water jets. IP66 = dust-tight + powerful jets. IP44 = protected against small objects and splashes — fine for a light drizzle, not for a pressure washer.
What a Fence Charger Actually Faces
Your energizer lives outdoors for years. The real-world threats are:
Rain and snow — falling water, splash-back from the ground, and water running down the mounting surface.
Dust, pollen and grass chaff — in dry seasons and harvest dust, fine particles work into housings.
Condensation — the invisible killer. Warm days and cold nights pull moisture inside a sealed housing even when it never rains.
Pressure washing — many owners clean the fence area and spray the energizer without thinking.
For a permanently outdoor unit, IP65 is the sensible minimum; IP66 adds a margin for exposed positions and hard weather. A unit rated below IP54 should live inside a weatherproof box, not on an exposed post.
Where the Rating Does Not Protect You
Here is the part the label does not tell you:
The rating applies to a properly mounted, undamaged unit. A cracked housing, a missing grommet, or a cable entering from above (letting water run down into the case) defeats the rating instantly. Route cables so they loop downward before entering the unit.
Terminals and connections are usually outside the rated zone. Battery clips, fence wire connections and solar leads are not IP-tested with the housing. Coat exposed terminals with dielectric grease and keep connections above splash level.
Mounting matters. Fix the unit off the ground, under an eave or overhang where possible, with the controls facing down-and-away from driving rain.
Ventilation can conflict with sealing. A fully sealed unit that also needs to shed battery heat needs a quality housing — cheap "waterproof" clones often skip the pressure-equalizing vent, and condensation does the damage.
Matching the Charger to the Job
AC (plug-in) energizers usually live near a building or in a shed — a rating of IP44–IP54 is often adequate if the location is genuinely sheltered. Outside in the open, choose IP65+.
Solar energizers are the true outdoor animals — they sit in open pasture with zero shelter by design. Choose IP65 or IP66, and check that the solar panel connector and battery compartment are protected too. Every unit in the LIFEALL solar series is sealed for open-pasture life.
Battery 12V units mounted on a post in the elements need the same IP65+ logic — rain does not care whether the power comes from the wall or a battery.
One More Number That Matters: The Display
If your energizer has an LCD display (like the LIFEALL range — live voltage, battery and fault readouts), the display window is part of the waterproofing story. A properly sealed display keeps reading correctly through years of weather. That live readout is also your early warning system: voltage drops from rain-driven shorts show up on screen before animals find the weak spot.
Browse the AC power series for sheltered installations and the solar series for open pasture — and when in doubt, pick the higher IP. Weather is the one thing every fence has in common.
Read article
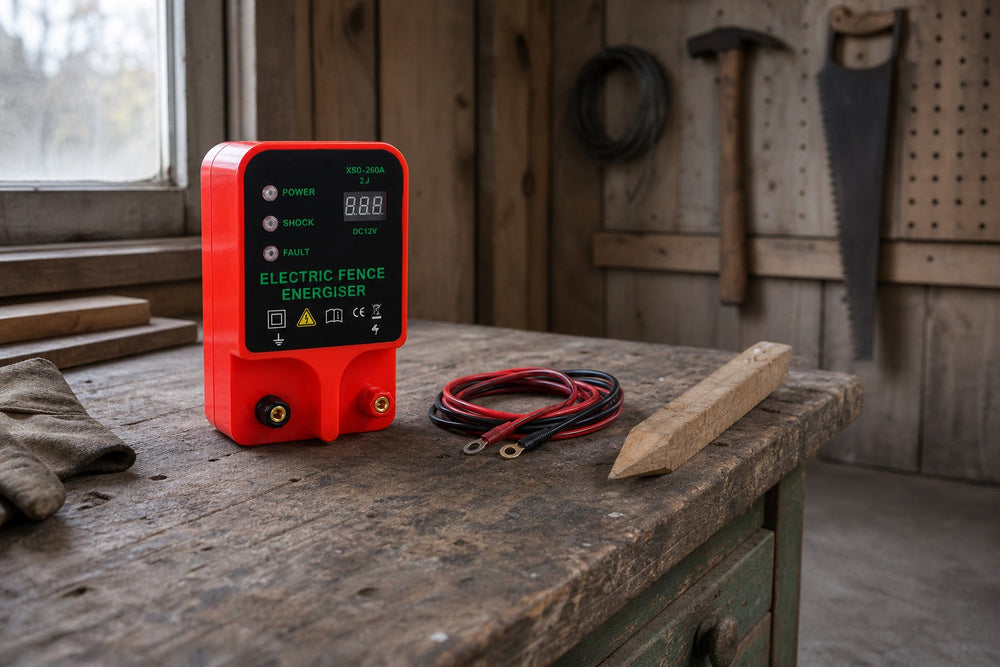
Ask a dozen farmers why their fence went dead last week, and half of them will answer with the same words: "the battery." Batteries are the most misunderstood — and most abused — part of a battery-powered electric fence. Choose the wrong chemistry and you will be hiking to the fence line every month. Treat the right one badly and it dies in a single winter.
Here is the practical difference between 9V and 12V fence battery systems, and how to get years of service out of either.
The Two Battery Worlds
9V dry-cell systems use disposable alkaline or carbon-zinc 9V batteries inside the energizer — the classic "no wiring, drop it in" setup for small, short fences.
12V systems use a rechargeable 12V battery (sealed lead-acid, AGM, or lithium) wired to the energizer with clips or leads — the standard for serious fencing, and the platform for solar charging.
Where 9V Makes Sense
Short fences — a few hundred feet to about 1 mile of light line (poultry netting, garden, small paddocks).
Occasional or seasonal use — trail cameras-style duty where the fence runs for weeks at a time and you check it rarely.
Portability — you carry the whole energizer in one hand and swap batteries in seconds.
The catch: 9V disposable batteries have limited stored energy (a good alkaline 9V holds roughly 500–600 mAh, and cold weather drains it faster). On a fence that is actually working — pulsing under load, fighting light weed contact — a 9V system can need fresh batteries every 2–6 weeks. At $3–6 per battery, that adds up, and a fence that dies mid-week is a fence animals learn to ignore.
Where 12V Wins
Fences longer than about a mile, or with significant vegetation contact.
Year-round permanent fences — one battery, months of runtime.
Solar setups — solar panels charge 12V batteries natively, which is why virtually every solar fence charger on the market is a 12V system.
Higher-joule energizers — a 5J+ unit draws more power than a 9V cell can realistically supply.
A quality 12V 7–9Ah battery running a small 12V energizer (like the LIFEALL A605, 2.5J with LCD) typically runs 4–8 weeks on a single charge on a working fence — and when it finally drops, the LCD low-voltage indicator tells you before the fence goes silent.
Cold Weather: The Battery Killer
Low temperatures hit all batteries, but not equally:
Alkaline 9V cells lose a large share of capacity below freezing. A fence that ran 3 weeks in summer can need batteries weekly in January.
Sealed lead-acid (SLA) 12V loses capacity in the cold too, but far less — and a solar panel keeps topping it up on sunny winter days.
Lithium 12V holds voltage best in the cold, at a higher upfront cost.
If your fence must work through winter, treat the battery as a cold-weather component: insulate the battery box, keep connections clean and greased, and — for 9V systems — switch to fresh cold-rated alkaline cells or move up to a 12V setup before the first hard freeze.
Battery Care That Doubles Lifespan
Never let a 12V battery sit dead. Deep discharge is what kills SLA batteries. Recharge immediately when the low-voltage alarm sounds — every day at empty costs real capacity.
Charge with the right charger. A trickle/maintenance charger matched to the battery chemistry beats a "fast" car charger every time.
Keep terminals clean. Corroded terminals are the #1 "bad battery" diagnosis that is actually a bad connection. Clean, tighten, and coat terminals with dielectric grease.
Disconnect for storage. Before long idle periods (winter layoff, off-season), fully charge the battery and store it cool and dry — ideally on a maintenance charger.
Test the system, not just the battery. A fence that "runs the battery down fast" is usually a fence with a problem — weed shorts and poor grounding force the energizer to work harder and drain more. Fix the fence and the battery suddenly lasts twice as long.
Battery-Powered or Solar: The Decision
If you are starting from scratch:
Small, mobile, budget-first → 9V energizer is fine; carry spares.
Permanent fence, more than a mile, or winter duty → 12V, and if the location gets any sun at all, put a solar panel on it. A solar 12V system removes the "dead battery hike" almost entirely — our solar series pairs the panel and battery in one sealed unit.
Already have 12V energizers → check the battery and solar care guide before winter.
The Honest Bottom Line
Match the battery to the job: 9V for short and seasonal, 12V for serious and year-round. Protect whatever you choose from cold, deep discharge and corrosion, and the weakest link in your fence becomes one of its most reliable parts.
Every LIFEALL 12V energizer shows live battery and fence voltage on its LCD screen — the low-battery warning arrives days before the fence dies, not after the livestock is out. Compare models in the LIFEALL range to find your size.
Read article
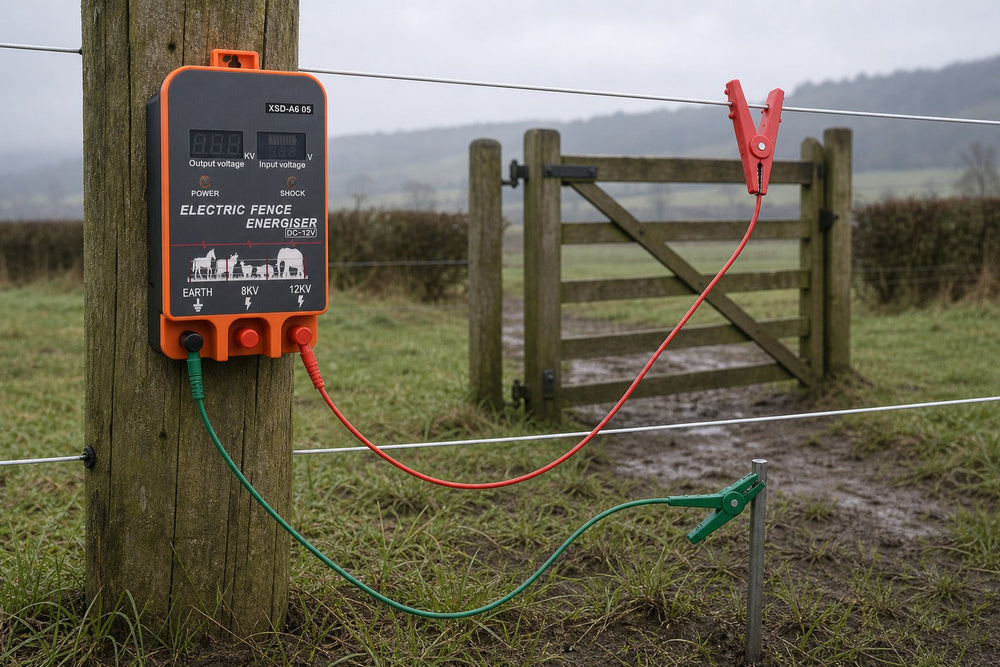
Every electric fence eventually needs an opening — for tractors, trailers, livestock, or your own daily shortcut. Done badly, a gate becomes the weakest link: wires dragged through mud, broken connections, and animals that learn exactly where the fence is "off."
The good news is that a reliable electric fence gate is simple to build. Here is how to do it right the first time.
Step 1: Decide Where the Gate Goes
Plan gates before you tension any wire:
Corners over mid-runs. A gate in the middle of a straight run means cutting every line; a gate near a corner cuts fewer wires and keeps tension simpler.
On firm, level ground. A gate in a low, muddy spot will be opened less and used as an escape route more.
Wide enough for your biggest vehicle. Livestock trailers are usually 8–10 ft wide — plan for at least 12 ft of opening so the gate clears the fence line on both sides.
Step 2: Choose Your Gate Style
Wood or metal panel gate — for permanent fence lines where you drive vehicles regularly. Mount on sturdy posts set in concrete, with the latch end well supported so it never sags into the electric line.
Electric "rope" gate with spring handle — the standard for electric fence openings. A spring-loaded gate handle keeps tension on the line across the opening, so the fence stays hot and tight. When you need through, unhook the handle, lay the line aside, and drive through.
Polywire drop gate — a lightweight option for temporary or rotational fences. One or two strands of polywire with insulated handles, unhooked and dropped for access. Not for daily vehicle traffic.
Step 3: Never Create a "Dead End"
The single biggest gate mistake is leaving a gap where the electric circuit stops. When an animal touches the fence line on either side of a dead gate, it gets no shock at all — and it learns that the fence is a suggestion.
Every conductor that crosses the gate opening must be reconnected across it:
Use a spring gate handle sized to the conductor (tape handles for tape, wire handles for wire).
Anchor the handle end to an insulated post or bracket on the opposite side.
Keep the handle under tension so the line stays at the same height as the rest of the fence.
Step 4: Carry Power Across Properly
Here is the detail most first-time builders miss: the two sides of the gate must be electrically joined — through the handle when closed, and that connection must be clean.
Practical tips:
Where the live line meets the gate handle, use crimp connections or galvanized connectors, never bare twisted wire that corrodes. Corrosion at gate connections is one of the top voltage-loss points on any fence.
For multiple strands, run a jumper lead from the power source side to each strand's handle — or use a gate handle bar that carries several lines.
If you run a wire underground to bypass the gate (common for buried lead-outs), use proper underground-rated insulated cable — and never bury standard fence wire where it can be cut by a cultivator.
Step 5: Test the Gate Like It's the Weakest Point — Because It Is
After installation:
Close the gate and hook all handles.
Walk to the far end of the fence and test voltage — it should read the same whether the gate is open or closed (when the gate is open, the fence beyond it naturally reads zero — that is expected).
Test again on the gate handle itself while the fence is live. If the handle reads low or zero with the fence hot, the connection is the problem — clean it and re-tension.
Re-test after rain and after heavy use. Gate connections need attention more than any straight-line joint.
Tools That Make the Job Easier
You do not need much: insulated gate handles, a good connector kit, jumper leads with croc clips for temporary spans and testing, and a voltage tester to verify your work.
A Gate That Works Is a Fence That Works
A fence is only as strong as its weakest opening. Take the extra hour to fit proper handles, clean connections and buried lead-outs, and your gate will carry power and hold livestock for years — no different from the fence on either side of it.
And when you choose the energizer for that fence, pick one with a live voltage display so gate and line problems show up on the screen before animals find them. Browse the LIFEALL energizer range — every model shows real-time fence voltage, turning gate maintenance from guesswork into a 10-second check.
Read article

Ask five farmers about electric fencing and you will get five confident opinions — and at least three of them will be wrong. Electric fencing is one of the most misunderstood tools on the farm, partly because the technology quietly improved while the old stories kept circulating.
Here are the myths we hear most often, and the facts that matter when you are deciding how to fence your land.
Myth 1: "An electric fence can kill people or animals"
False — when built and maintained correctly. A proper electric fence energizer delivers a short, high-voltage pulse (typically 2,000–10,000V for a fraction of a second, repeating roughly once per second). The pulse is current-limited and energy-limited — that is what the joule rating measures. A typical livestock energizer delivers well under 1 joule per pulse at the fence, far below the energy needed to interfere with a human or large animal heartbeat. It is designed to startle, not to injure.
What is dangerous: continuous-current (non-pulse) devices, homemade mains transformers, and running fence wire directly off household power. Never connect fence wire to anything other than a certified pulse energizer.
Myth 2: "More volts always means a better fence"
Not true. Voltage is only part of the picture. What actually determines whether an animal gets a reliable correction is stored energy (joules) and how well the system delivers it. A 10,000V fence with a weak ground or a shorted line can still let an animal push through — while a well-grounded 4,000V fence holds firm all season.
This is why energizer specs list joules first and volts second. Joules tell you how much "punch" the pulse carries; volts tell you how hard it pushes through vegetation and dry conditions. For most livestock, the practical target is 2,000–4,000V measured at the far end of the fence — and a fence that holds voltage is worth more than one that spikes on paper.
Myth 3: "Solar energizers are unreliable"
Outdated. Early solar units had small panels and weak batteries, and that reputation stuck. Modern solar fence chargers pair an efficient panel with a deep-cycle battery and low-draw circuitry — in most of the US they run year-round, and even in cloudy winter weeks the battery carries the load. (See our honest take on solar in winter.)
The real question is sizing: a small 0.5J solar unit is for garden and poultry lines, not for a 20-acre cattle pasture. Match the solar output to the fence length and the job gets done.
Myth 4: "You don't need to ground a small fence"
This is the most expensive myth on the list. The ground system is half of the circuit — the pulse travels from the energizer, down the fence, through the animal, into the soil, and back to the energizer through the ground rods. Skimp on grounding and the animal still gets a tickle... but only if it is standing within a few feet of the rods. Everywhere else the fence is dead.
Rule of thumb: one to three steel ground rods, each driven at least 1.5 m (5 ft) into moist soil. A proper grounding guide is worth reading before you hammer a single rod.
Myth 5: "Any wire will do for any animal"
Partly true — and that is the problem. Steel wire carries current beautifully but is nearly invisible; horses and wildlife will hit it blind. Polytape and polyrope are visible and flexible but have higher resistance, so they need a stronger energizer over long runs. Polywire is a compromise for temporary fences.
Choose the conductor for the animal and the job: wide visible tape for horses, heavy steel or high-tensile for long cattle perimeters, lightweight polywire for strip grazing. If you are unsure, our guide to choosing the right electric fence wire walks through each option.
Myth 6: "Electric fencing is cruel"
The opposite is true when set up correctly. A well-trained animal touches the fence once, learns the boundary, and is never hit hard again — most corrections are a brief, startling pulse. Compared with barbed wire (which cuts and tears) or tangled mesh (which traps legs), an electric fence that an animal respects causes dramatically fewer injuries. The cruelty stories almost always trace back to either a broken fence that animals learn to ignore (then push through and get tangled), or an oversized energizer used without warning signage. Train animals properly, post warning signs where the public can touch the fence, and electric fencing is among the most humane barriers available.
Myth 7: "Bigger energizer = always better"
A huge energizer on a tiny fence is not an upgrade — it is a hazard and a waste of money. Oversized units can deliver uncomfortable shocks to children or pets who touch a garden fence, and they drain batteries faster. Size the energizer to the fence: length of wire, amount of vegetation contact, and the animal species. A 0.5–1J unit suits poultry and gardens; 2–5J suits most cattle, horse and sheep perimeters; 5J+ is for long, weed-heavy or predator-duty lines.
The One Myth That Is True: Maintenance Is Everything
Here is the fact behind most "my electric fence stopped working" stories: fences fail from weeds, poor connections and bad grounding — not from the energizer. A 10-minute weekly voltage check catches every one of those problems before animals do. Our troubleshooting guide lists the six most common causes and the fixes.
When you are ready to replace a tired energizer, look for one that tells you the truth about your fence — every LIFEALL energizer displays live fence voltage on an LCD screen, so you are never running on faith and folklore.
Read article
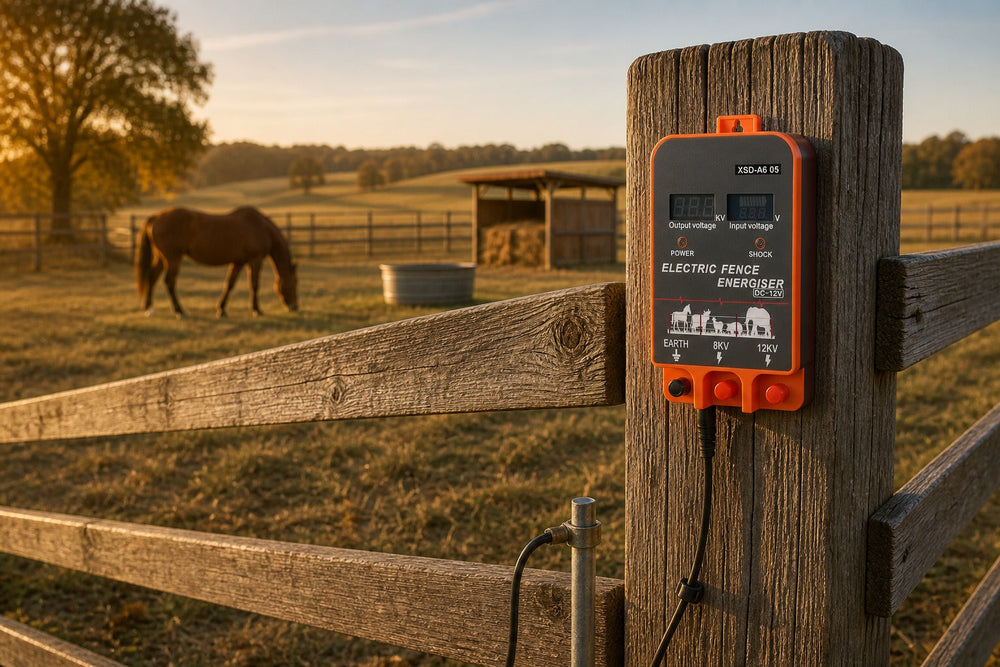
A corral is one of the most useful additions to a horse property. It gives you a safe place to hold a horse for feeding, farrier visits, vet checks, or simply to keep a horse off wet pasture. Done right, a corral is also one of the safest places your horse will ever stand — done wrong, it can cause injuries that cost far more than the fence itself.
This guide walks you through planning, building and powering a horse corral, with the practical details that make the difference between a corral that works and one that is a constant headache.
Step 1: Decide the Size and Location
Horses need room to move. As a rule of thumb, plan for at least 400–600 square feet per horse for a holding corral, and more if horses will live in it for extended periods. A common layout is a rectangular corral roughly 50 ft × 100 ft for one to two horses.
Location matters just as much as size:
Good drainage. Muddy corrals cause hoof abscesses and skin issues. Build on the highest, best-drained spot you have.
Visible and accessible. Place the corral where you can see it from the house or barn, with all-weather access for trailers and equipment.
Away from high-traffic hazards. Keep distance from busy roads and avoid putting the only water source inside a muddy corner.
Step 2: Choose Your Fencing
You have three practical options, and most owners combine them:
Metal pipe or heavy wood panels for the sides where horses are caught or handled — strongest and safest for close contact, but expensive.
Electric fencing for the rest of the perimeter — flexible, far cheaper, and easy to move or expand later.
Post-and-board where appearance matters, with an electric line on top to stop chewing and leaning.
For a permanent corral that includes electric fence, use highly visible conductors. Horses have excellent depth perception but poor close-range vision, and they need to see the fence line. White or yellow polytape (½–1 inch wide) is the standard choice for horses because it is wide enough to see and stretches instead of breaking if a horse leans on it.
Run three to four lines for horses: bottom line around 18–20 in from the ground, middle at 36–42 in, and a top line at 48–54 in. A horse that respects the fence will rarely test it — the job of the extra height is to stop a determined horse from stepping over.
Step 3: Get the Gate Right
The gate is where injuries happen. Use a wide gate (10–12 ft minimum) so horses never feel trapped when entering or leaving, and swing it away from the horse's path. Never use barbed wire anywhere near horses — a single kick into barbed wire can destroy a leg.
If your corral uses electric fence, install spring-loaded gate handles at every gate so the electric line continues across the opening. A gate that is "dead" teaches horses they can push through fences elsewhere.
Step 4: Power It with the Right Energizer
A small horse corral does not need a monster energizer — but it does need enough stored energy to overcome weeds and dry conditions, and it needs to stay effective all season.
For a corral of up to a few acres, a 1–3 joule 12V energizer is the sweet spot: powerful enough for a reliable shock through grass contact, small enough to run for weeks on a charge. Our LIFEALL 12V Energizer 2.5J with LCD (A605) is sized for exactly this job — the LCD screen shows fence voltage at a glance, so you know the fence is working instead of guessing.
Two rules that apply to every installation:
Ground it properly. The grounding system is half the circuit. Use one to three galvanized ground rods, each driven at least 1.5 m (5 ft) into moist soil. A weak ground makes even a 9-joule energizer useless.
Test weekly. Voltage should read at least 2,000–3,000V on the fence for horses. A $25 tester pays for itself the first time it catches a sagging line.
See our full electric fencing range for cattle and horses to match the energizer to your setup.
Step 5: Safety Checklist Before the First Horse Steps In
Walk the corral before introducing any horse:
No protruding nails, broken boards or sharp edges at horse height.
Electric lines taut and no lower than 18 in where a horse could get a leg over or under.
All gates latch securely with no gaps a hoof could slip through.
No loose polytape ends — horses can step through a sagging line and get tangled.
Feed and water positioned away from gates and corners where horses crowd.
If this is your horse's first experience with electric fencing, introduce them gradually — a brief fence-training session prevents the panicked first contact that causes most breakouts.
A Corral Is an Investment in Safety
Build it square, build it visible, and power it with an energizer you can trust — then the corral becomes the piece of equipment you reach for every single day. When you are ready to power your build, the LIFEALL collection covers everything from small holding pens to large breeding farms, each with LCD voltage monitoring and weather-sealed housings backed by a manufacturer warranty.
Read article
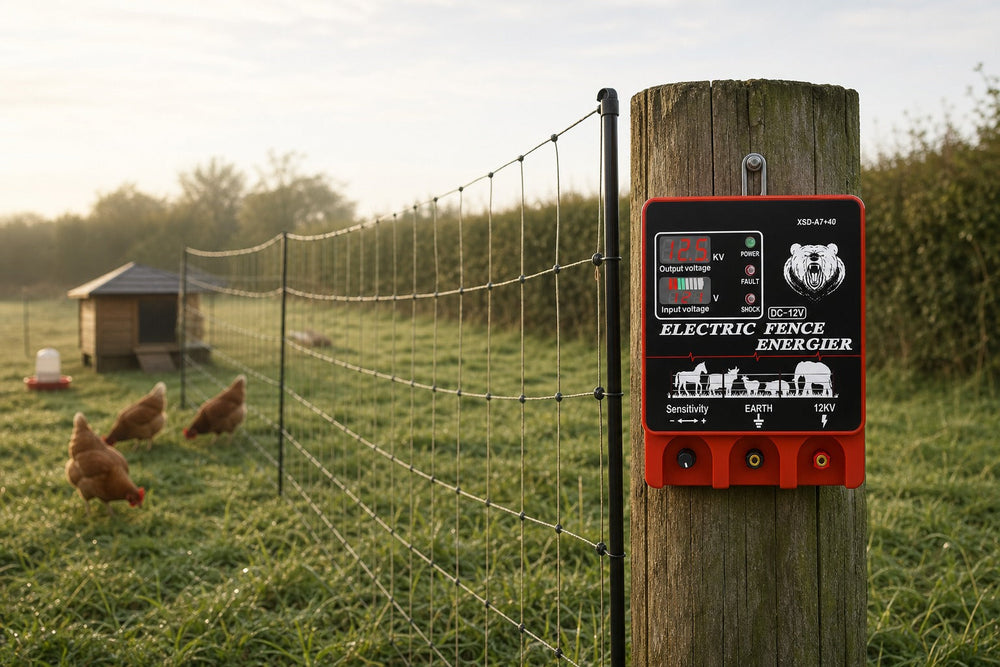
You have bought the netting — now the question that trips up more buyers than any other: how many rolls of net can one energizer actually run?
The honest answer is: it depends on three things — the net's own load, the vegetation touching it, and the energizer's real output. Get the math wrong on the small side and your poultry net reads 1,500V at the far end (which foxes notice immediately). Oversize it and you have paid for power you do not need. Here is a sizing method that works.
Step 1: Know What a Net Actually Draws
Electric netting is a dense grid of conductors — every horizontal strand carries current, and the verticals tie them together. That makes netting a heavy electrical load compared with a single strand of wire. The spec that matters is the net's length and strand count:
Poultry net (50 m / 164 ft, ~1 m tall) — typically 6–8 horizontal conductors. This is the standard "one net" unit everyone talks about.
Sheep/goat net (50 m, 90 cm–105 cm tall) — similar or slightly heavier strand counts.
Taller or multi-strand nets draw proportionally more.
As a rule of thumb, one 50 m net is roughly equivalent to 400–600 ft of single-strand fence line in electrical load — which is why energizer charts that quote "miles of fence" mean single-strand miles, not nets. This mismatch is the #1 source of undersized poultry setups.
Step 2: Match Joules to the Number of Nets
Here is a practical joule-per-net guideline for clean, weed-free conditions (the ideal case):
| Nets (50 m each) | Recommended energizer output |
|---|---|
| 1–2 nets | 0.5–1.0 joule |
| 3–4 nets | 1.0–2.0 joules |
| 5–8 nets | 2.0–3.5 joules |
| 9–12 nets | 3.5–5.0 joules |
| 12+ nets or long runs | 5 joules and up |
The LIFEALL 2.5J 12V energizer (A605) comfortably handles 4–6 nets in good conditions — the typical backyard-to-small-farm poultry setup — while the larger models in the poultry and small animal range cover the bigger runs.
Step 3: Add the Load Factors (This Is Where Fences Fail)
The chart above assumes clean, dry netting. Reality adds three loads that can double or triple your requirement:
Vegetation contact. Grass and weeds touching the net bleed power continuously. Netting sits low and close to the ground — it will contact growth. A net that drags through lush grass needs 1.5–2× the joule of the same net in a mown lane.
Moisture and rain. Wet netting and wet ground conduct — expect output to drop on damp days. Size for the worst month, not the dry one.
Length of lead-out. Long lead-out cables from the energizer to the net add resistance. Keep lead-outs short and use proper insulated cable for buried runs.
Practical rule: after sizing from the table, add 50% if the net will touch any vegetation at all — and assume it will. A 3-net setup in a grass paddock wants a 2J-class energizer, not a 0.5J.
Step 4: Verify with a Tester, Not a Guess
Sizing charts are starting points — the fence itself is the truth. After connecting everything:
Read the voltage at the energizer and at the far end of the last net with a voltage tester.
For poultry and small predators, the far end should hold at least 2,000–3,000V. Below that, predators test it — and a raccoon or fox that pushes through netting once will keep coming back.
Re-test after rain and as grass grows through the season. Netting that passed in April can sag to useless in June.
This is where an energizer with a live LCD voltage display earns its keep: you see the far-field voltage trend every time you walk past, instead of discovering the problem when something digs in. Every LIFEALL energizer shows real-time fence voltage.
The One-Net Special Case: You Still Need a Real Energizer
A single poultry net protecting a coop from raccoons seems like it needs almost nothing — but this is the case where undersizing hurts most, because the predators are at their most determined right outside the net. A 0.2J toy unit will not hold a raccoon through wet grass. A genuine 0.5–1J energizer will. Do not buy "netting kits" with built-in energizers so weak they cannot fire through dew — buy the energizer and net separately so you control the real spec.
Sizing Table Shortcut
1–2 nets, clean site, garden/backyard: 0.5–1J
3–6 nets, light vegetation: 2J class (A605 territory)
6–10 nets or weedy site: 3–5J
Big runs or predator-heavy country: 5J+ with margin
When in doubt, size up one step — the cost difference between a 1J and 2.5J energizer is small; the cost of a predator that learns your netting is weak is a whole flock. Browse the LIFEALL range for poultry and small animals and match your net count to a unit with honest joules and a voltage display you can trust.
Read article
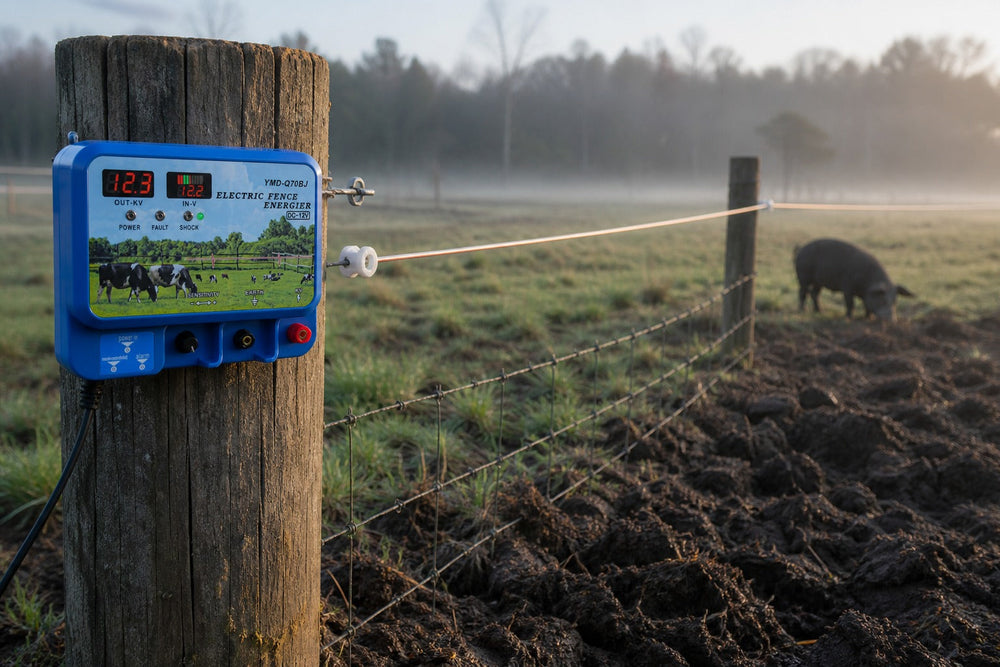
You find it the morning after: a strip of pasture turned over like it was ploughed, a feeder pushed off its feet, a fence post leaning where something heavy leaned back on it. Feral hogs do not wander through a fence line — they work at it until it stops being a fence.
This guide is about a specific job: keeping wild hogs out. That is a different problem from keeping domestic pigs in, and it needs a different design. (If you are fencing your own pigs, our pig and hog containment guide covers that side.)
Why Wild Hogs Beat an Ordinary Fence
A hog does not test a fence the way a horse or a cow does. It tests it like a bulldozer with a plan.
It pushes low. The force arrives at shoulder and snout height, at ground level. Most fences are built to resist a push that comes from higher up.
It roots. A hog lifts soil at the fence line. Ground that was firm in spring gets soft, and a wire that read as tight last month is suddenly standing on air.
It rubs and chews. Repeated contact wears wire, loosens staples and opens the line the way a loose tooth opens a gap.
It learns. A hog that touches a fence and feels nothing decides the fence is scenery.
That last point is the whole design brief. You are not building a wall. You are building a correction that arrives at the exact height a hog works — reliably, every single time.
The Core Design: A Charged Offset on a Fence You Already Have
For exclusion, the most practical setup is a charged offset wire carried on the outside of a fence that is already standing: woven wire, barbed wire, or high-tensile.
The hot wire sits on standoff insulators a hand-width out from the existing fence. A hog approaching meets the electric wire with its nose well before its shoulder reaches the mechanical fence behind it. The electric wire does the teaching; the physical fence provides the stop. Neither half works alone — a physical fence without charge gets pushed and rooted until it fails, and a light electric fence standing by itself gets walked into the ground by an animal that weighs as much as a person and is not interested in negotiating.
This is the same principle behind our predator deterrent layouts: put the voltage where the animal commits, and put a solid barrier where it does not.
Line Layout: Heights, Offset and Corners
Two charged wires, not one. A low wire at snout height catches a rooting hog; a second wire higher up catches an animal pushing with its shoulder or leaning in. A single wire is a single lesson, and hogs are not single-lesson animals.
Offset the wire outward. The hot wire should stand out from the existing fence far enough that a hog contacts it before it can lean on the fence behind. If the hog can touch both at once, the mechanical fence becomes a shield rather than a backstop.
Brace the corners and gateways. Hogs funnel. Corners, gate posts and feeders are where a determined animal concentrates its weight, so these are the places that need the stoutest posts and the tightest wire.
Keep the line clear of vegetation. A wet, tall grass load at the fence line is the most common way an exclusion fence quietly stops working. The energizer is still running; the fence is just leaking its charge into the ground.
Check the line after weather. Windfall, flooding and soft ground all move a fence. A quick walk with a voltage tester at the far end tells you whether the line is still doing its job — that is the end a hog will reach first.
Sizing the Energizer for Exclusion Duty
Here is where hog exclusion differs from almost every other fencing job: you are energizing perimeter, not animals. A property boundary can be several thousand feet of line, and it will be running through rough ground that you cannot keep perfectly clear.
Length and load decide the size. The longer the run and the more weed contact along it, the more joules you need in reserve. Selecting on animal count alone is how hog fences end up underpowered.
Low impedance, high output. You want an energizer that keeps pushing through grass and damp ground rather than one that looks after its own voltage.
An alarm pays for itself. A downed line on a boundary you only walk once a week is a hole in the fence you find by finding the damage. A remote and alarm unit tells you the line has failed instead.
Match the power source to the land. Mains where you have it; a 12V battery or solar on ground you cannot reach with a cable.
For serious hog pressure — long boundaries, rough ground, or a recurring population — step up to a high-output AC/DC unit such as the LIFEALL 15.5J Q780BJ, or the 9J A740 for a shorter boundary with lighter weed load. Both sit in our large-farm range.
Grounding: Half the Circuit Is Under Your Feet
Fence voltage is only half of what a hog feels. The return path runs through the soil, and in exclusion duty that ground is often rough, dry, or far from the energizer.
Put ground rods where the soil actually holds moisture, not where it is convenient to dig.
On a long boundary, multiple rods spaced along the run shorten the return journey.
Recheck grounding when the season turns. Ground that worked in spring mud can fail in summer dust — and the fence will still read as "on" at the energizer end.
The full method is in our grounding guide.
Make the First Contact Count
Hogs investigate by scent, and you can use that. Before you expect trouble, draw them to the wire deliberately — scent on a rag or a small bait station set right at the line — so their first encounter is a full-voltage correction at the correct height, taken squarely on the nose, rather than a glancing brush that teaches them nothing.
One clean correction usually settles a hog's opinion of a fence. A confusing one teaches it that the fence is worth testing.
Fence or Trap?
Be clear about what each tool is for. A trap removes hogs from the population; a fence protects the ground, the feeders and the crop you cannot move. Most operations running serious hog pressure do both — trap to reduce numbers, fence to hold the line in between. Fencing is what keeps one bad night from undoing a season.
Upkeep, in Real Terms
An exclusion fence is maintained, not installed. Plan on a walk along the line after hard weather, a voltage check at the far end, and a strimming pass when grass load builds. That is the whole maintenance programme, and it is what separates a fence that keeps working from one that stopped working three weeks ago without telling you.
The Bottom Line
Wild hogs are not stopped by height, and they are not stopped by strength alone. They are stopped by a charged wire placed exactly where their nose arrives, backed by a barrier that shrugs off their shoulder — and by a line that stays live every day of the year until they stop bothering to test it.
Browse the LIFEALL energizer range — every model with LCD voltage monitoring, so you know the line is holding long before the hogs find out.
Read article



 Electric fencing


