 electric fence
Rain Is the Most Common Cause of Fence Underperformance
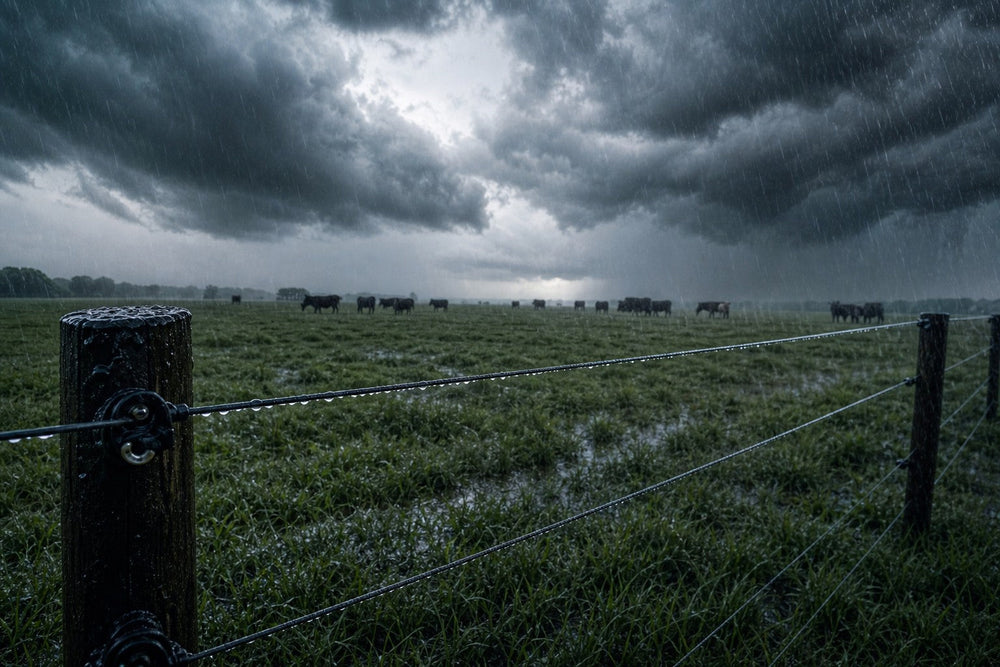
Rain is one of the most frequent reasons an electric fence underperforms — and one of the most misunderstood. The good news: a properly built and maintained electric fence works fine in heavy rain. The bad news: most voltage problems in wet weather trace back to four fixable causes.
The Physics: Three Ways Rain Drains Your Fence
1. Surface leakage across insulators
Water is a conductor — especially when it carries dissolved minerals, soil and organic material. A thin film of dirty water across an insulator can bleed current straight off the wire into the post and ground, bypassing animals entirely. Contaminated insulators have been shown to cut effective pulse voltage by up to 45% during rainfall.
2. Vegetation contact
Rain flattens grass and weeds against the wire, and wet vegetation conducts far better than dry. A single patch of wet grass on the line can drain thousands of volts in seconds. Vegetation contact is responsible for more than 60% of electric fence failures year-round — and the number spikes in wet weather.
3. Grounding (the surprise)
Rain usually improves your ground system: moist soil has lower electrical resistance. Optimal soil moisture for grounding is roughly 20–40% saturation. Only saturated, flooded soil starts to raise resistance again — so a moderate rain is actually a good time for your ground rods to work.
How Fence Types Perform in Rain
Fence type
Wet-weather performance
Key risk
Single-strand steel wire
Moderate
Vegetation contact, insulator leakage
Multi-strand polywire
Good
Moisture absorption in low-quality wire
Polytape (25–40mm)
Good
Wind exposure in storms
Electric netting
Very good
Standing water on the bottom strand
Under-powered energizer (<0.5 J)
Poor
Insufficient output to overcome losses
Netting shines in rain: the mesh has multiple conductors at different heights, so even if the lowest strand shorts against standing water, the upper strands still carry voltage.
The Energizer: Joules Matter More Than Peak Voltage
Stored joules determine how much power the energizer delivers under load — that's what counts in rain. A unit claiming 10,000V peak may drop to 1,500V under wet load, far below the minimum effective threshold. In wet climates, plan on at least 1 joule per 3 km of fence, and size up from there.
Grounding Is Your Secret Weapon
Ground setup
Dry soil
Wet soil
1 rod, 1.5 m deep
Poor
Adequate (low-power energizers only)
2 rods, each 1.5 m deep
Adequate
Good (standard setup)
3 rods, each 1.5 m deep
Good
Excellent (energizers over 3J / long runs)
Rods + buried ground wire
Excellent
Excellent (best all-weather option)
In clay-heavy soil, drive rods deeper to reach moist sub-soil. A real-world case: a dairy farm losing voltage from 6,200V (dry) to 1,800V (wet) fixed it by going from a single rod to a full ground system with a buried ground wire — winter voltage stabilized at 4,800–5,200V regardless of rain.
Pre-Rain Maintenance Checklist
Task
Priority
Why in rain
Clean all insulators with a damp cloth
Critical
Removes the conductive dirt film that causes surface leakage
Clear vegetation within 15cm of the wire
Critical
Wet weeds drain voltage rapidly
Measure ground rod resistance
High
Ensures the circuit can complete on contact
Test voltage at the far end of the run
High
Catches voltage drop over fence length
Inspect joins and connections
High
Corroded joins add resistance
Confirm energizer weatherproofing (IP rating)
Moderate
Water ingress can destroy the circuit board
And Lightning?
Rainstorms often bring lightning — an entirely different threat. A strike on the wire can send a massive spike back into the energizer:
Install an external lightning diverter on the fence line, 10–20m from the energizer.
Use a surge-protected power strip for mains units.
Never connect your fence ground system to your building ground — that routes surges into household wiring.
Solar and battery energizers are inherently more protected (no mains connection). See our lightning protection guide for details.
FAQ
Will my fence shock animals less effectively in rain?
Light to moderate rain typically reduces voltage 15–30% on a well-maintained system — animals still get an effective deterrent. Heavy rain with dirty insulators and vegetation contact can cut voltage 50–60%. Keep a minimum on the line: 3,000V for cattle, 2,000V for sheep and goats, 1,500V for poultry.
What insulators are best for wet climates?
UV-stabilized glass-filled nylon or HDPE resist biofilm buildup and don't absorb moisture. Avoid old nylon or PVC, which develop microcracks that trap conductive dirt. Porcelain performs excellently wet but is heavier and pricier — see our insulator comparison. Clean insulators at the start of the wet season with a cloth dampened in diluted white vinegar.
Can rain damage my energizer?
Direct water ingress can permanently damage the circuit board. Choose an energizer rated IP54/IP65 (our LIFEALL chargers include weatherproof housings) and mount it under cover or with the display facing down.
The Bottom Line
Electric fences absolutely work in heavy rain — when four things are right: a powerful enough energizer, a solid multi-rod ground system, clean quality insulators, and vegetation management. Get those four right and your fence becomes a genuinely all-weather containment system.
Read article
 electric fence
Rabbits Should Be at the Top of Your List
When it comes to creatures destroying a garden, rabbits are near the top of the list. They have a voracious appetite, breed quickly, and can wipe out weeks of work in a single night. Fencing is the reliable answer — and you have two solid options: a temporary physical fence, or an electric fence that trains them to stay away permanently.
Option 1 — Temporary Chicken-Wire Fence (No Power Needed)
A quick, effective rabbit-proof fence can be built with chicken wire, stakes and zip ties:
Hammer corner stakes 12 inches into the ground around the area to protect.
Add posts every six feet between the corners, evenly spaced.
Cut chicken wire to span between two corner stakes, and bend the bottom at a 90-degree angle to create a 12-inch lip — the flap lies flat on the ground outside the fence so rabbits can't tunnel underneath.
Secure the wire to the corner post with zip ties, keeping the flap on the outside.
Repeat for each side.
Stretch the wire tight and zip-tie it to each post at the top, middle and bottom.
Staple the flap to the ground with landscape staples every two feet — at the fold and along the outside edge.
Trim excess wire and check for gaps.
Layer 2–3 inches of mulch over the outside flap to hide it.
The underground lip is the critical step — rabbits dig, and a fence that stops at the surface is a fence they'll simply tunnel under.
Option 2 — Electric Garden Fence (24/7 Defense)
An electric fence does more than block — it trains. The mild shock teaches rabbits to change their behavior and avoid the garden permanently. Other benefits:
24/7 protection with no maintenance beyond voltage checks.
Stops other small animals (groundhogs, raccoons, stray cats) from getting in.
Easy installation with a small energizer, step-in posts and polywire or tape — no digging required.
A small solar or battery energizer is all a garden needs — run one or two low hot wires 4–8 inches off the ground (rabbit nose height), and pair it with a gate handle for access. Our solar energizers handle garden-size loads with ease, and the installation guides walk through the whole setup in minutes.
Which Option Should You Choose?
If you need protection this afternoon and have an hour to spare, the chicken-wire fence works. If you want permanent, low-effort protection for the whole season — and protection from other pests too — go electric. Many gardeners do both: electric lines for the main plot, chicken wire for a small nursery bed.
Read article
 electric fence
Pigs Are Surprisingly Easy to Contain
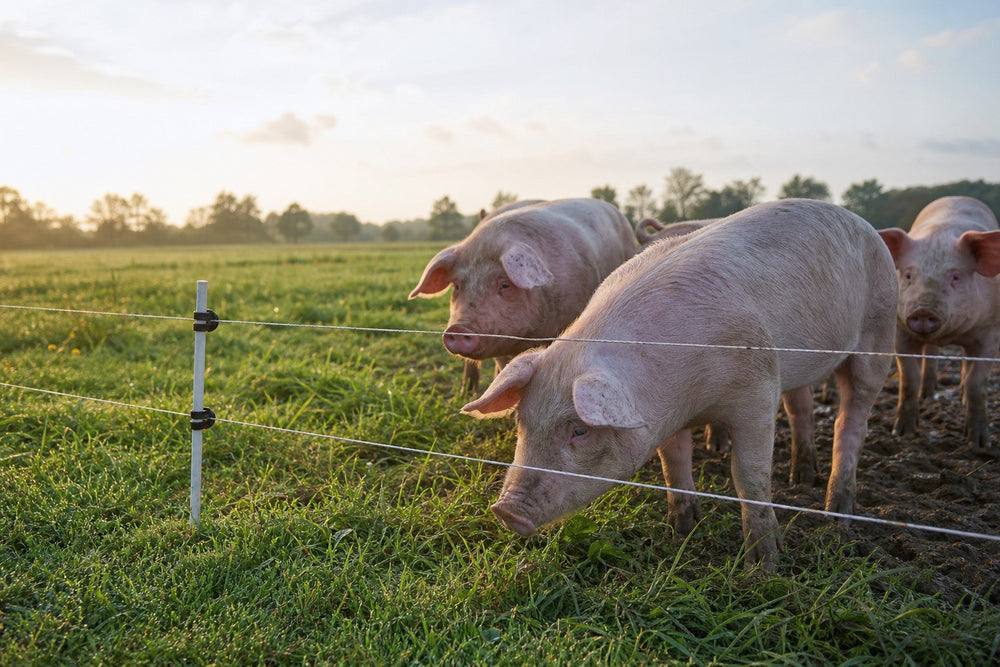
Pigs are one of the easiest animals to control with electric fencing. They have very little hair and large, wet noses — which means the shock travels well — and they are intelligent enough to learn, after one or two contacts, to respect and avoid the fence entirely.
The Three Things That Matter
1. Wire Height — Rooting Is the Problem
Pigs root, so the lowest wire must start 6 inches or less from the ground, with the next wires closely spaced at even intervals up to the pig's nose height (e.g. 8 inches, 10 inches and up). Plan on at least 3 strands and a total fence height of at least 24 inches.
2. Spacing — the "Behind the Eyes" Trap
If a pig gets its head between wires and takes the shock behind the eyes instead of in front of them, it tends to push into the fence rather than pull out. Proper spacing — including a hot wire at shoulder height — is what keeps the shock in front of the nose so the pig backs away.
3. Voltage and Energizer
You need an energizer that maintains a minimum of 2,000 volts on the line. Because the low wires sit close to the ground, a low-impedance energizer is the right choice: it pushes through weed contact, and it penetrates the mud that would otherwise insulate a pig from the shock.
Tips That Save Trouble
With wires close to the ground, low-impedance is essential to overcome weeds.
Mud insulates pigs — another reason to choose low-impedance.
Piglets need more protection: if piglets share the pen, add wires spaced closer together and lower to the ground than for pigs alone.
Pigs challenge fences with their snouts at ground level, so keep that bottom wire tight and hot.
Getting the Rest of the System Right
Match the energizer to your fence length and vegetation load — see our energizer and grounding guides — and test the far end of the line before turning the pigs in. A fence that reads at least 2,000 volts at the far end will hold hogs; below that, they'll find out for themselves.
Read article
 cattle
Dairy Cattle Are Easy to Contain — If You Size It Right
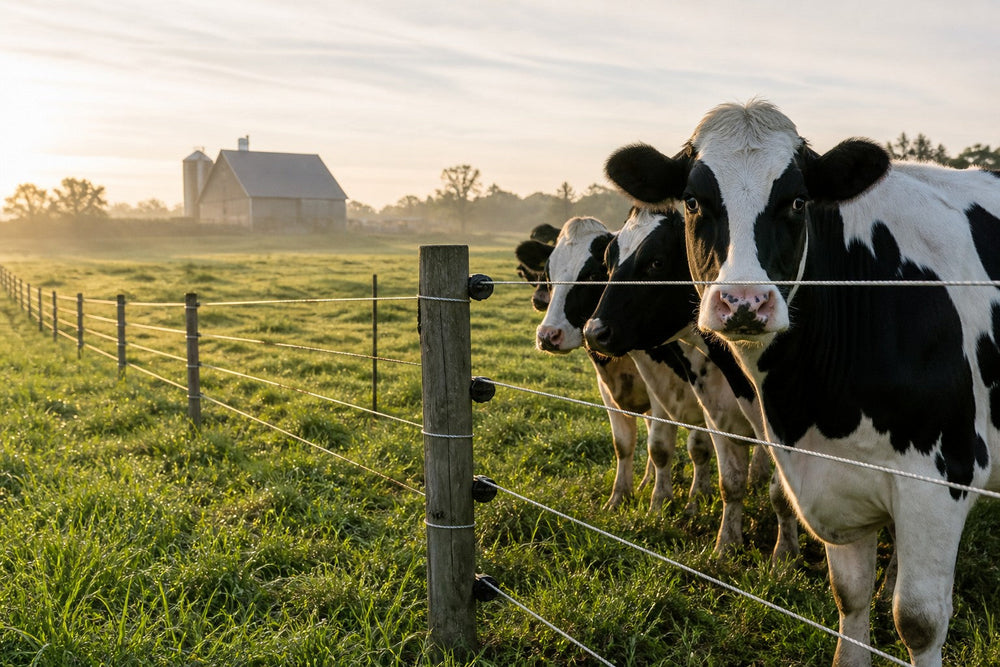
Dairy cattle are among the easiest animals to contain with electric fencing: they're relatively docile and used to daily human contact. High-tensile electric fencing is the most popular choice — it works for both perimeter and interior lines. But the right setup depends on where the fence is doing its job: perimeter, paddock, handling area or parlor.
Wire Count Depends on the Job
The number of wires ranges from 1 to 6, depending on cow size, fence lifespan expectations, whether calves share the pasture, predator pressure and rotational grazing plans.
Perimeter Fencing
For high-tensile perimeter fencing, use at least 5 strands at a minimum height of 54 inches, with 2–3 strands electrified. Bulls and aggressive breeds need more wires. A standard electric fence alone should not serve as a perimeter — high-tensile is the right perimeter choice.
Tip: if the fence encloses cows and calves together, include an electrified wire at each animal's nose height — see our strand placement rules for the anatomy logic.
Rotational Grazing Paddocks
For cross-fencing, T-posts with a 2-wire system subdivide large pastures into paddocks. For a less permanent option, step-in posts with 1–2 strands of polywire or polytape do the job, tied into the hot wires of the main perimeter fence. This is the cheapest and most flexible way to run a managed grazing program — see our rotational grazing guide.
Handling Facilities and Parlor Pens
Electric fencing is not appropriate for handling facilities or milking parlor holding areas — the areas are small, animals are packed together, and fight-or-flight behavior needs a physical barrier. Use wood or heavy wire panels instead:
Handling facility fences: at least 60 inches high, highly visible to reduce animal stress.
Parlor holding area: at least 15 square feet per cow, sheltered from severe weather, laid out for easy daily cleaning. Gates can be a standard metal gate, a movable hot wire, or an automatic crowding gate.
Energizer and Voltage Requirements
Dairy cows: maintain a minimum of 2,000 volts on the line.
Dairy bulls: more wires and higher voltage — bulls can be aggressive, and when cows are in heat they get highly motivated to escape. Maintain 3,000–4,000 volts with 5–6 wires.
Predator exclusion: a minimum of 5,000 volts on the line.
Charger selection follows the fence: low-impedance for heavy weeds, long fences or poly conductors; solid-state for light-to-moderate conditions on conventional wire; battery or solar for remote installations without AC power — our solar energizers cover off-grid paddocks.
One Anatomy Warning
If a cow gets its head between wires and takes the shock behind the eyes rather than in front of them, it tends to push into the fence instead of pulling out. Proper spacing — including a hot wire at shoulder height — keeps the shock in front of the nose so the animal backs away. Get the spacing right and dairy cattle learn the fence in a single memorable lesson.
Read article
 electric fence
Work Through It in Order
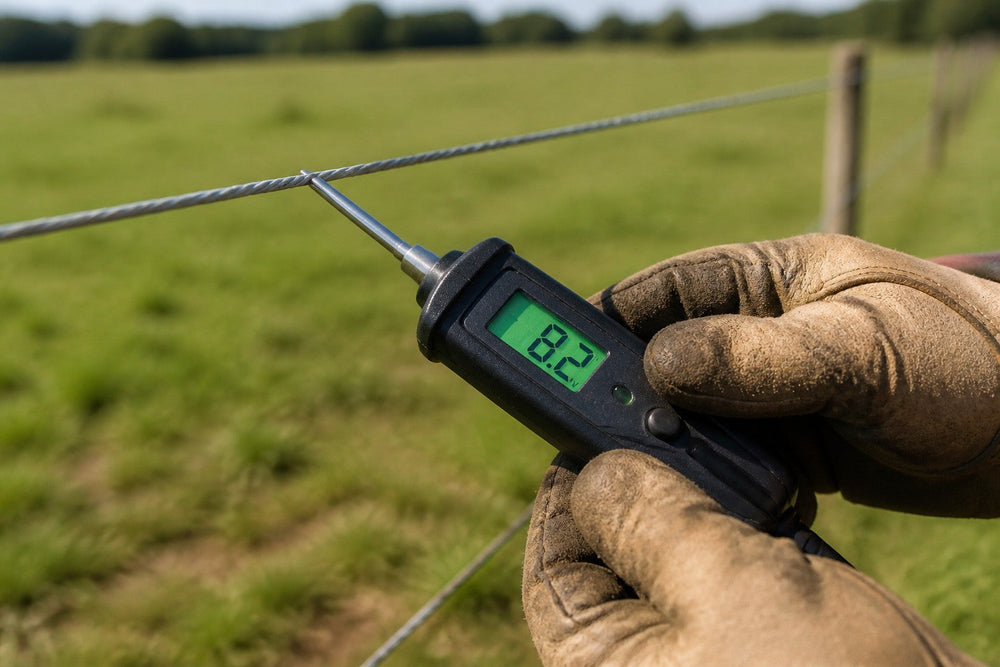
When an electric fence underperforms, the cause is almost always one of four things: the energizer, the battery/panel, the grounding system, or the fence line itself. This guide walks through them in order — no guessing, no random fence walking. Grab a fence tester, a battery tester and a screwdriver, and find your energizer type below.
Electric Fence Voltage Tester, 8-Level LED (600V–12000V)
$24.99
Shop Now
Step 1 — Test the Energizer Itself
AC (plug-in) energizers
If using an extension cord, it must be industrial-rated and no longer than 50 feet.
Unplug the energizer.
Remove both the hot and ground wires from the fence.
Plug the energizer back in.
Check voltage at the energizer terminals with a fence tester.
Voltage within 20% of spec? Reconnect the wires and move to the grounding test (Step 3).
More than 20% below spec? The energizer itself is suspect — contact the manufacturer with your model and serial number.
DC (battery) energizers
Turn off the energizer, remove both wires, turn it back on and test.
Voltage within 20% of spec → reconnect and go to grounding (Step 3).
More than 20% below → turn off, remove the battery and test it with a battery tester.
Battery low → replace or recharge it. Battery reads fine → the energizer is suspect — call the manufacturer.
Solar energizers
Charge the energizer in the off position for at least three full sunny days before testing.
Remove both wires, turn on, and test voltage.
Within 20% of spec → reconnect, go to grounding.
More than 20% below → turn off, remove the battery and test it. Low battery → replace; accurate battery → energizer suspect.
Step 2 — Check the Voltage Requirements
Compare your tester reading with the energizer's published specification. The number that matters is what the fence delivers at the far end of the line, not what the box claims with nothing connected. If the energizer reads fine but the fence doesn't, the problem is downstream — grounding, lead wire or the line itself.
Step 3 — Test the Grounding System
Many electric fence issues trace back to grounding — even a fence that worked for years can fail when soil moisture changes. A proper ground system needs one to three galvanized steel rods, each driven at least 1.5 m (5 ft) into moist soil. To test:
Lay a metal bar against the fence, about 100 yards from the energizer.
Touch the hooked end of the fence tester to the top of a ground rod.
Place the probe end into the soil.
If your ground system matches the manufacturer's spec — one to three galvanized steel rods, each at least 1.5 m (5 ft) deep in moist soil — move to the fence line. If it does not, fix it first: add rods, drive them deeper, or in dry/sandy soil run a buried ground wire connecting the rods. See our grounding guide for the full setup.
Step 4 — Test the Lead Wire
Your electricity may be leaking into the ground before it ever reaches the fence:
Turn off the energizer and remove the hot lead wire from the fence.
Turn the energizer back on and test the lead wire.
If the lead reads significantly lower than the energizer terminals, electricity is leaking to ground — replace the hook-up wire with 20kV insulated wire and recheck. Similar reading? Move to the fence line.
Step 5 — Walk the Fence Line
If everything above checks out, there's no way around it — walk the line with tools and spare parts, looking for:
Heavy or wet vegetation touching the wires — the most common voltage thief; clear a corridor under the line.
Cracked insulators — replace any that leak current to the post.
Rusty or loose connections — clean and retighten.
Wire touching wood — grounds out the pulse; re-hang on insulators.
Splices or jumpers no longer secure — a loose splice adds resistance.
Faulty connections at gate openings — check the jumpers under gates.
Metal objects within 4 inches of the line — can short the pulse.
Prevention Is Cheaper Than Repair
Most of these failures are preventable: keep vegetation off the line, check insulators and connections seasonally, and test the far-end voltage on a schedule — a fence you measure is a fence that works. For routine upkeep, our maintenance guide covers the full seasonal routine.
Read article
 battery
The Short Answer
When temperatures plunge and the first frost hardens the soil, every solar fence owner wonders the same thing: will it keep up this winter? The reassuring answer, backed by field experience, is yes — but only when the system is correctly sized and properly maintained. Winter failure is almost never a mystery; it's one of four predictable problems, and all four are fixable.
Counterintuitive fact: photovoltaic panels actually operate 5–12% more efficiently in cold temperatures than in summer heat — resistance decreases in cool conductors. The real winter challenges are shorter daylight, snow cover, cold batteries and frozen ground.
The Four Real Winter Challenges
1. Short daylight hours
Above 40°N, December delivers just 2–4 peak solar hours a day versus 6–8 in July. A 20W panel harvests nearly three times more energy in a summer day than a December day at the same location. Panel wattage must be sized for December, not July.
2. Snow and ice on the panel
Even 2–3 cm of snow cuts panel output by 70–100% — a covered panel is functionally no panel. Panels cleared within 6 hours of snowfall recover 95%+ of expected daily output. Panel angle and a clearing routine are your primary defenses.
3. Battery capacity collapses in cold
Cold slows the electrochemical reactions inside batteries. At −18°C, a standard lead-acid battery may retain only 40–60% of rated capacity, while lithium iron phosphate (LiFePO4) retains 80–90%. This is the most critical variable in winter solar fence performance.
4. Frozen ground reduces conductivity
Frozen, dry soil is a poor conductor, weakening the ground circuit. The solutions are established: drive ground rods below the frost line, and in deep-freeze climates consider a two-wire return system (an energized wire alternating with a ground-return wire at hoof height) so animals complete the circuit without relying on soil at all.
Summer vs Winter: What to Expect
Factor (45°N, 20W panel + 12V/20Ah lead-acid)
Summer
Winter
Daily peak sun hours
6–8 hrs
2–3.5 hrs
Net daily energy harvested
~100–130 Wh
~35–55 Wh
Lead-acid usable capacity at −18°C
100%
40–60%
LiFePO4 usable capacity at −18°C
100%
80–90%
Measured fence voltage (well-sized system)
5,000–8,000V
3,500–6,000V
Animal coat insulation (shock resistance)
Low
High — needs stronger shock
The 5 Factors That Decide Winter Reliability
Battery capacity and chemistry — the highest-impact upgrade. A system designed for 3 days of autonomy in summer may only deliver 1.2 days in winter on lead-acid. Target at least 5 days of battery autonomy in winter, upgrade to LiFePO4 when budget allows, and insulate the battery housing in a foam-lined box elevated off concrete (never on a bare concrete floor — it draws heat away and costs you 10–15% capacity).
Panel wattage and tilt — size for December. A 20W summer setup typically needs 40–60W for equivalent winter output at mid-latitudes. Increase tilt from the summer 25–30° to 45–60° in winter — steeper angles capture the low sun and let snow slide off.
Placement and snow clearing. Face panels south (Northern Hemisphere) in shade-free spots, and clear snow within 6 hours of a storm to recover 95%+ of daily output.
Energizer joule rating — never underpower in winter. Thick winter coats and drier skin mean a shock that worked in August may go unnoticed in January. Size for 2–3× your summer requirement, and add 1–2 joules beyond the standard recommendation for your livestock.
Grounding depth. Drive rods at least 1.5 m (5 ft) into the ground — below the frost line in most regions — using one to three galvanized rods wired in series. For deep-freeze regions, the two-wire return system is the most reliable option.
Three Climates, Three Lessons
Minnesota sheep farm (Zone 4b): a 20W panel + 20Ah lead-acid failed in a January overcast stretch. After upgrading to a 40W panel, a 100Ah LiFePO4 battery and frost-line ground rods, the system ran two full winters including −26°C cold snaps with zero failures. Lesson: the original system was sized for summer.
Welsh dairy goats (perpetual cloud): with January irradiance among Europe's lowest, a 60W panel (3× the summer minimum) plus a 150Ah AGM battery held 4,200V all winter — zero escapes in 18 months. Lesson: panel wattage compensates where battery size can't.
Colorado poultry (sunny but cold): netting collapsed twice under heavy snow, causing shorts. After adopting a raise-the-posts-after-snowfall routine, voltage stayed above 5,000V all winter with no predator breaches. Lesson: snow management on netting is non-negotiable.
Winterize Checklist (Before the First Hard Freeze)
Increase panel tilt to 45–60°.
Upgrade to LiFePO4 battery, or double lead-acid capacity.
Insulate the battery housing (foam-lined box, elevated off concrete).
Drive additional ground rods below the frost line.
Inspect and replace corroded terminals and connections.
Clear snow from the panel after every significant snowfall.
Test fence voltage with a digital tester at least weekly.
Raise and re-tension netting after each snowstorm.
20-Mile Solar Electric Fence Charger, 0.5J Energizer
$139.99
Shop Now
Choosing a Winter-Ready Energizer
In winter, add 1–2 joules beyond your standard livestock recommendation. Rough winter minimums: poultry 0.5–1.5J, sheep/goats 1.5–3J, cattle 2–5J, horses 1.5–3J, predator exclusion 3–6J. Our LIFEALL solar energizers are built for off-grid, cold-climate use with weatherproof housings — and pair them with the winterization guide for the full seasonal routine.
Read article
 electric fence
Goats Are the Houdinis of the Livestock World
Goats squeeze through gaps, leap over barriers and treat ordinary fences as suggestions. A 2021 survey of small ruminant farmers found that over 68% of goat owners reported at least one weekly escape incident before switching to electric containment. The good news: with the right setup — correct voltage, proper wire spacing, adequate joules and a quality netting system — the escapes stop for good.
Why Standard Fences Fail
Browsers, not grazers — goats eat at eye level and lean on fences to reach branches, damaging them.
High pain tolerance and thick coats — weak shocks don't penetrate their winter coats.
Horn physiology — keratin horns insulate, letting goats push or pull fences without getting shocked.
Incredible agility — an adult goat can clear 4 feet from a standstill.
Research shows goats test fence integrity an average of 12 times per day. A fence that is only physical — without the psychological deterrent of a shock — will eventually fail. Electric fencing creates a conditioned avoidance response within 2–3 encounters.
The Core Requirements
Parameter
Recommended for goats
Why it matters
Minimum voltage
4,000–5,000 V on the line
Thick coats block weak shocks
Energizer output
0.5–1 J (small herds); 2–5 J (large acreage)
More joules push through vegetation contact
Pulse frequency
1 pulse/second (standard)
Gives the goat time to pull back, reducing entanglement
Wire height (multi-strand)
6", 12", 18", 24", 36" from the ground
Deters crawling under, pushing through and jumping over
Solution 1 — Electric Netting (Best for Rotational Grazing)
Electric netting is the gold standard for goat containment on homesteads and small farms:
Zero squeeze-through room — tightly woven grids (roughly 3.5" × 6" near the bottom) mean a goat can't fit its head through, and horns can't tangle.
Intense psychological deterrent — multiple conductive strands guarantee the investigating goat touches a live wire with its nose or ears.
Predator protection — keeps coyotes, neighborhood dogs and bobcats out at the same time.
Portability — a 164-foot section sets up and energizes in under 15 minutes, ideal for moving goats to fresh pasture.
For fence-jumping breeds like Boer goats, choose the taller (50") netting; 42" suits most standard breeds.
Solution 2 — Multi-Strand High-Tensile (Best for Permanent Perimeters)
Netting isn't practical for fencing a 50-acre boundary. For permanent lines, the standard is a 5–6 strand high-tensile electric fence — smooth wire, extremely strong, and it conducts electricity over massive distances.
Netting vs Multi-Strand: Which Fits Your Farm?
Feature
Electric netting
Multi-strand high-tensile
Best use case
Rotational grazing, temporary paddocks, rented land
Permanent perimeter, large acreage
Installation time
~15 minutes per 164-ft roll
Post driving, bracing, wire tensioning
Cost
Higher per foot, no tools needed
Lower per foot over long runs, high tool/labor cost
Predator protection
Exceptional
Very good with close spacing
Maintenance
Frequent moving or weed control beneath
Occasional tensioning and brush clearing
Choosing the Energizer
The energizer is the heart of the system, and under-powering is the most common reason goat fences fail. Penn State Extension recommends sizing at double the fence length — vegetation, moisture and wire resistance all reduce effective output, so a fence testing at 3,000V at the energizer may deliver only 2,500V at the far end.
Solar — remote pastures; needs adequate sun; the LIFEALL 20-Mile Solar covers mid-size operations off-grid.
AC mains — most reliable and powerful for permanent barn-side fences.
Battery/DC — portable; needs regular battery checks.
Multi-power (AC + DC) — greatest flexibility; high-output models like our 9J charger handle large, high-vegetation lines.
Real-World Fixes
Three common patterns from farm case studies: a Tennessee farm with 14 Pygmy goats stopped twice-weekly escapes with a 5-strand electric wire fence on a 1-joule AC energizer, plus netting at the barn gate where escapes happened most. An Oregon Boer goat operation switched interior paddocks to portable netting on a solar energizer while keeping permanent electric wire on the outer boundary. A Texas hobby farm with Nigerian Dwarfs replaced wide welded-wire panels (newborns squeezed through) with fine-mesh netting and bottom-electrified strands.
Introducing Goats to the Fence
Turn the power on before the goats arrive, and let them learn at their own pace — most need only 2–3 contacts. Keep the line clear of vegetation, test the far end with a fence tester, and match volts to the animals' coats. For the full setup, work through our installation and grounding guides.
Read article
 electric fence
How to Train Horses to Electric Fencing: A Step-by-Step Guide
Training Is Part of the Installation
After installing electric fencing for horses, proper introduction is not optional — a horse that discovers the fence the hard way at a gallop is a horse that can hurt itself and wreck the fence. The training process is simple, but it must be deliberate. Three steps, done in daylight, in the right order.
Visibility Comes First
The top training priority — and the top horse-fence safety priority — is visibility. Horses must be able to see the fence from a distance, even at a gallop, so they can slow down and avoid it. If your fence is a thin wire rather than tape or braid, attach flags or tapes at regular intervals along the line. And always introduce horses to the fence in daylight, not at dawn or dusk.
Step 1 — Lead the Perimeter with the Power Off
Turn the energizer off before you bring the horse near the fence — a surprise shock to a horse you are leading can make it bolt. Lead the horse slowly around the full perimeter of the new paddock, letting it see and sniff the boundary line at its own pace.
Step 2 — Energize and Let the Horse Explore Alone
Once the horse has walked the boundary and knows where the line is, release it into the paddock and switch the energizer back on. Let each horse learn on its own — ideally one horse at a time, without companions. For safety:
Do not hold the horse while it investigates the fence.
Stand outside the fenced area.
Make sure no other person is inside the paddock.
Step 3 — Observe the Lesson
Now wait and watch. It is natural for a horse to test the boundary, so give it time to actually touch the wire and feel the shock. The desired reaction is a recoil — the horse backs away and keeps its distance. It usually takes only one or two contacts before a horse respects the fence permanently.
After Training: Keep the Power On
Once training begins, do not turn the energizer off. Consistent power is what keeps the lesson learned and the horses safe. The running cost is trivial — a typical energizer draws about the same as a 100-watt light bulb — so there is no reason to switch it off.
Avoid Nuisance Shocks
Nuisance shocks train horses to distrust the fence and can push them through it:
Keep water troughs away from the electrified line.
Don't hang grain pails on fence posts.
Don't throw hay close to the fence — a horse reaching through the line for hay gets shocked and can panic forward.
Choosing the Right Horse Fence
For horses, high-visibility conductors matter: tape or braid is easier for a horse to see than a single steel wire. Pair the conductor with a properly sized energizer and follow our installation guides for grounding and setup — a well-built, well-trained fence is the safest and most economical horse containment on the market.
Read article
 electric fence
How Many Strands? 7 Rules for Building an Effective Electric Fence
The Short Answer
Farmers and ranchers constantly ask how many strands of electric fence wire they need. The answer may surprise you: the number of strands matters far less than the location and spacing of the electrified wires. Get the heights right and even a single wire can hold a trained herd; get them wrong and a six-strand fence will leak animals.
Rule 1 — Know the Nose
Every electric fence needs at least one hot wire set at the nose height of the animals you want to control — the level of the animal's nose as it walks toward the fence. The goal is to shock the animal in front of its eyes so it backs away. If an animal gets its head through and takes the shock behind the eyes — on the back of the head or shoulder — it triggers a flight response, and the animal runs forward, often straight through the fence.
Rule 2 — Plan for the Kids
If the same fence pens animals of different sizes, you need a nose-level strand for each. A classic example: calves and full-grown cattle in one pasture. Set one strand at adult nose height and another at calf nose height. A strand at a young animal's nose height teaches it, in one memorable lesson, to respect the fence for life.
Rule 3 — Prepare for Grazing
Besides the walking strand, add a hot wire at grazing height — near the ground, where an animal's head is when it eats. Livestock love to graze right along the fence border chasing fresh growth, and without a charged grazing line they push physical stress into posts and lower wires.
Rule 4 — Teach Them a Lesson
Animals that are trained to the fence usually need fewer hot wires — for many temporary interior paddocks, one line is enough. Dairy cattle, which get regular human contact and a daily routine, learn particularly fast. Young animals are harder to control and need more wires. For horses, deliberate fence training works better than letting them find out on their own; either way, most animals find the touch so jarring they don't test it twice.
Rule 5 — Keep a Head in Mind
Measure the height of one animal's head — from the top to the bottom. That distance is your ideal vertical spacing between hot wires. If an animal can't fit its head between wires, it can't breach the fence. Combined with Rule 1, this is the anatomy-based secret of electric fencing: shock from nose to eyes and the animal backs away; shock behind the eyes and it runs forward.
Rule 6 — Know What's Outside
Electric fences can do two jobs: keep livestock in, and keep predators out. Most farmers build for the first and forget the second. To deter predators, add hot wires very close to the ground (diggers like coyotes and raccoons will go under a fence), and tighten the spacing between the other wires — adding a line between each head-height set is a good guide. See our predator fencing guide for coyote, bear and fox setups.
Rule 7 — Be Flexible
Installing electric fencing is an art more than a science. Terrain, water sources, trees, dislodged posts and snapped lines will all test your plan. Keep a fence tester, spare insulators and a length of spare line on hand, and troubleshoot until it all comes together. A flexible installer is the difference between a fence that works and a fence that's always broken.
Putting the Rules Together
Start from the animal: nose strand, grazing strand, head-spacing between them, then predator wires at ground level if needed. Train the animals, test the line at the far end, and adapt as conditions change. For the height and spacing figures by species, our fence height guide covers cattle, goats and poultry in one place.
Read article
 electric fence
Wire Gauge Selection for Electric Fencing: What Thickness Do You Need?
Start with the Wire
When planning an electric fence, the wire is a great place to start — it is the conductor that carries the pulse along the boundary. The two decisions that matter are the gauge (thickness) and the conductor type (steel, aluminum, high-tensile or poly).
Gauge: Thicker Is Better for Distance
Gauge numbers work backwards from intuition: the lower the gauge number, the thicker the wire. A thicker wire has more surface area for electricity to travel across, which means less resistance and a stronger charge at the far end of the line. Most electric fences use 14 or 17 gauge wire, depending on fence length and the animal being contained or repelled:
Larger animals — cows, bulls, bison, sheep, goats and predators — benefit from a larger (lower-number) gauge that carries more punch.
Smaller animals — pets, poultry and nuisance animals — can be handled with smaller (higher-number) gauge.
Rule of thumb: use the largest diameter wire your budget allows — the greater the surface area, the less resistance, and the more electricity reaches the far end.
Wire Types Compared
Wire type
Best for
Notes
Galvanized steel
Permanent fences
Lasts the lifetime of the fence; carries a charge over long distances; works with any energizer
Aluminum
Long runs, easy handling
Conducts an even stronger charge than steel; flexible and easy to work with
High-tensile
Livestock containment + predator exclusion
Commonly 12–12.5 gauge stainless steel; can stand alone but is a more effective barrier when electrified
Polywire
Temporary and rotational fencing
Thin metal wires + polymer filaments; more visible than bare wire; reusable
Polyrope
High-visibility temp/permanent lines
Stronger than polywire; typically 1/4-inch diameter
Polytape
Horses and high-visibility lines
Highly visible, resists wear; 1/2-inch to 2-inches wide
Poly Products: Visibility Is the Advantage
Poly fencing (polywire, polyrope, polytape) combines thin metal wires with polymer filaments — it conducts the pulse and is far more visible than a single bare wire. That visibility makes animal training easier, because livestock see the boundary before they touch it. Poly products work for both temporary and permanent fencing, which is why they dominate rotational grazing setups. For a full comparison of polywire vs polytape vs steel, see our wire selection guide.
What Not to Electrify
We don't recommend electrifying barbed wire or chain-link fence directly. If you already have a conventional fence and want to add a charge, the right approach is to run an electrified wire on offset insulators in front of the existing fence — the animals touch the hot wire first and learn to stay back, while the old fence keeps doing its physical job.
Choosing by Fence Length and Animal
Longer fences and bigger animals both push you toward thicker wire and, in practice, toward a larger energizer. If you are building a permanent boundary for cattle, plan on steel or high-tensile; if you are sectioning a pasture for rotational grazing, polywire or polyrope with step-in posts is faster and easier to move. Pair the conductor with a properly sized energizer and good grounding — see our voltage and energizer guides — and the fence will hold through the season.
Read article



 electric fence


