 Earthing
Als je schrikdraad goed meet bij het schrikdraadapparaat maar zwak aanvoelt in het weiland, is het apparaat meestal niet het probleem — de grond is het. Hier lees je hoe je een aardsysteem bouwt dat blijft werken in droge, zanderige, rotsachtige of bevroren grond.
Read article
 Electric fencing
Most wildlife-conflict fences fail for one reason: they were designed for livestock, not for the animal on the other side. This guide covers the design, power and maintenance changes that hold up against primates, wild dogs, big cats, otters and burrowing wildlife — wherever in the world you farm.
Read article
 Electric fencing
Farm energizers deliver short, high-voltage pulses — painful, but engineered to be non-lethal. This guide explains how the safety limits work, what the law typically expects from fence owners, and the practical rules that protect people, pets and visitors.
Read article

Almost every herd problem on a small farm traces back to an animal that looked perfectly healthy on the day it arrived. Buying in stock — a ram, a heifer, a pair of goats, a few replacements — is how you improve a herd. It is also how you import its worst weeks.
An animal that looks clean at the sale barn can be incubating something, carrying a parasite load that hasn't shown itself yet, or simply be days away from crashing under the stress of transport, new water, new feed and a new pecking order. An isolation pen — sometimes called a quarantine pen or a receiving pen — is the separate space where a new animal spends its first weeks on your property, well away from the herd, under daily observation.
The arithmetic is why it's standard practice rather than a regulatory chore. A small pen and a few weeks of patience cost almost nothing. One infection that reaches your whole herd costs production, veterinary bills, deadstock and months of your time.
Here's the part most small farms get stuck on: people rarely skip isolation because they disagree with it. They skip it because they don't have a spare permanent yard. Permanent pens cost money, eat a paddock, and need fencing. A temporary electric fence removes that excuse — which is what this guide is about.
Why isolation earns its place
A healthy-looking animal is not a tested animal. Many problems pass through an incubation period with no visible sign, and the animal can pass them on the whole time.
Transport stress exposes what was hidden. Movement, new water, new feed and a new hierarchy all press on the immune system. The first days are exactly when latent problems surface — which is precisely when you want the animal somewhere you can see it.
One infection in the herd costs far more than a pen. Production loss, treatment, losses and weeks of disruption versus a small fenced area and some patience.
Isolation protects the new animal too. It gets to adapt to your feed, your water and your climate without competing at the trough with animals that already know the routine.
Why temporary electric fencing is the right tool for a receiving pen
You are not building a permanent facility. You are creating separation and observation for a few weeks:
Real distance, not a single fence. A permanent yard forces you to isolate inside your existing layout, often only a fence-width away from the herd. A portable electric pen can sit 15–30 m away, with a lane or a paddock between it and your main fence line — so there's no nose-to-nose contact over the wire.
No permanent build, no wasted space. The pen comes down when isolation ends, and the posts and wire go back into service for strip grazing or a temporary paddock.
Cheap enough to keep ready. A few posts, a spool of polywire and an energizer you probably already own means the pen is standing before the animal arrives — not improvised the same afternoon.
It's genuinely stock-proof. Two or three strands of polywire on well-placed posts will hold cattle, sheep and goats reliably, provided the fence is powered and grounded properly. See our beginner's guide to rotational grazing with temporary electric fencing for the basic post-and-strand layout.
Setting up the pen
Distance and separation
Put real space between the pen and the herd. Aim for at least 15–30 m, and never a shared fence line where animals can touch noses.
No shared anything. Separate troughs, separate water, separate hay rack, separate handling tools. A separate pen with shared feed equipment is isolation in name only.
Drainage first. Pick ground that drains. Wet footing and a damp pen is the environment that turns a mild problem into a serious one, and it makes the next three weeks miserable for both of you.
Shade and airflow. A shaded, well-ventilated spot with dry bedding that you can replace regularly. In hot weather, ventilation matters as much as shade.
Make it easy to stand and watch. The whole point is daily observation, so put the pen where your normal morning and evening rounds already take you.
The fence itself
Two to three strands of polywire or polytape on lightweight posts is enough for cattle, sheep and goats. On a small pen, keep the bottom strand low enough that a horned or determined animal meets it at nose height.
Corner posts matter more than straight runs. Brace your corners properly — a pen that leans over in week two isn't containing anything.
Give the isolation pen its own energizer, or at least its own section. This is the detail that gets skipped and then causes confusion: if the pen shares one energizer with the whole farm, a fault in the pen drops voltage on the main line, and a fault on the main line drops voltage on the pen. You then can't tell which side has the problem. Separate power (or a cleanly separated section) means a separate diagnosis.
Power and grounding
A small perimeter needs modest power. A 2-joule low-impedance energizer is more than enough for a small pen holding a few animals — the constraint is distance and weed load, not animal count.
Ground it properly. Voltage is only half a circuit; the ground is the other half. As a working rule, allow roughly 3 ft of ground rod per joule of output, driven into damp soil. Our complete grounding guide covers rod placement and the mistakes that quietly halve your voltage.
Test at the far end. Never at the energizer terminals. Walk to the far corner of the pen and read the voltage there with a fence voltage tester. If the far end reads low, the problem is in the line, the joints or the ground.
No mains nearby? A 12V battery energizer, or a solar unit, keeps the pen independent of your farm's power. The 12V LCD energizer with remote and alarm is a good fit for a pen you check twice a day but don't want to babysit — an alarm tells you if a wire has gone down.
The daily routine — this is the real work
Isolation without daily observation is just a separate paddock. Two short visits a day, morning and evening, is the standard worth holding to.
Order of work matters. Serve the main herd first, the isolation animal last. Keep a dedicated pair of boots, a dedicated coat and dedicated tools for the pen, and don't carry anything back from the pen to the main yard without cleaning it. You are the most likely route between the two.
What to look at each visit:
Appetite and drinking. Is it cleaning up feed and drinking normally?
Rumination. In cattle and sheep, quiet cudding after a meal is a good sign; standing off feed is not.
Demeanour and movement. An animal that stands apart, hangs its head, or won't get up needs attention now, not tomorrow.
Discharge. Any abnormal discharge from nose, eyes or mouth.
Breathing. Unusual rate, audible breathing, or a repeated cough.
Droppings and urine. Consistency, colour and frequency — often the earliest warning you'll get.
Coat and skin. Persistent rubbing, hair loss, scurf or anything crawling.
Gait and feet. Lameness or reluctance to stand.
Write it down. A dated note in a notebook or on your phone — what you saw, when — is worth real money when you're describing the animal to a vet, and it's how you learn which suppliers to trust next season.
Call the vet immediately when you see
Complete refusal to eat or drink · severe dullness or an animal that won't rise · obvious difficulty breathing · severe or persistent diarrhoea · marked bloating · rapid decline over a few hours.
In any of those cases, phone the vet and describe exactly what you're seeing. Don't experiment with treatments of your own, and don't move the animal back to the herd. Diagnosis and treatment is the vet's job; your job is observation, prevention and sound judgement.
How long should isolation last?
There is no single number that suits every animal, source and farm — which is why the sensible answer is to agree the duration with your vet when the animal arrives, based on its species, its origin and your herd's situation. Plan for weeks, not days: incubation periods are longer than a weekend, and "it looks fine" is not a diagnosis. A vet check-up during the isolation period is part of the routine, not an optional extra.
The mistakes that defeat a quarantine pen
Cutting isolation down to a day or two because the animal looks well.
Isolating the space but not the equipment — a separate pen with shared buckets, boots and scoops isn't isolation.
Forgetting that you are a carrier. Hands, boots and clothing move things you can't see.
Adding a "companion" from the herd. You've just put one of your own animals at risk and undone the whole exercise.
Treating the pen as storage. The value is in the daily look, not the fence.
Skipping the veterinary check because the days passed without symptoms.
Letting the fence go soft. Once the animals have learned the wire, voltage creeps down with grass contact and a loosened joint. Troubleshooting a fence that's lost voltage takes ten minutes and is far cheaper than a breakout. In wet weather especially, re-check the ground — see the checks in our wet-weather fence care and livestock health overview.
Ending isolation and joining the herd
When the period your vet recommended is complete, and the animal has been eating, drinking and behaving normally throughout:
Choose a mild day with no heat stress and no storm coming through.
Move calmly and keep the first introduction short and observable.
Expect some jostling. Re-sorting the hierarchy is normal — what you're watching for is an animal that gets pushed off feed or water, or is being persistently chased.
Keep watching for several days after. The move itself is fresh stress, and problems that were held in check can surface afterwards.
Leave the pen up. The next purchase is already on the calendar somewhere.
Quick checklist before the animal arrives
☐ Pen sited 15–30 m from the herd, with a lane or paddock in between
☐ No shared troughs, water, hay racks or tools
☐ Shade, drainage and dry bedding ready
☐ Two to three strands on braced corners, own energizer or own section
☐ Ground rod driven; far end tested with a voltage tester before the animal arrives
☐ Dedicated boots, coat and tools set aside for the pen
☐ Isolation duration and vet check agreed
☐ Log started, with dates
The bottom line
An isolation pen isn't a facility you build once — it's a habit you keep. A few posts, a spool of polywire and an energizer you already own will give a new animal its own space, real distance from your herd, and a few weeks of daily attention at the exact moment those weeks matter most.
For a pen of your own, a 12V energizer or a remote-alarm unit will run a receiving pen anywhere on the property — and the same kit goes back to work on grazing strips the moment isolation ends. Browse the large-farm and multi-paddock range if you'd rather buy once and cover both jobs.
Read article
 Electric fencing
One wrong grazing day in wet weather can damage pasture for the whole season. Learn the paddock strategies — priority groups, tighter cells, sacrificial areas — that keep grass and soil healthy when the ground softens.
Read article
 Electric fencing
Pigs are smart, strong, and root for a living — yet they are among the easiest animals to hold with electric fencing. This guide covers how many strands and at what height, how much power you need, and the training trick that stops escapes.
Read article
 Cattle
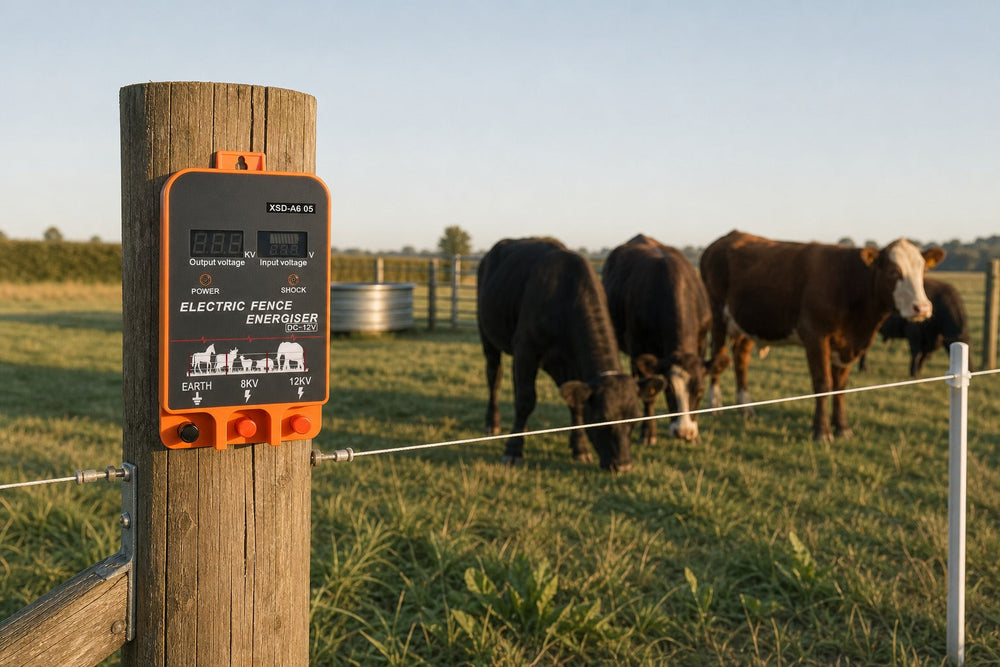
"Schrikdraden houden geen dieren vast — getrainde dieren houden de afrastering vast." Met een correct opgezette afrastering en een paar dagen geduldige introductie respecteren de meeste kuddes de lijn jarenlang. Deze gids behandelt de drie dingen die het succes bepalen: eerst de afrastering goed krijgen, de dieren op de juiste manier introduceren en weten wat u moet verhelpen wanneer vee de draad nog steeds uitdaagt.
Read article
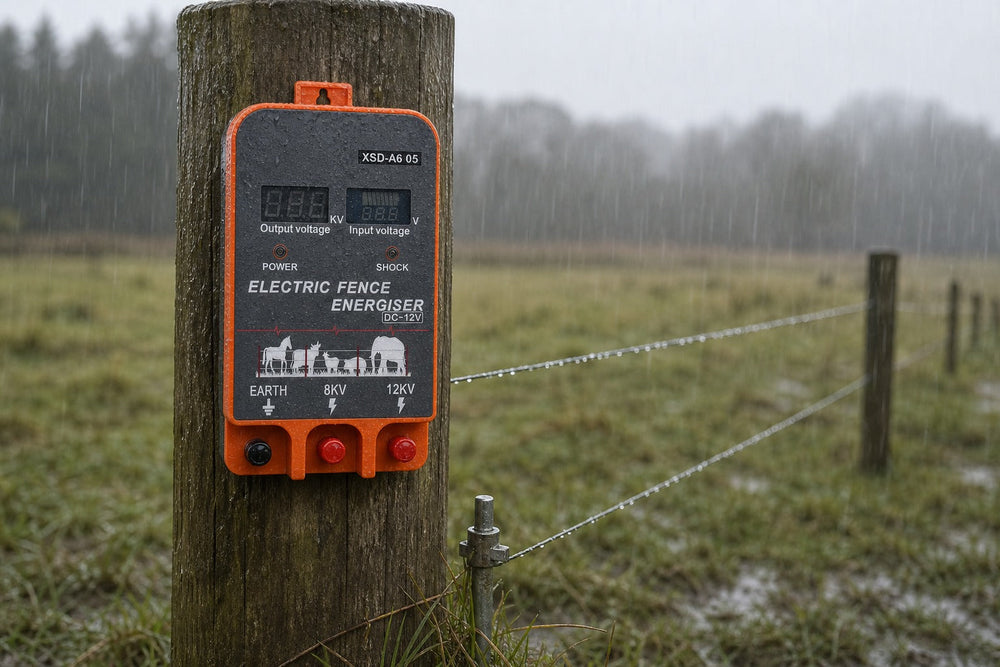
Look at the spec sheet of any outdoor electronic device and you will see a two-letter code with two numbers — IP44, IP65, IP66 — that most buyers skim past. On an electric fence charger, that code is the difference between a unit that survives ten seasons in the weather and one that dies in the first thunderstorm.
Here is how to read IP ratings, what level your fence actually needs, and where the rating stops protecting you.
What the IP Code Actually Means
IP stands for Ingress Protection (some manufacturers call it International Protection). It is an international standard (IEC 60529) that grades how well a housing keeps out solid objects and water. The two digits are independent:
First digit — solids (0 to 6):
0–1: no protection / large objects
4: protection against objects over 1 mm (most wires and tools)
5: dust-protected — some dust can enter, but not enough to harm operation
6: dust-tight — no dust ingress at all
Second digit — water (0 to 9):
0–3: none / dripping / spraying up to 60°
4: splashing water from any direction
5: water jets from any direction
6: powerful water jets (roughly fire-hose force)
7: temporary immersion in water
8: continuous immersion
So IP65 = dust-protected + protected against water jets. IP66 = dust-tight + powerful jets. IP44 = protected against small objects and splashes — fine for a light drizzle, not for a pressure washer.
What a Fence Charger Actually Faces
Your energizer lives outdoors for years. The real-world threats are:
Rain and snow — falling water, splash-back from the ground, and water running down the mounting surface.
Dust, pollen and grass chaff — in dry seasons and harvest dust, fine particles work into housings.
Condensation — the invisible killer. Warm days and cold nights pull moisture inside a sealed housing even when it never rains.
Pressure washing — many owners clean the fence area and spray the energizer without thinking.
For a permanently outdoor unit, IP65 is the sensible minimum; IP66 adds a margin for exposed positions and hard weather. A unit rated below IP54 should live inside a weatherproof box, not on an exposed post.
Where the Rating Does Not Protect You
Here is the part the label does not tell you:
The rating applies to a properly mounted, undamaged unit. A cracked housing, a missing grommet, or a cable entering from above (letting water run down into the case) defeats the rating instantly. Route cables so they loop downward before entering the unit.
Terminals and connections are usually outside the rated zone. Battery clips, fence wire connections and solar leads are not IP-tested with the housing. Coat exposed terminals with dielectric grease and keep connections above splash level.
Mounting matters. Fix the unit off the ground, under an eave or overhang where possible, with the controls facing down-and-away from driving rain.
Ventilation can conflict with sealing. A fully sealed unit that also needs to shed battery heat needs a quality housing — cheap "waterproof" clones often skip the pressure-equalizing vent, and condensation does the damage.
Matching the Charger to the Job
AC (plug-in) energizers usually live near a building or in a shed — a rating of IP44–IP54 is often adequate if the location is genuinely sheltered. Outside in the open, choose IP65+.
Solar energizers are the true outdoor animals — they sit in open pasture with zero shelter by design. Choose IP65 or IP66, and check that the solar panel connector and battery compartment are protected too. Every unit in the LIFEALL solar series is sealed for open-pasture life.
Battery 12V units mounted on a post in the elements need the same IP65+ logic — rain does not care whether the power comes from the wall or a battery.
One More Number That Matters: The Display
If your energizer has an LCD display (like the LIFEALL range — live voltage, battery and fault readouts), the display window is part of the waterproofing story. A properly sealed display keeps reading correctly through years of weather. That live readout is also your early warning system: voltage drops from rain-driven shorts show up on screen before animals find the weak spot.
Browse the AC power series for sheltered installations and the solar series for open pasture — and when in doubt, pick the higher IP. Weather is the one thing every fence has in common.
Read article
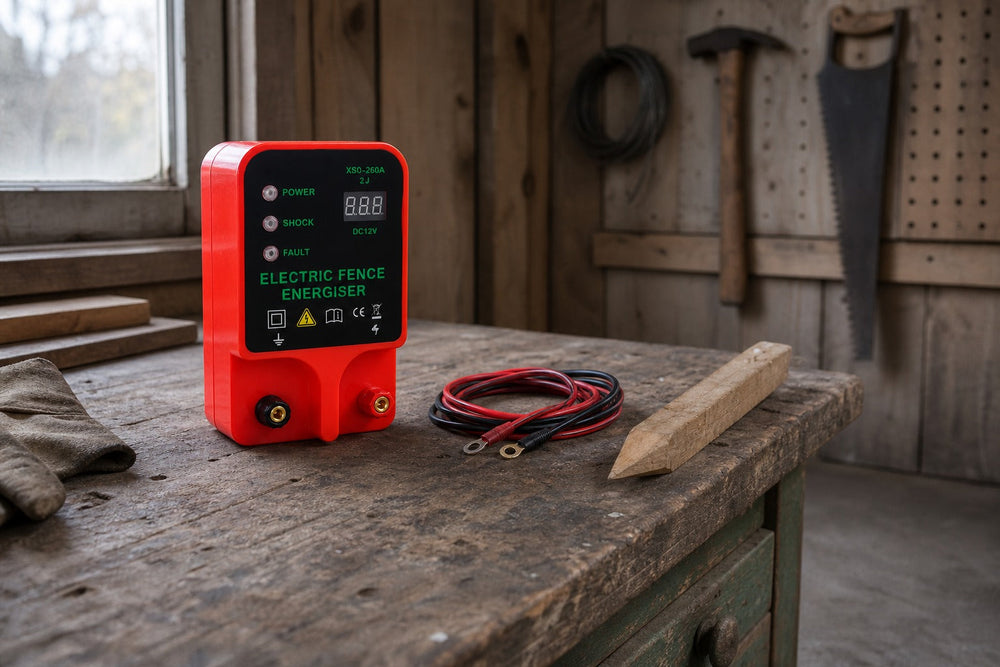
Vraag een dozijn boeren waarom hun afrastering vorige week uitviel, en de helft antwoordt met dezelfde woorden: "de accu." Accu's zijn het meest misverstane — en meest mishandelde — onderdeel van een accugevoede elektrische afrastering. Kies je de verkeerde chemie, dan loop je elke maand naar de afrasteringslijn. Behandel je de juiste slecht, dan bezwijkt die in één winter.
Hier is het praktische verschil tussen 9V- en 12V-accusystemen voor afrasteringen, en hoe je uit beide jarenlang profijt haalt.
De twee batterijwerelden
9V-droogcelsystemen gebruiken wegwerpbare alkaline- of koolstof-zink-9V-batterijen in het schrikdraadapparaat — de klassieke "geen bedrading, gewoon plaatsen"-opstelling voor kleine, korte afrasteringen.
12V-systemen gebruiken een oplaadbare 12V-accu (gesloten loodzuur, AGM of lithium) die met klemmen of kabels aan het schrikdraadapparaat wordt aangesloten — de standaard voor serieuze afrastering en het platform voor zonne-oplading.
Waar 9V zinvol is
Korte afrasteringen — enkele honderden voet tot ongeveer 1 mijl lichte lijn (kippengaas, tuin, kleine weides).
Occasioneel of seizoensgebruik — gebruik zoals bij wildcamera's, waarbij de afrastering wekenlang draait en je die zelden controleert.
Draagbaarheid — je draagt het hele schrikdraadapparaat in één hand en wisselt de batterijen in seconden.
Het addertje: wegwerpbare 9V-batterijen hebben beperkte opgeslagen energie (een goede alkaline-9V heeft ongeveer 500–600 mAh, en koud weer put die sneller uit). Op een afrastering die echt werkt — pulserend onder belasting, vechtend tegen licht onkruidcontact — kan een 9V-systeem elke 2–6 weken nieuwe batterijen nodig hebben. Bij $3–6 per batterij loopt dat op, en een afrastering die midden in de week uitvalt, is een afrastering die dieren leren negeren.
Waar 12V wint
Afrasteringen langer dan ongeveer een mijl, of met aanzienlijk contact met begroeiing.
Permanente afrasteringen voor het hele jaar — één accu, maanden looptijd.
Zonne-installaties — zonnepanelen laden 12V-accu's van nature op, daarom is vrijwel elk zonne-schrikdraadapparaat op de markt een 12V-systeem.
Schrikdraadapparaten met meer joule — een apparaat van 5 J-plus verbruikt meer vermogen dan een 9V-cel realistisch kan leveren.
Een kwaliteitsaccu van 12V 7–9Ah die een klein 12V-schrikdraadapparaat aandrijft (zoals de LIFEALL A605, 2,5 J met LCD) houdt het doorgaans 4–8 weken op één lading vol op een werkende afrastering — en als die uiteindelijk leegloopt, waarschuwt de lagespanningsindicator op het LCD je voordat de afrastering stil wordt.
Koud weer: de accudoder
Lage temperaturen treffen alle accu's, maar niet in gelijke mate:
Alkaline 9V-cellen verliezen een groot deel van hun capaciteit onder het vriespunt. Een afrastering die in de zomer 3 weken meeging, kan in januari wekelijks batterijen nodig hebben.
Gesloten loodzuur (SLA) 12V verliest ook capaciteit in de kou, maar veel minder — en een zonnepaneel blijft die bijladen op zonnige winterdagen.
Lithium 12V houdt de spanning het beste vast in de kou, tegen een hogere aanschafprijs.
Als je afrastering de winter door moet werken, behandel de accu dan als een koudweercomponent: isoleer de accubox, houd verbindingen schoon en ingevet en — voor 9V-systemen — stap over op verse alkalicellen voor koud gebruik of ga vóór de eerste strenge vorst over op een 12V-opstelling.
Accuonderhoud dat de levensduur verdubbelt
Laat een 12V-accu nooit leeg staan. Diepe ontlading is wat SLA-accu's om zeep helpt. Laad direct op wanneer het lagespanningsalarm klinkt — elke dag leeg kost echte capaciteit.
Laad op met de juiste lader. Een druppel-/onderhoudslader die is afgestemd op de accuchemi wint altijd van een "snelle" autolader.
Houd de accuklemmen schoon. Gecorrodeerde klemmen zijn de nummer 1 "slechte accu"-diagnose die in werkelijkheid een slechte verbinding is. Maak schoon, draai vast en bedek de klemmen met diëlektrisch vet.
Koppel los voor opslag. Laad de accu vóór lange stilstandsperiodes (winterstop, buitenseizoen) volledig op en bewaar die koel en droog — idealiter aan een onderhoudslader.
Test het systeem, niet alleen de accu. Een afrastering die "de accu snel leegtrekt" is meestal een afrastering met een probleem — onkruidsluitingen en een slechte aarding dwingen het apparaat harder te werken en meer te verbruiken. Repareer de afrastering en de accu gaat ineens twee keer zo lang mee.
Accu of zonne-energie: de beslissing
Als je helemaal opnieuw begint:
Klein, mobiel, budget voorop → een 9V-schrikdraadapparaat is prima; neem reserves mee.
Permanente afrastering, meer dan een mijl of wintergebruik → 12V, en als de locatie ook maar enige zon krijgt, zet er een zonnepaneel op. Een zonne-12V-systeem neemt de "leeg-accu-tocht" vrijwel volledig weg — onze zonne-serie combineert het paneel en de accu in één gesloten eenheid.
Heb je al 12V-schrikdraadapparaten → bekijk de gids voor accu- en zonneonderhoud vóór de winter.
De eerlijke conclusie
Stem de accu af op de taak: 9V voor kort en seizoensgebonden, 12V voor serieus en het hele jaar rond. Bescherm wat je ook kiest tegen kou, diepe ontlading en corrosie, en de zwakste schakel in je afrastering wordt een van de meest betrouwbare onderdelen.
Elk LIFEALL 12V-schrikdraadapparaat toont de actuele accu- en afrasteringsspanning op het LCD-scherm — de waarschuwing voor een bijna lege accu komt dagen voordat de afrastering uitvalt, niet nadat het vee eruit is. Vergelijk modellen in het LIFEALL-assortiment om jouw formaat te vinden.
Read article
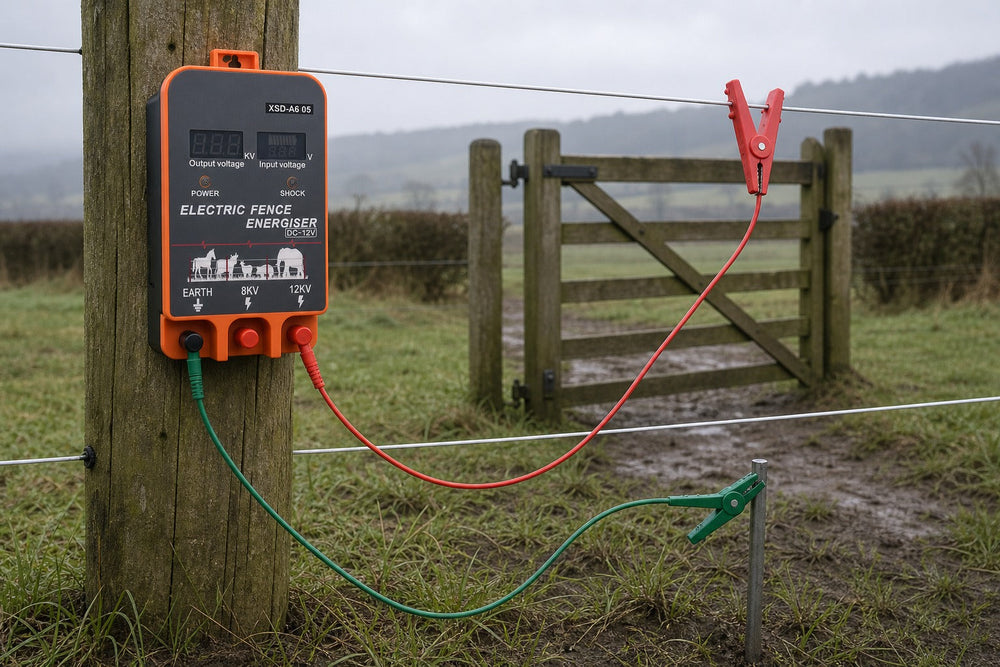
Every electric fence eventually needs an opening — for tractors, trailers, livestock, or your own daily shortcut. Done badly, a gate becomes the weakest link: wires dragged through mud, broken connections, and animals that learn exactly where the fence is "off."
The good news is that a reliable electric fence gate is simple to build. Here is how to do it right the first time.
Step 1: Decide Where the Gate Goes
Plan gates before you tension any wire:
Corners over mid-runs. A gate in the middle of a straight run means cutting every line; a gate near a corner cuts fewer wires and keeps tension simpler.
On firm, level ground. A gate in a low, muddy spot will be opened less and used as an escape route more.
Wide enough for your biggest vehicle. Livestock trailers are usually 8–10 ft wide — plan for at least 12 ft of opening so the gate clears the fence line on both sides.
Step 2: Choose Your Gate Style
Wood or metal panel gate — for permanent fence lines where you drive vehicles regularly. Mount on sturdy posts set in concrete, with the latch end well supported so it never sags into the electric line.
Electric "rope" gate with spring handle — the standard for electric fence openings. A spring-loaded gate handle keeps tension on the line across the opening, so the fence stays hot and tight. When you need through, unhook the handle, lay the line aside, and drive through.
Polywire drop gate — a lightweight option for temporary or rotational fences. One or two strands of polywire with insulated handles, unhooked and dropped for access. Not for daily vehicle traffic.
Step 3: Never Create a "Dead End"
The single biggest gate mistake is leaving a gap where the electric circuit stops. When an animal touches the fence line on either side of a dead gate, it gets no shock at all — and it learns that the fence is a suggestion.
Every conductor that crosses the gate opening must be reconnected across it:
Use a spring gate handle sized to the conductor (tape handles for tape, wire handles for wire).
Anchor the handle end to an insulated post or bracket on the opposite side.
Keep the handle under tension so the line stays at the same height as the rest of the fence.
Step 4: Carry Power Across Properly
Here is the detail most first-time builders miss: the two sides of the gate must be electrically joined — through the handle when closed, and that connection must be clean.
Practical tips:
Where the live line meets the gate handle, use crimp connections or galvanized connectors, never bare twisted wire that corrodes. Corrosion at gate connections is one of the top voltage-loss points on any fence.
For multiple strands, run a jumper lead from the power source side to each strand's handle — or use a gate handle bar that carries several lines.
If you run a wire underground to bypass the gate (common for buried lead-outs), use proper underground-rated insulated cable — and never bury standard fence wire where it can be cut by a cultivator.
Step 5: Test the Gate Like It's the Weakest Point — Because It Is
After installation:
Close the gate and hook all handles.
Walk to the far end of the fence and test voltage — it should read the same whether the gate is open or closed (when the gate is open, the fence beyond it naturally reads zero — that is expected).
Test again on the gate handle itself while the fence is live. If the handle reads low or zero with the fence hot, the connection is the problem — clean it and re-tension.
Re-test after rain and after heavy use. Gate connections need attention more than any straight-line joint.
Tools That Make the Job Easier
You do not need much: insulated gate handles, a good connector kit, jumper leads with croc clips for temporary spans and testing, and a voltage tester to verify your work.
A Gate That Works Is a Fence That Works
A fence is only as strong as its weakest opening. Take the extra hour to fit proper handles, clean connections and buried lead-outs, and your gate will carry power and hold livestock for years — no different from the fence on either side of it.
And when you choose the energizer for that fence, pick one with a live voltage display so gate and line problems show up on the screen before animals find them. Browse the LIFEALL energizer range — every model shows real-time fence voltage, turning gate maintenance from guesswork into a 10-second check.
Read article



 Earthing

